By now, most of us have played around with ChatGPT and know the basics of how it works. But just in case: ChatGPT is an AI-driven chatbot that uses natural language processing (NLP) and deep learning to generate conversations that sound like they’re coming from a person. The chatbot can do things like write text, come up with ideas, answer questions, and more.
In this post, we’ll walk you through the step-by-step process of building an AI chatbot without writing a single line of code. It’s true: no Javascript, no Python, no need for Github. All you need is a Microsoft Azure account and Bubble’s visual web editor to build all the core features of a ChatGPT clone, including a chat function, a running history of your “conversation,” and a backend powered by artificial intelligence that uses natural language processing to talk back.
So whether you’re looking to leverage generative AI to build a purpose-specific chatbot using your prompt engineering skills, or you’re just interested in tapping into the power of Microsoft Azure OpenAI Service’s large language model (LLM), let’s dive in — it’s easier than you think.
The steps to building a ChatGPT clone with no-code include:
Gather the tools you’ll need for your ChatGPT clone
First, if you haven’t already, you’ll need to create a free Bubble account. Click the button below to get started so that you can follow along as we build this web app together.
(New to Bubble? Check out our introductory videos to get familiar with the basics of our visual web editor.)
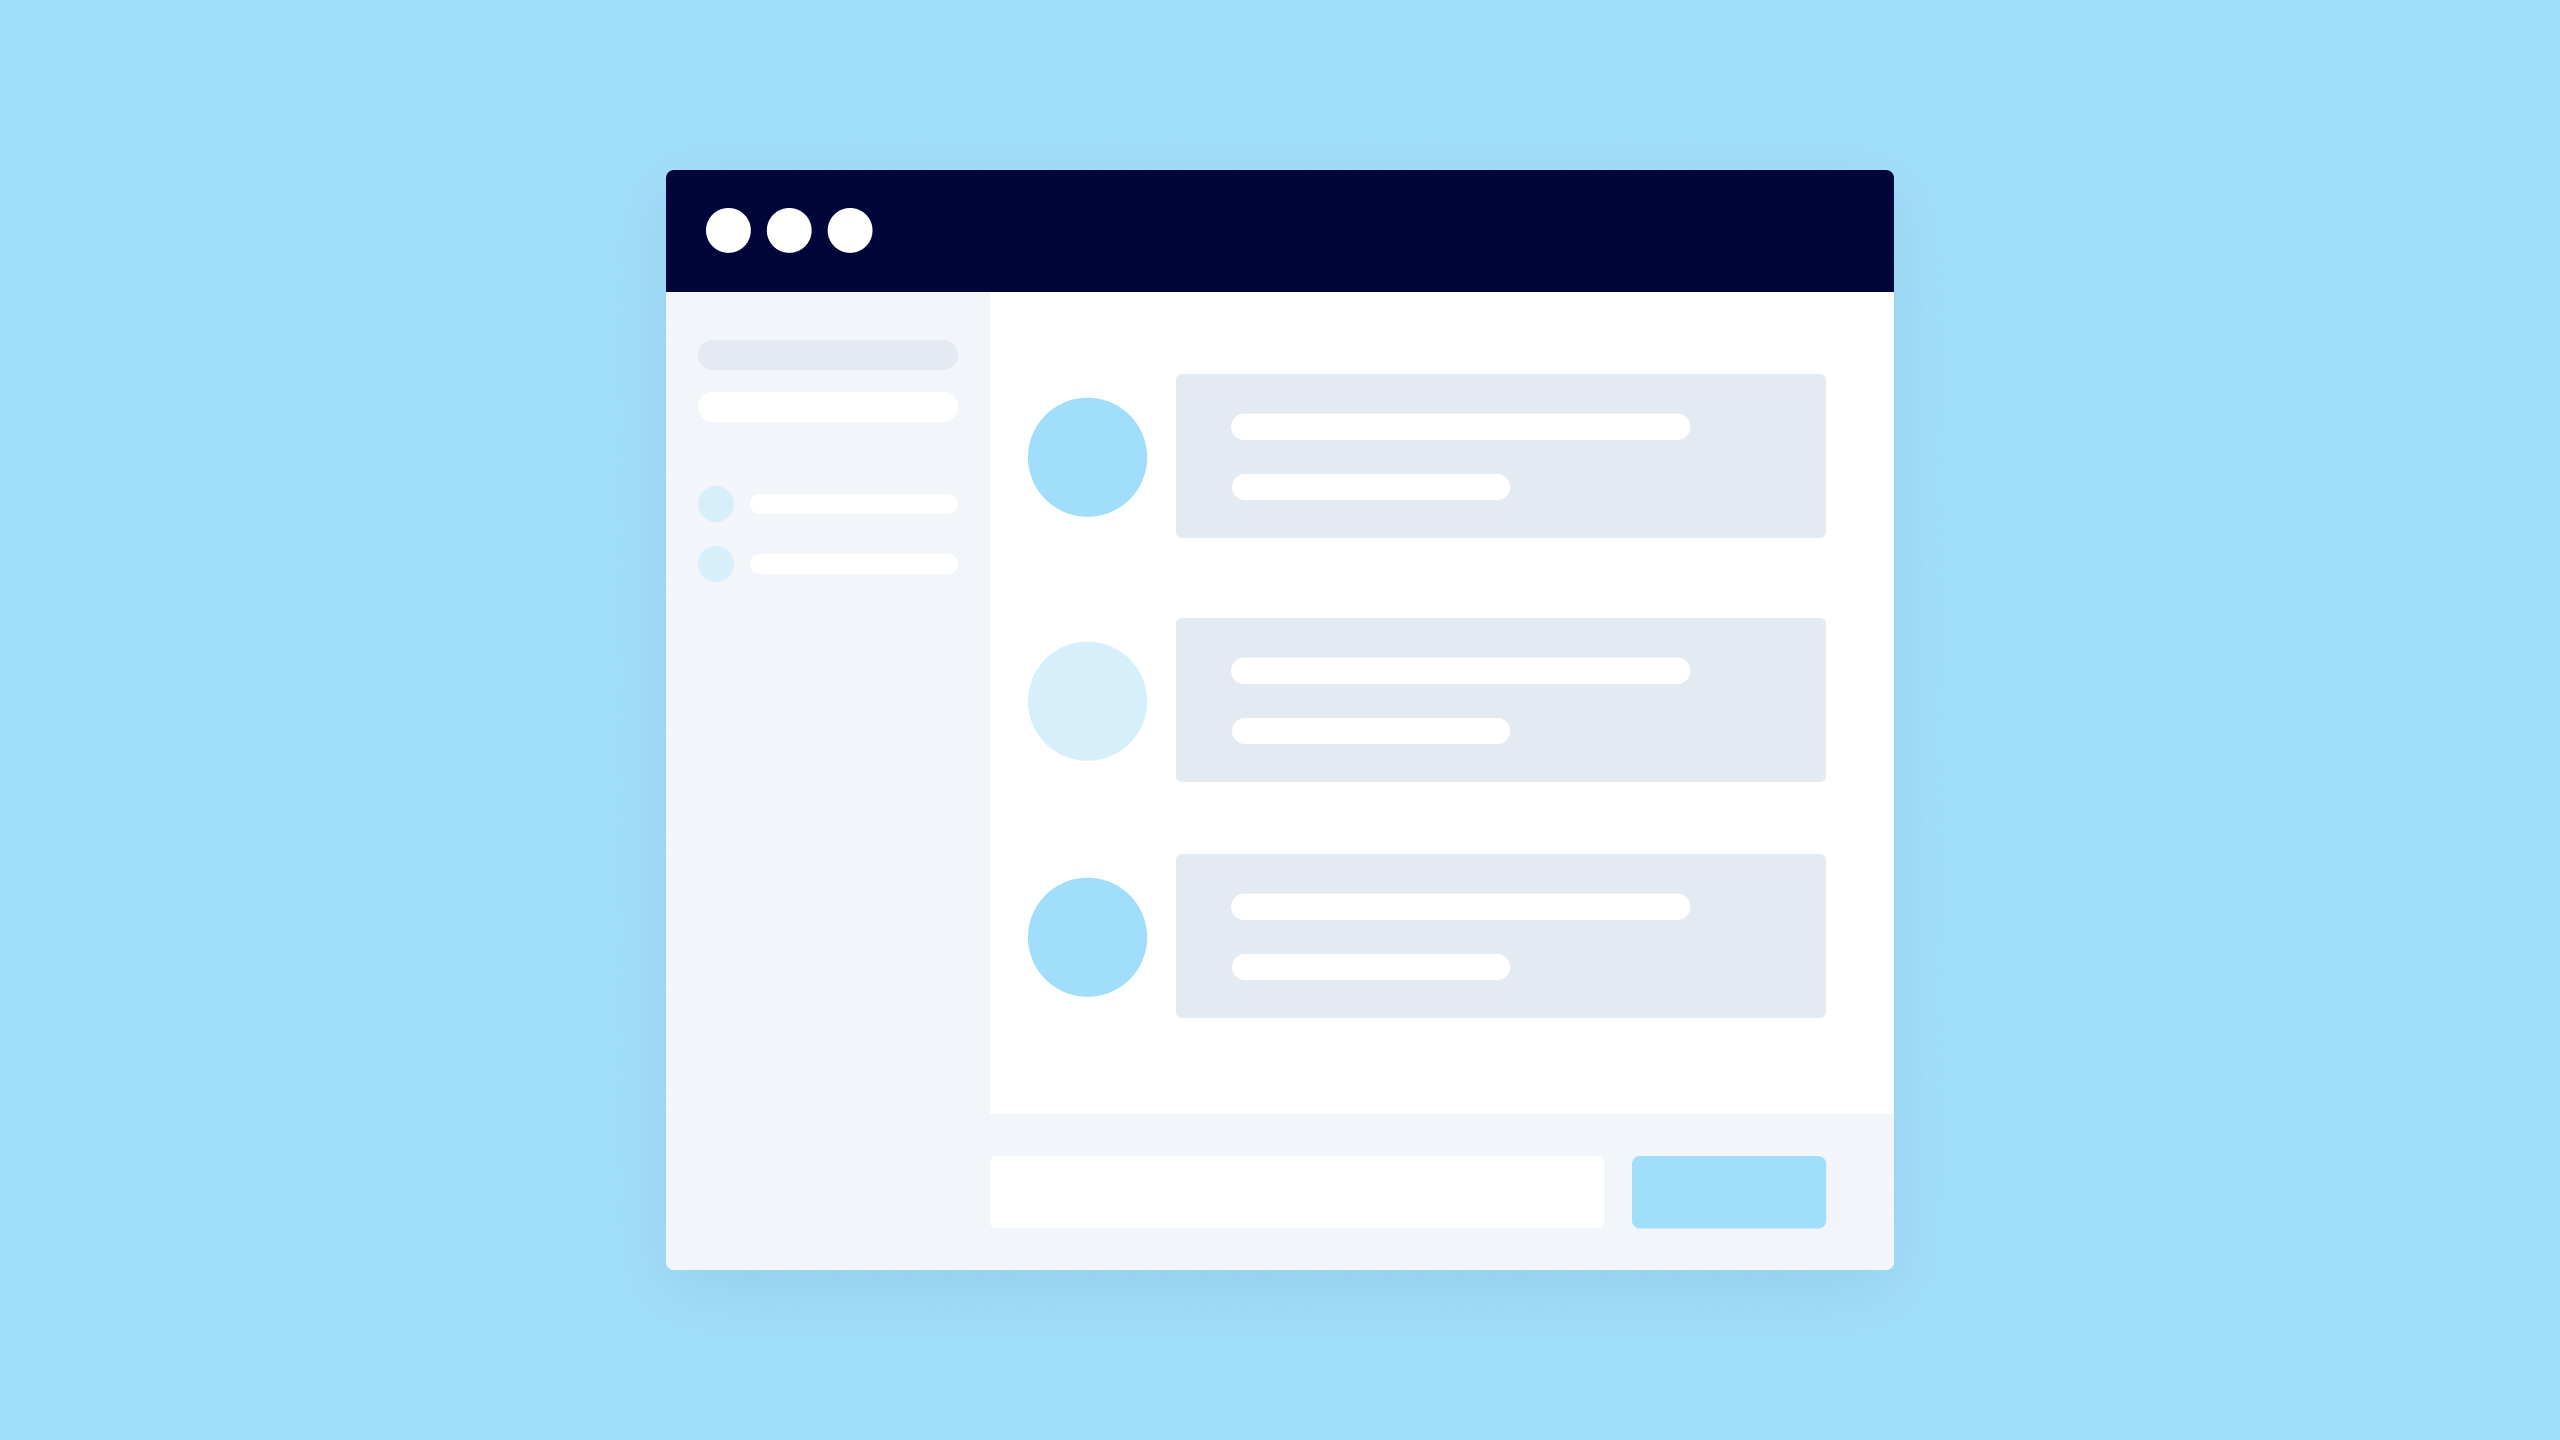
We’ll start this project using the Microsoft Azure OpenAI Service Chatbot Template. This Bubble template comes pre-configured with an input box and submit button for sending requests (messages) to the chatbot, plus a repeating group to display the chatbot’s responses. The repeating group shows a scrollable history of your chat, as well:

Note: You must also have a Microsoft Azure account and access to the Azure OpenAI Service to use their AI models in your Bubble app — including to complete this tutorial. Right now, Azure is only granting access to users with a business domain email address, but we’re hoping to open it up to all Bubble users as soon as we can.
- If you don't have an Azure account, you can create one here
- More information on gaining access to Azure OpenAI Service can be found here
Install the Microsoft Azure OpenAI Service Chatbot Template
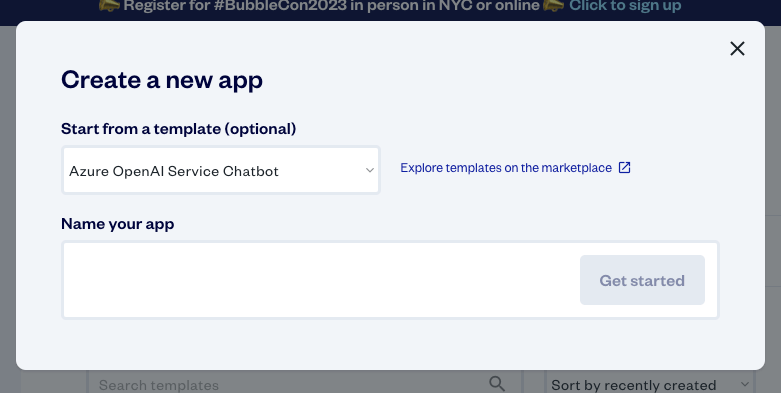
Start by adding the free template to your Bubble account. Then navigate to the Templates area of your account, find the template, and click Start an app. In the pop-up dialogue box that appears, make sure you choose Azure OpenAI Service Chatbot as the template to start from. Give your new Bubble app a name and click Get started.
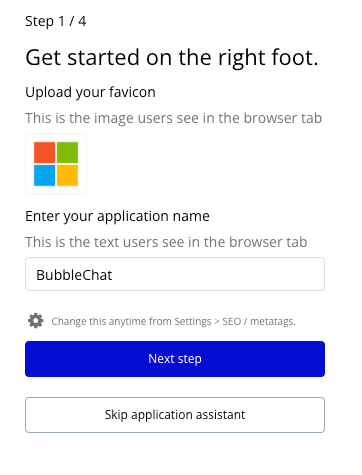
Once your app loads, follow the steps under Get started on the right foot to configure your app’s favicon, name, font, and color settings. When you get to step 4, keep it simple for now and don’t add additional plugins to your app.
Your Bubble app will load in design mode. Click the X on the Build a landing page popup to close it, and close the component library as well.
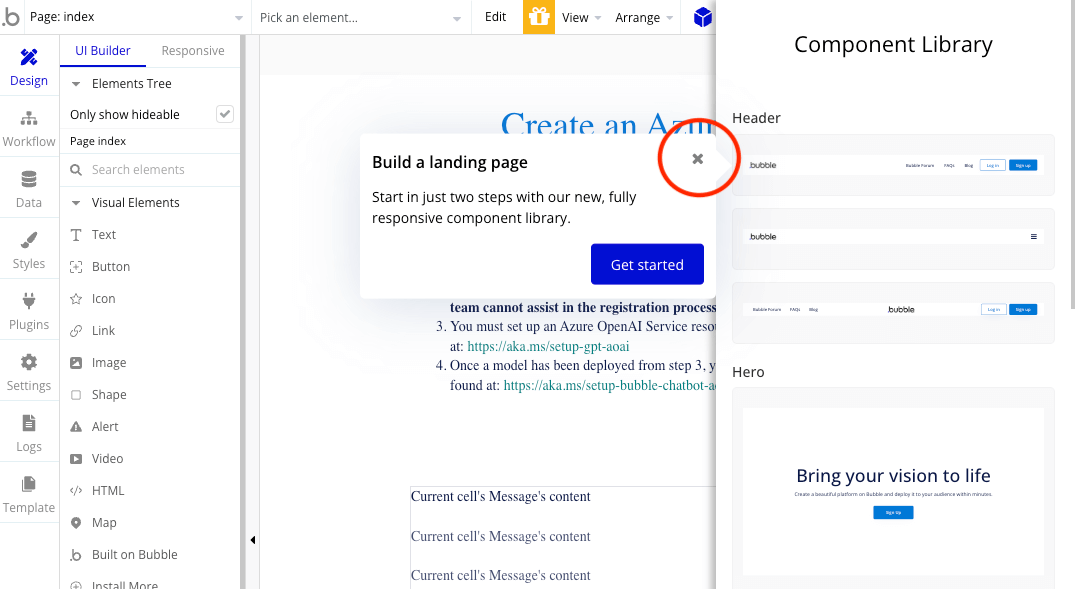
You should now see the template loaded into your app:
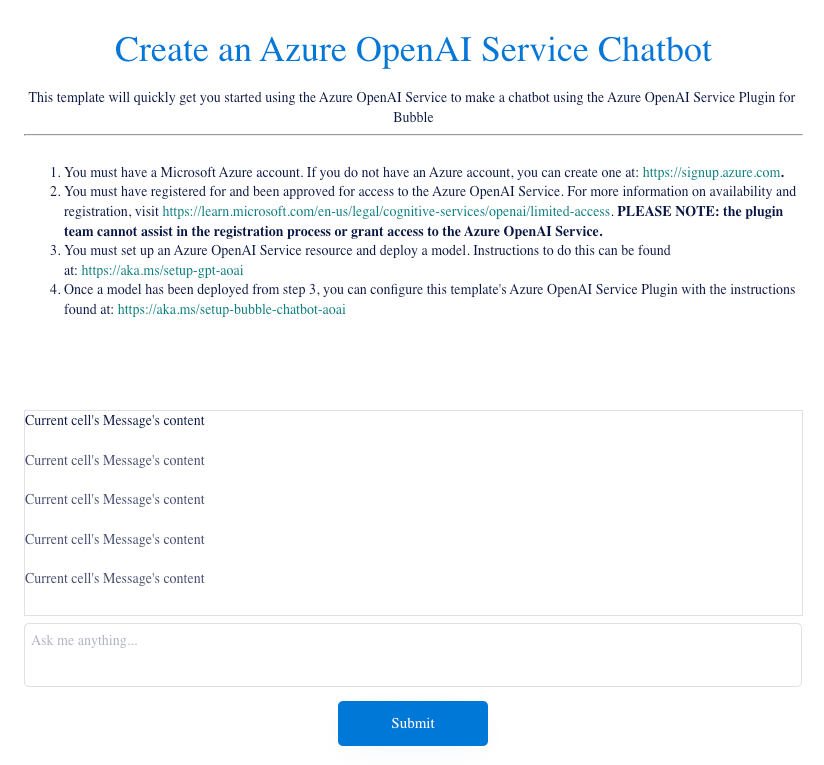
The upper portion of the template is pre-filled with instructions for creating the chatbot (which we’re about to explain in detail, and which you’ll delete at the end). The lower portion contains the on-page elements that the app actually uses.
OK — once you have the template open (and an Azure account with OpenAI Service access), you’re ready to deploy a model.
Deploy a large language model through Azure OpenAI Service
Open a new browser tab or window and navigate to https://portal.azure.com, then log in to your account. If you’ve already set up Azure OpenAI Service and deployed a model, skip ahead to the next section to connect your template to the model.
If not, you’ll need to set up and configure a GPT deployment on Azure OpenAI Service. Microsoft has a step-by-step guide to walk you through the process.
Once your model is deployed, you’re ready to connect it to your Bubble app.
Configure the template to connect to your LLM
The beauty of this template — and the Azure OpenAI Service Plugin that comes with it — is that there’s no need to set up an API connection between the two services from scratch. Instead, connecting your Bubble app to your OpenAI model is a simple matter of copying key information from your Azure account and pasting it into the correct fields in your Bubble app.
Here’s how to do it:
1. From your Azure account, click the Search resources, services, and docs (G+/) search box.
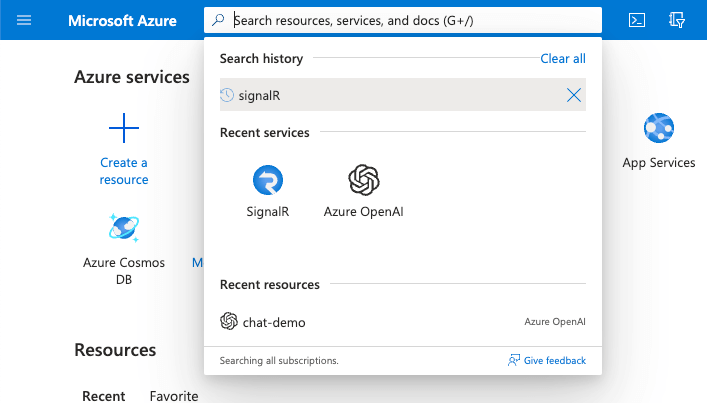
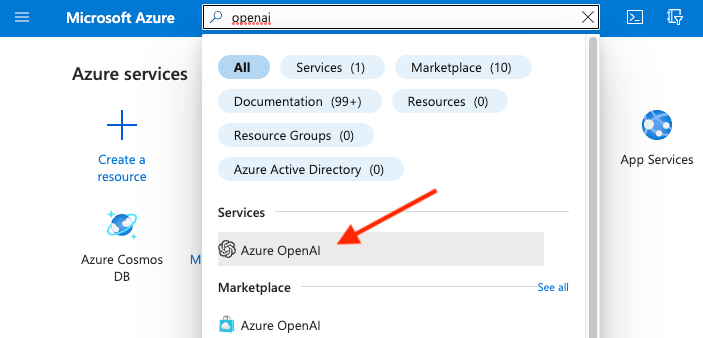
2. Type “openai.”
3. Click Azure OpenAI.
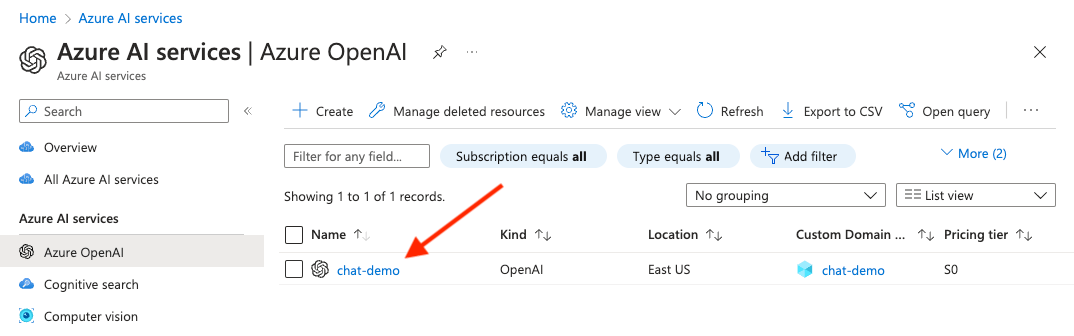
4. Select the resource that you want to use with the plugin. This is the model you deployed earlier — you should recognize it by the name you gave it.
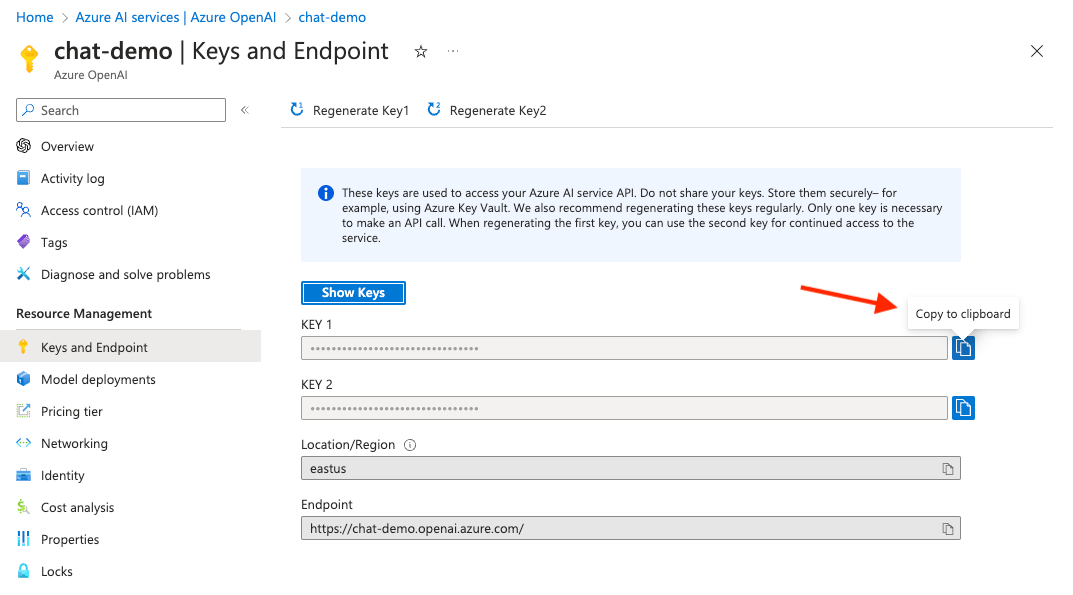
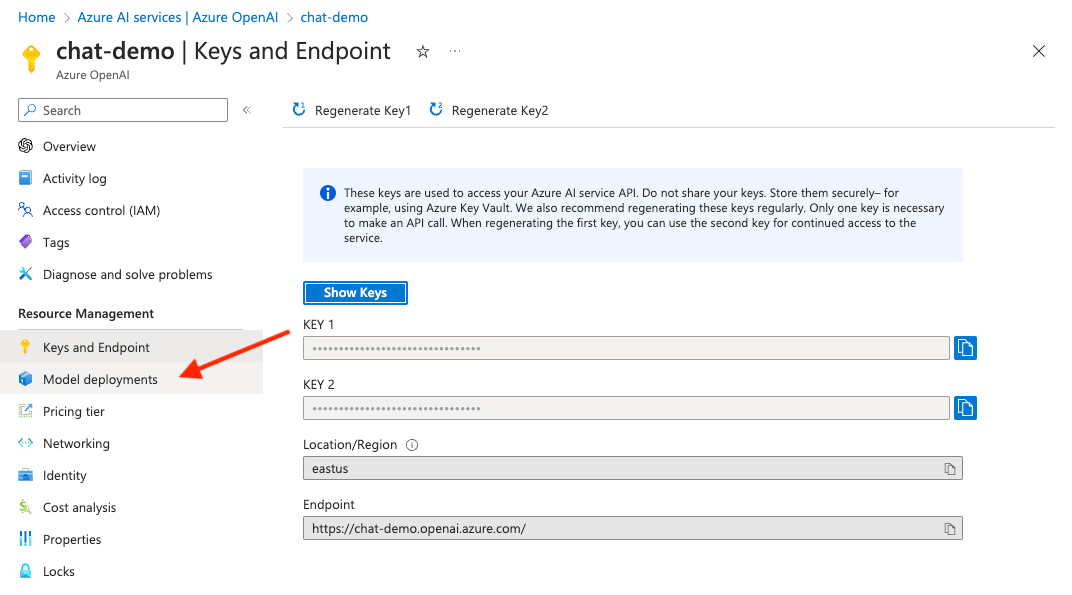
5. Click Keys and Endpoint.
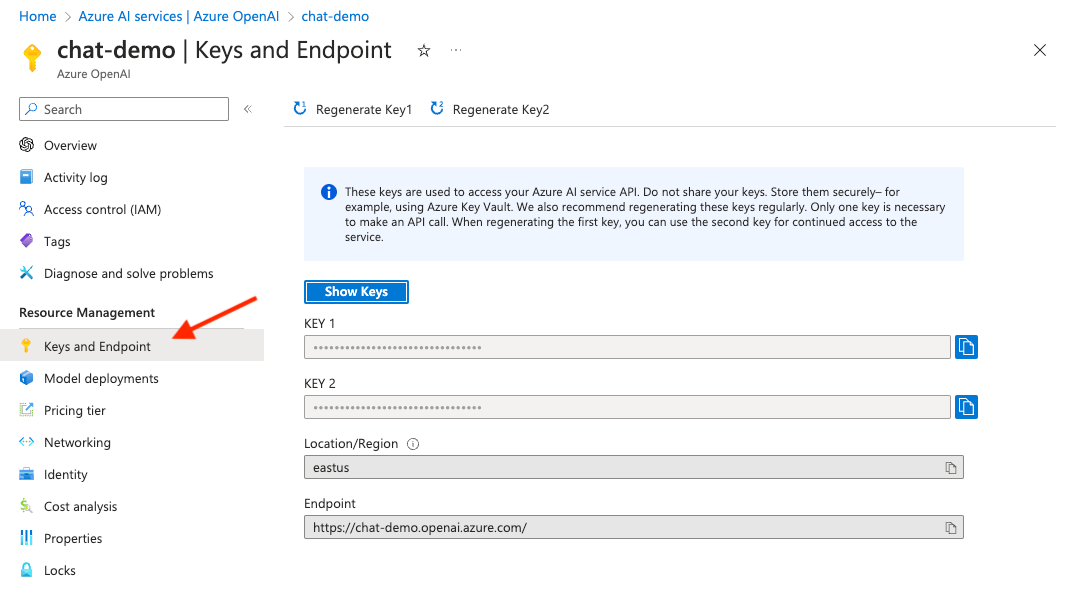
6. Click the Copy to clipboard button for Key 1.
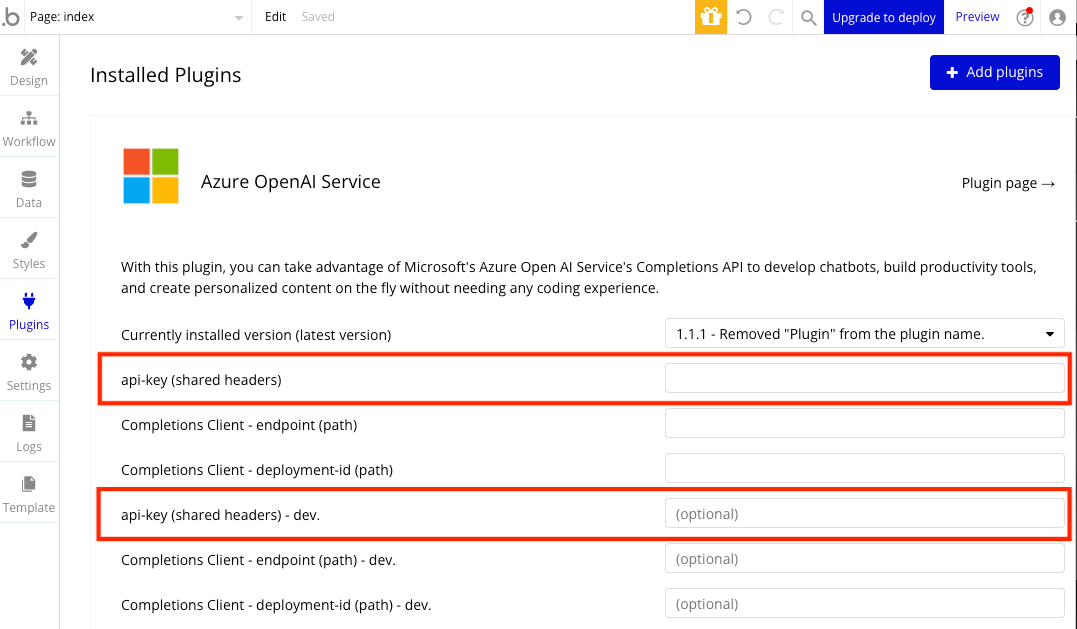
7. Switch to your Bubble app, open the plugin settings, and paste the key into both the api-key (shared headers) and api-key (shared headers) - dev text boxes.
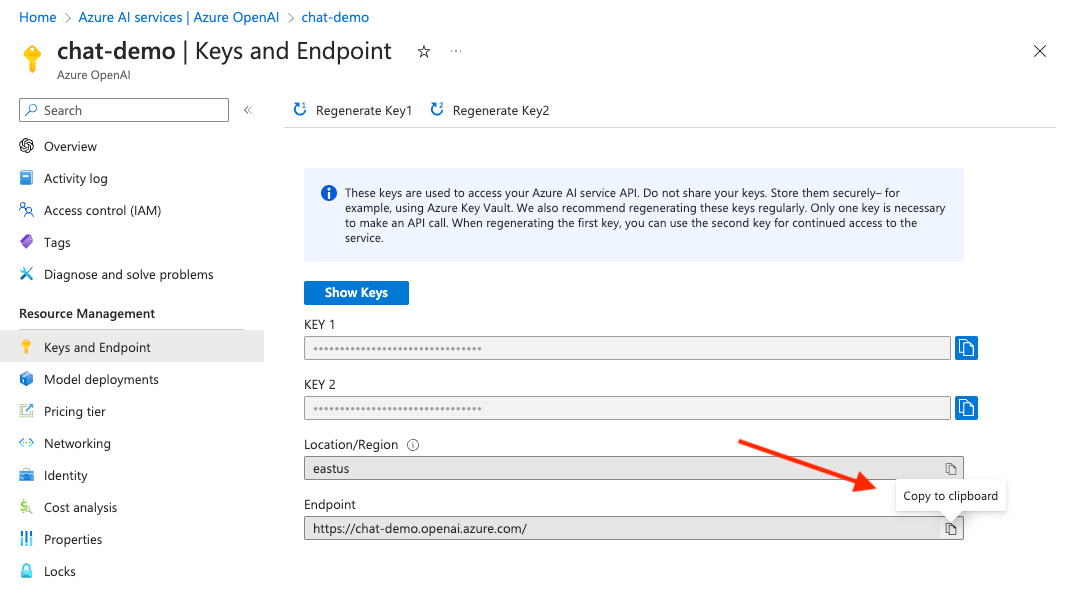
8. Switch back to your Azure OpenAI Service Keys and Endpoints tab. Click the Copy to clipboard button for Endpoint.
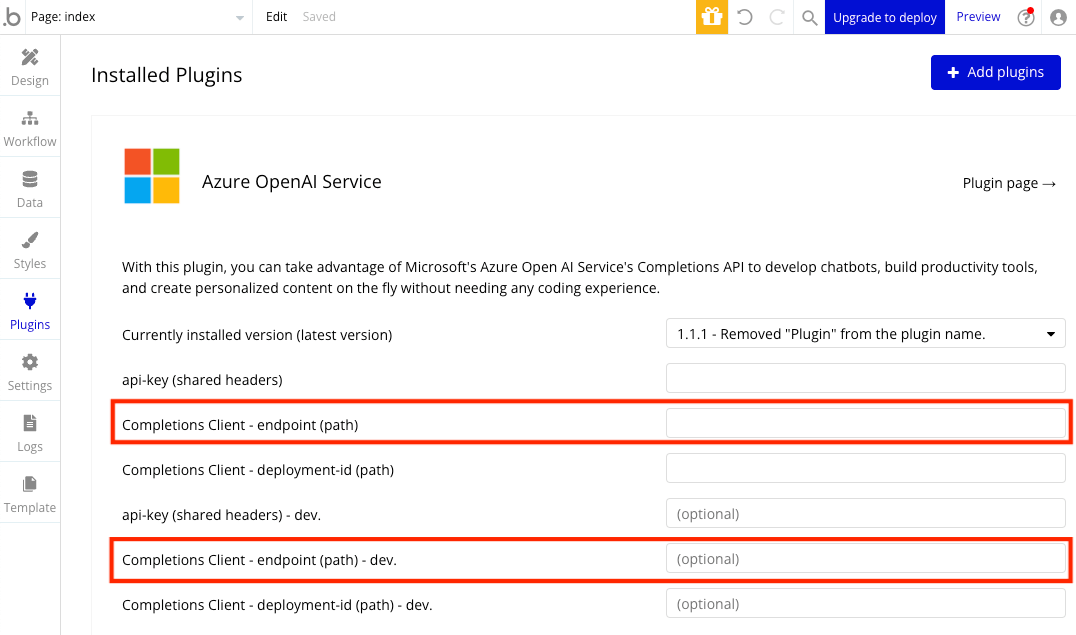
9. Switch to your Bubble app and paste the endpoint into both the endpoint (path) and endpoint (path) - dev text boxes.
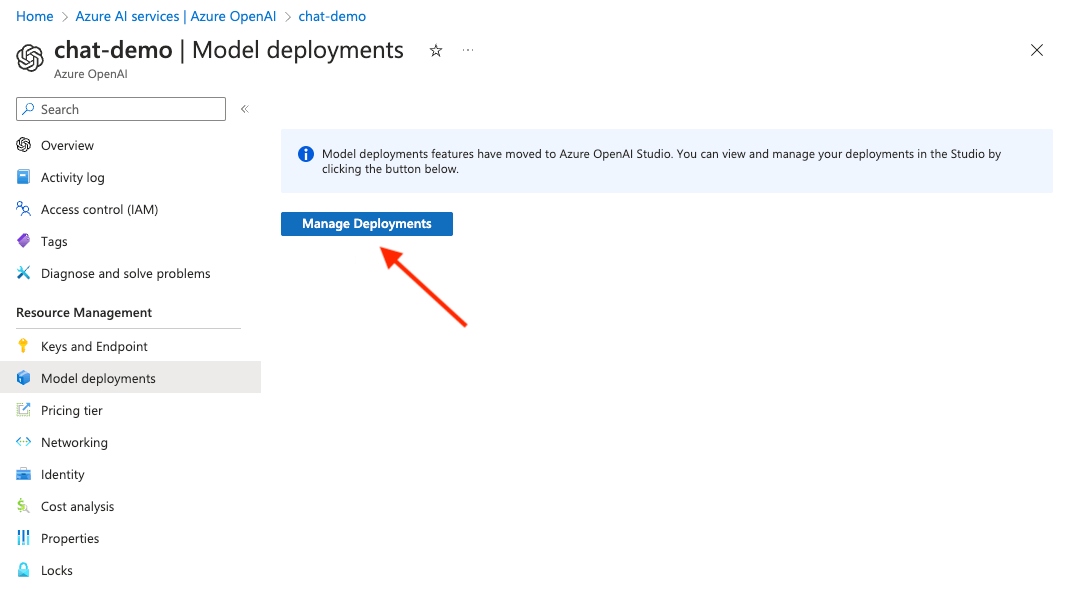
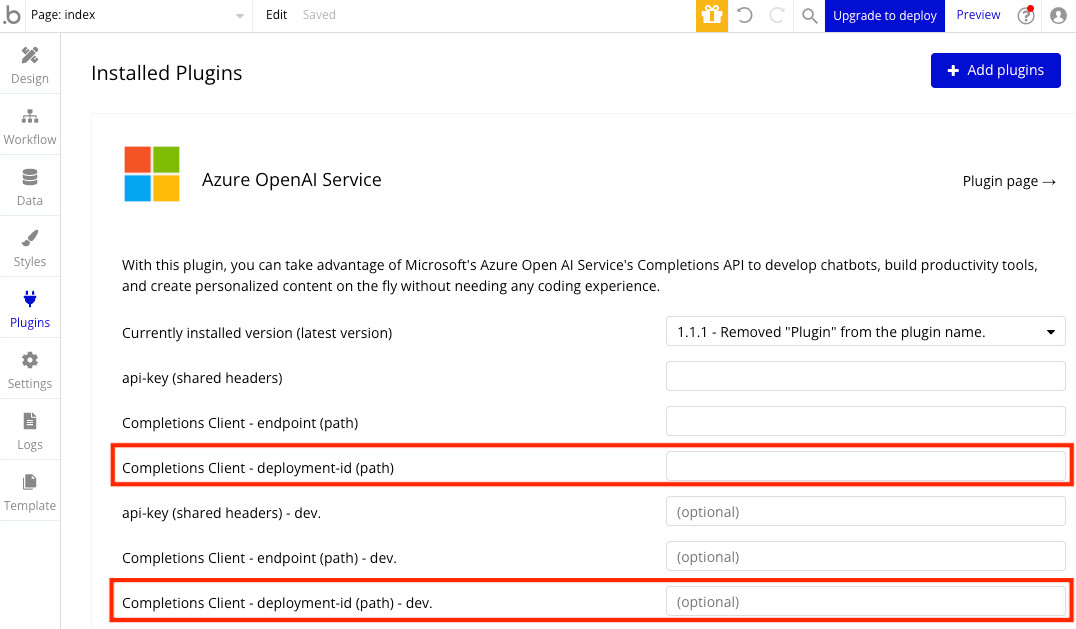
10. Switch back to your Azure OpenAI Service tab and click Model Deployments.
11. Click the Manage Deployments button to go to Azure OpenAI Studio.
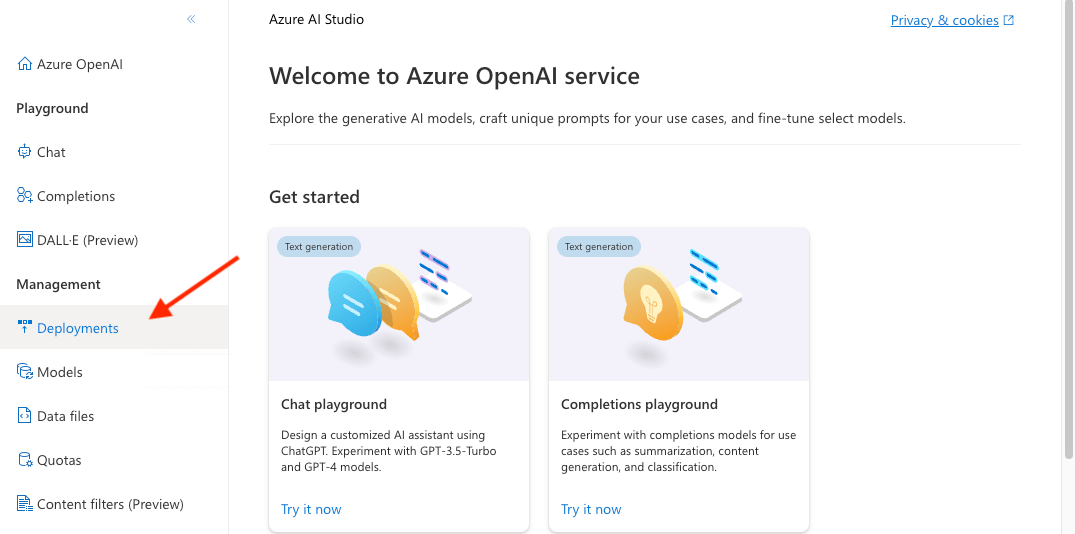
12. If necessary, select the directory and subscription, then the resource used in the previous steps. Then, click Deployments from the Management group.
13. Copy the name of your desired deployment to the clipboard.
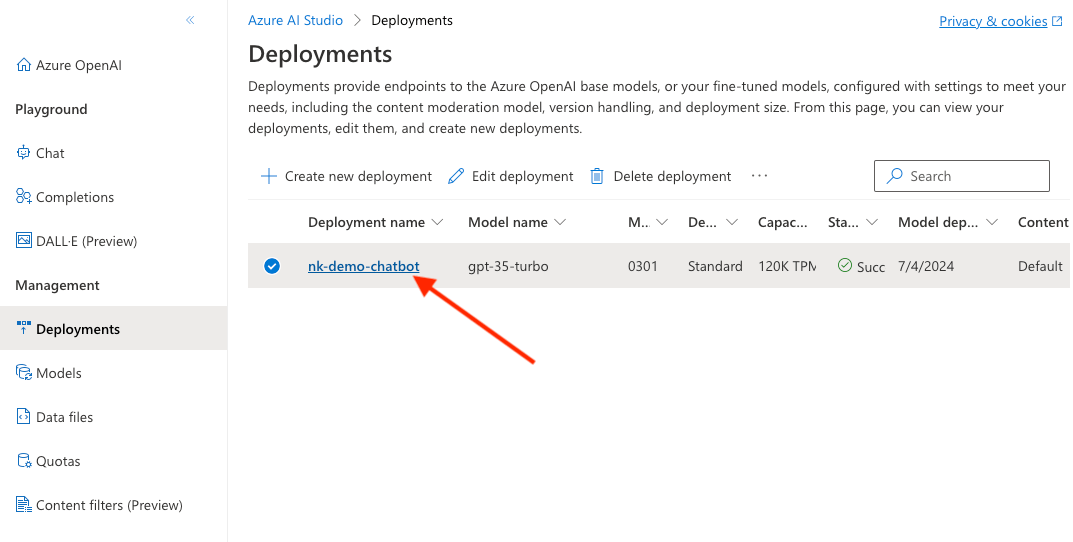
14. Switch to your Bubble app and paste the deployment name into both the deployment-id (path) and deployment-id (path) - dev text boxes.
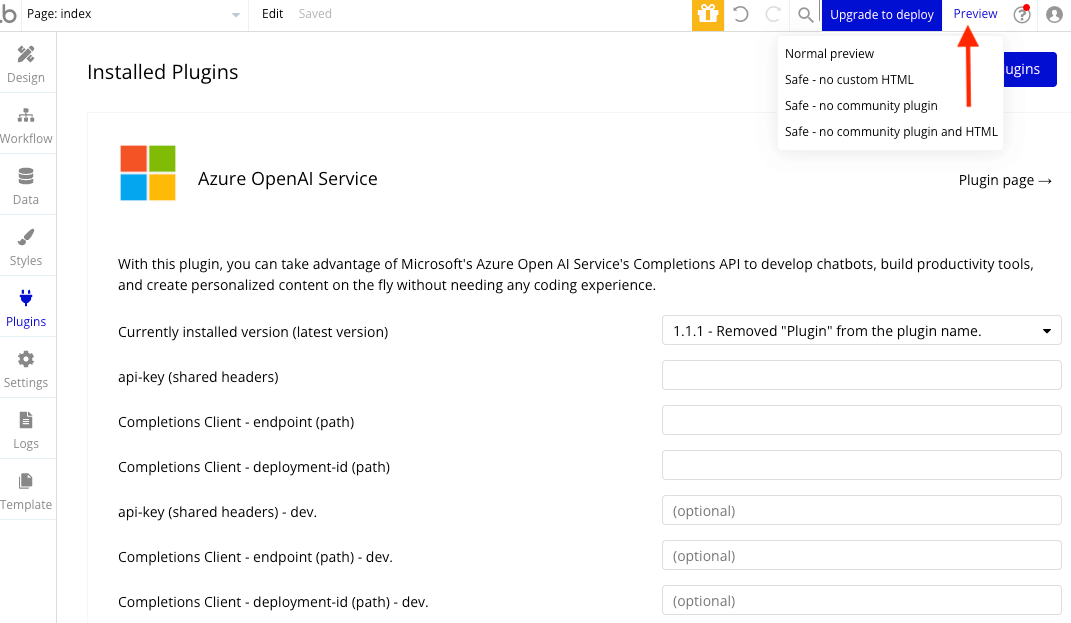
15. That’s it! Click Preview to see your app in action.
16. Use Bubble’s easy-to-use design tools to customize the look and feel of your chatbot. For example, after a little editor magic:
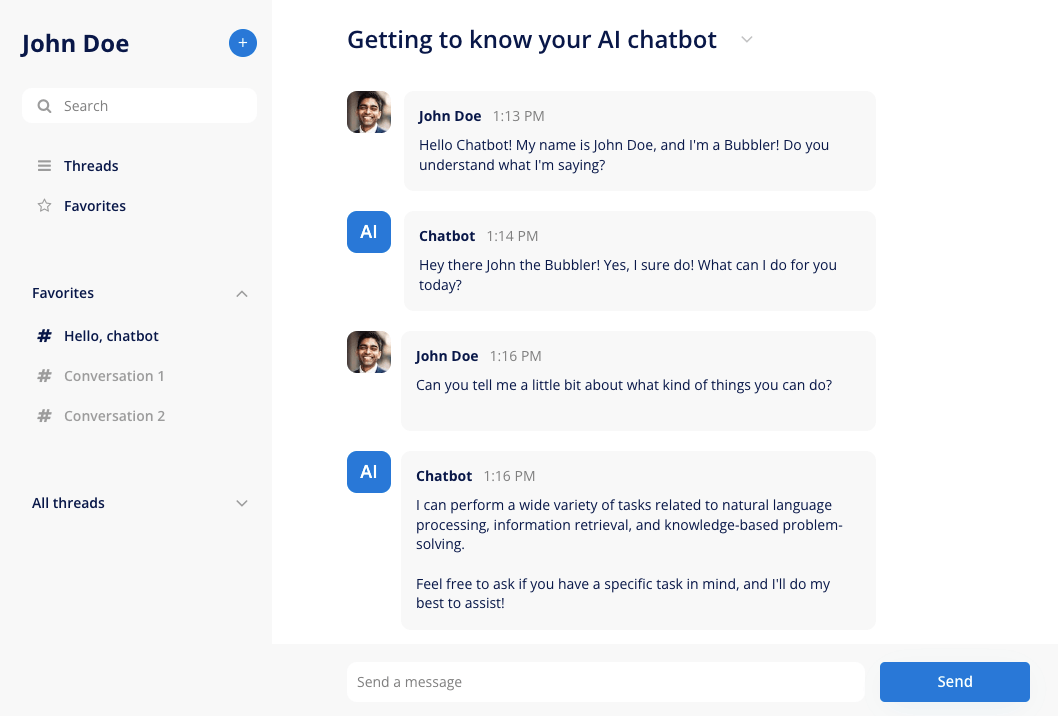
17. Test your new chatbot out! You can look at the workflows to see how the plugin works with the web app and interacts with the APIs.
Congrats — you've created a ChatGPT clone without any code!
Build out additional features
Once you’ve got your basic chatbot set up, start to play around and get creative with the experience you build. Here are a few ideas to consider:
- Add the ability to save conversations with the chatbot into a searchable library
- Create tailored chatbot prompts in Bubble's workflow tab to focus your chatbot on certain tasks and contexts
- Build features that match your chatbot’s intended use case (for example, if the chatbot is meant to help people write, you could create preset chat personas like coach, comedian, or translator to customize the experience)
- Change what happens as a user waits for the chatbot’s response (for example, you could ddd a loading state indicator, like an hourglass that turns over and over. Or, you could add streaming so that your user can read along as the chatbot “types”)
- Connect to a speech-to-text API and add a microphone icon so users can dictate their questions
- If you really want to level up, you can train your chatbot on a certain set of data (say, your website’s FAQs) via “fine tuning”
Add privacy and security
Don't forget to start setting some privacy rules and conditions to keep your users’ data secure — starting with roles in the Privacy section of your data tab. You can also check if you're unintentionally exposing any data with an API checker.
Launch
Once it’s time to launch, you’ll need a paid Bubble plan, which start at $29 a month. These allow you to make your app live for external users, host the app on your own custom domain, and more. If you’ve added other plugins to your app, those may come with their own subscriptions — but don’t worry, you can build all the functionality of ChatGPT above without any additional costs.
Start building today
Ready to join the no-code movement? Bubble can help you build a ChatGPT clone — or any other web app you dream up! In fact, we have a whole library of tutorials just like this one, plus plenty of other templates. It’s never been easier to build something incredible without having to code. All you need to start is a free account.
If you’d like more help building your product, our thriving community forum is a great place to find advice and resources. Anyone is encouraged to ask questions to help drive their no-code journey.