In this post, we’ll walk you through the step-by-step process of building a cash-back site like Rakuten (Ebates) or Ibotta with Bubble. Whether you’re looking to build an affiliate link platform, or you’re just interested in utilizing some of Rakuten’s core features, this guide will share how to start building the underlying workflows for your product.
The steps to building a cash-back app with no code include:
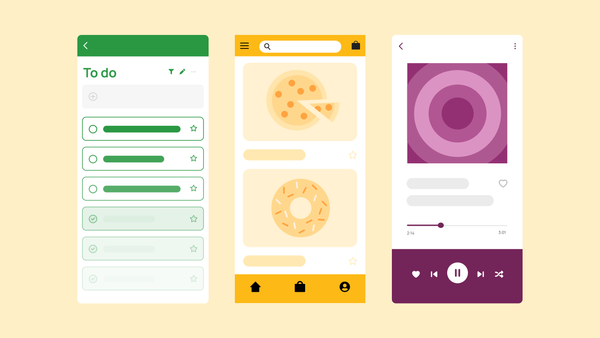
- Building a dashboard page where the user can browse offers and see the cash-back value of each one.
- Setting up a profile page that’ll be used in two ways: by the platform’s regular users to see past purchases and points earned; and by merchant users, where they can register their brands and enter their affiliate tracking links.
- Configuring a referral page to redirect users to the merchant’s website, with instructions on how to proceed.
Get Started
Before you start, you’ll need to first register your free Bubble account. Click the button below to get started, then you can follow along as we build our product together.
New to Bubble? Follow along on our introductory videos to get familiar with the basics of Bubble. This will help you get a running start when building a Rakuten clone.
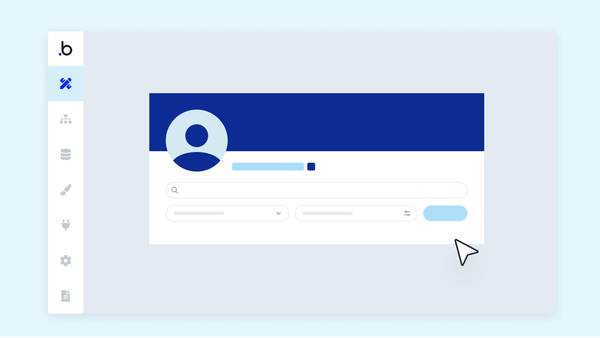
When kickstarting your project, you can choose to begin by wireframing your product design, or building the necessary fields within your database. In this case, we’ll start by using Bubble’s visual design tool to shape the user interface of our platform.

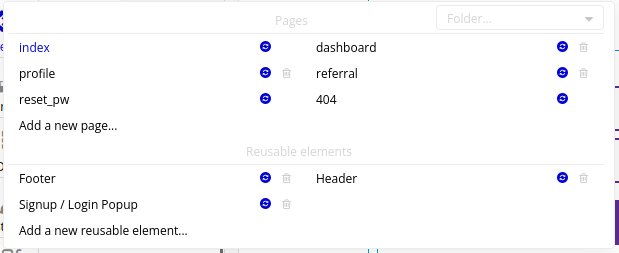
If you’re creating an app similar to Ebates or Rakuten, you’ll need to build the following pages:
- A dashboard page (“dashboard”): This page lists the cash-back offers from the brands on the platform, allowing the user to filter by category and search by name.
- A profile page (“profile”): Here, regular users can see their points and recent transactions; users with a merchant account can edit their brand’s details and add a tracking link.
- A referral page (“referral”): A simple page instructing the user on how the process works, before redirecting to the merchant’s website using the tracking link provided.
Once you create these pages, your page dropdown should look like this:
A major feature within Bubble is the ability to send data between pages. This allows you to create one generic version of a page, then dynamically display the relevant content from your database when it’s required.
In the case of your Rakuten clone, you’ll only need to create one page for activity. We can then add unique conditions to display only the relevant content of each of them when it’s needed (we’ll cover this in more detail soon).
Configuring your database
Once you’ve wireframed these pages, you can focus on creating the necessary data fields to power your application. We’ll rely on these fields to connect the workflows behind your product.
Bubble’s pre-built database makes it easy to create different data types with unique fields. When building a cash-back app as an MVP, we’ll need to create the following data types and fields.
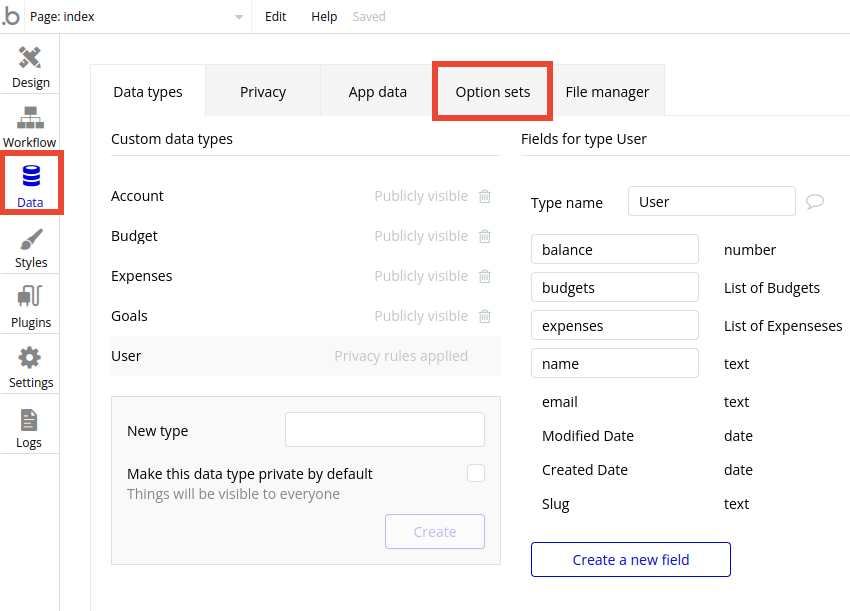
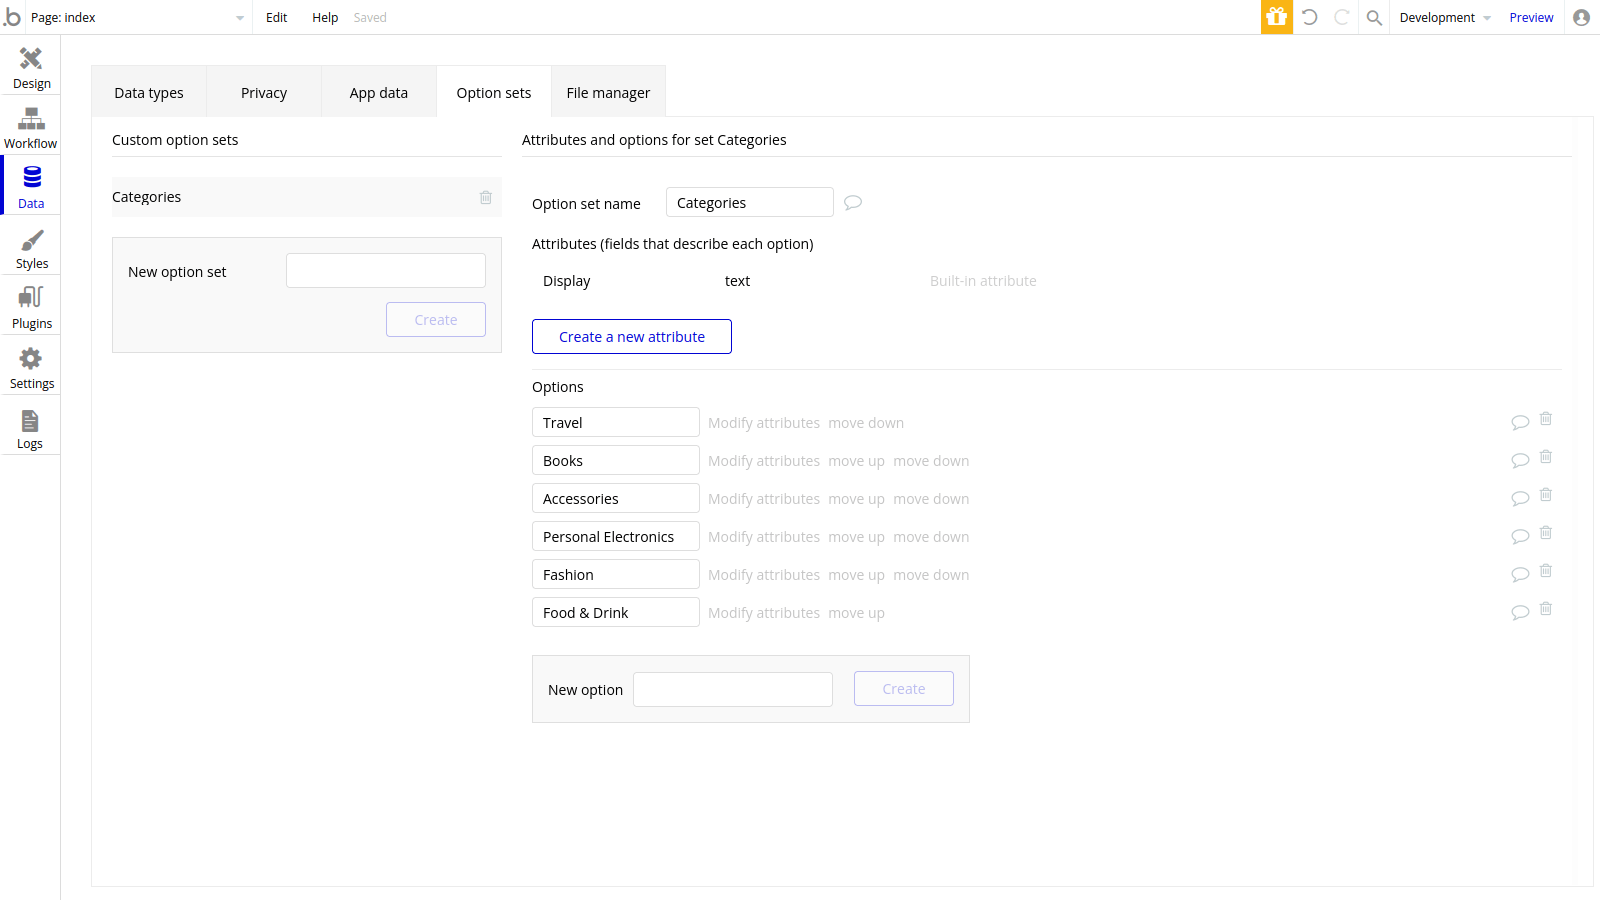
Option set: Categories
An option set allows you to use a set of options in different parts of your app without having to retype each into every page, dropdown menu, or data type.
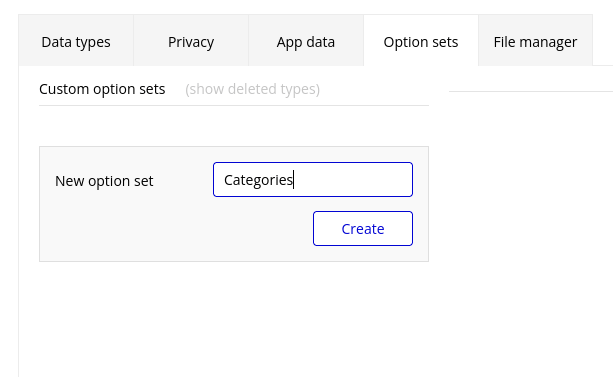
On Bubble’s Data tab, click on Option sets.
Type “Categories” into the input box, and click create.
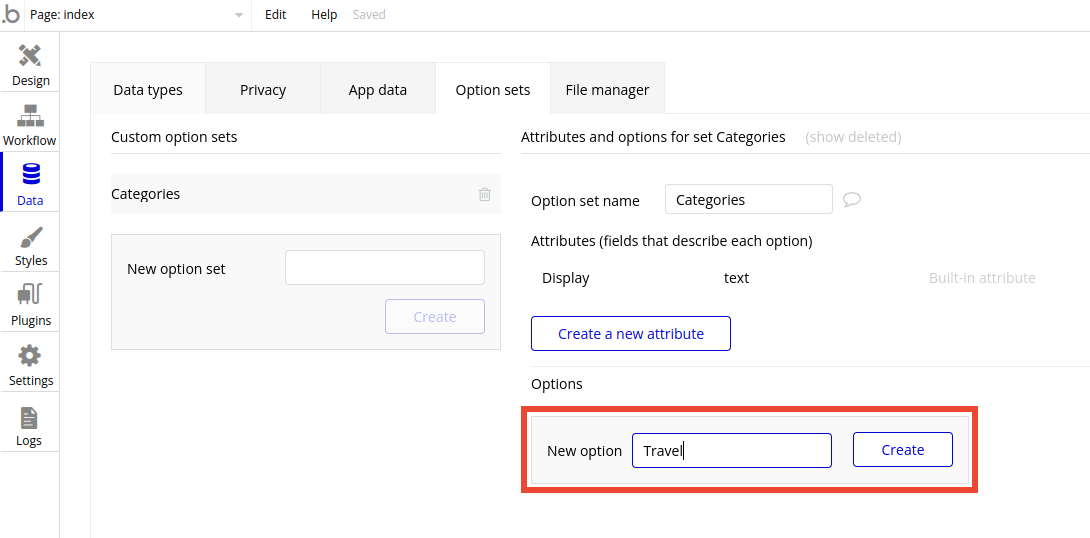
We’re going to add the different shopping categories to this option set. Type “Travel” in the “New option” input as our first category, and click “Create.”
Repeat the process for the following shopping categories:
- Books
- Accessories
- Personal Electronics
- Fashion
- Food & Drink
Once you’re done, your option sets section should look like this:
You can add or remove any category depending on what kinds of brands you want to have on your app.
Now, click back to the “Data types” section and add the following data types:
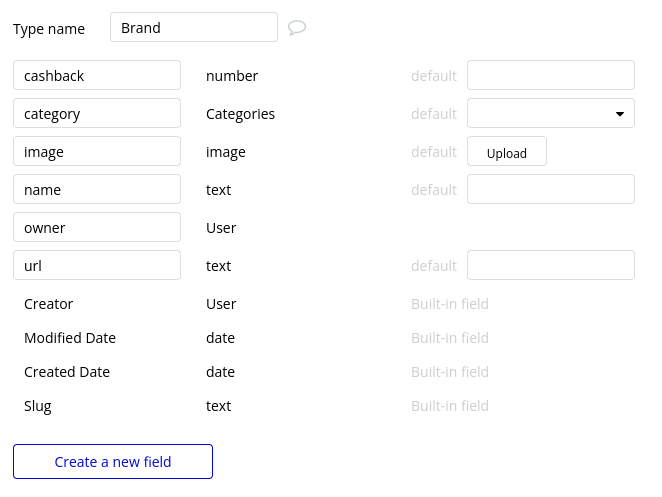
Data type: Brand
Fields:
- cashback (type: number)
- category (type: Categories. This is the option set we just created. We’ll use it to organize the brands on our platform into categories.)
- image (type: image)
- name (type: text)
- owner (type: User)
- url (type: text)
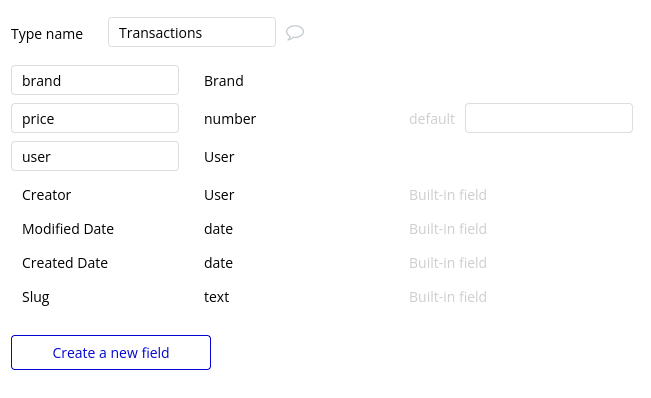
Data type: Transactions
Fields:
- brand (type: Brand)
- price (type: number)
- user (type: User)
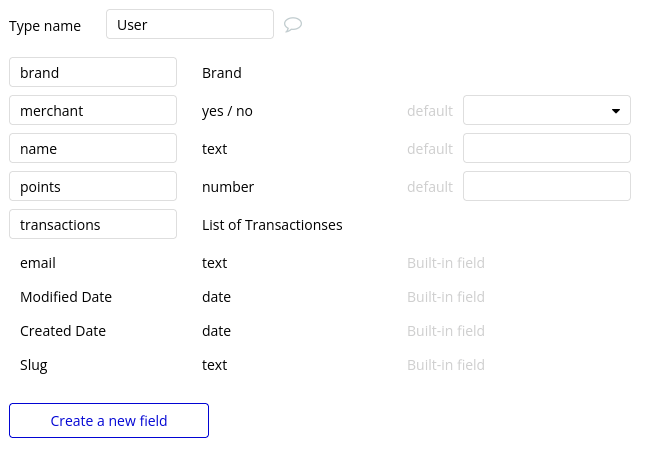
Data type: User
Fields:
- brand (type: Brand)
- merchant (type: yes/no)
- name (type: text)
- points (type: number)
- transactions (type: Transactions. Tick “this field is a list.” Doing so will allow you to add multiple transaction records to this field.)
Building workflows
Now that you’ve structured both the design and database of your application, it’s time to start stitching everything together, making your app functional.
In Bubble, the main way to create functionality in your app is with workflows. Each workflow happens when an event occurs (e.g. a user clicks on a button), and then runs a series of “actions” in response (e.g. “sign the user up” or “make a change to the database”).
Setting up the profile page
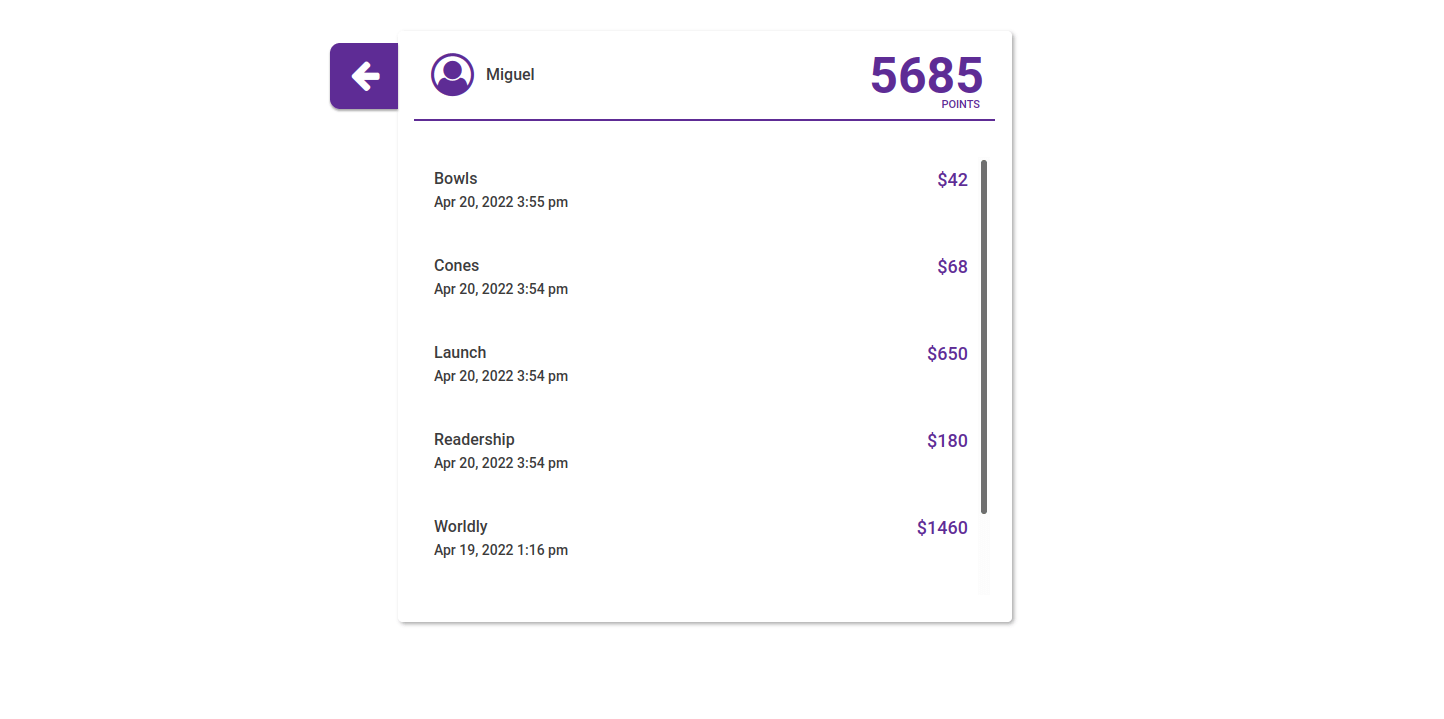
We’re going to start by designing the profile page. This page should fulfill the needs of regular users (showing the transaction history and current points), and the needs of merchant users (who’ll be on the platform to register their affiliate links and edit their brand details).
Let’s start by configuring the page for regular users. Here’s an example design:
First, add an icon and a text field to display the name of the user. Edit the text element, and click on “Insert dynamic data.”
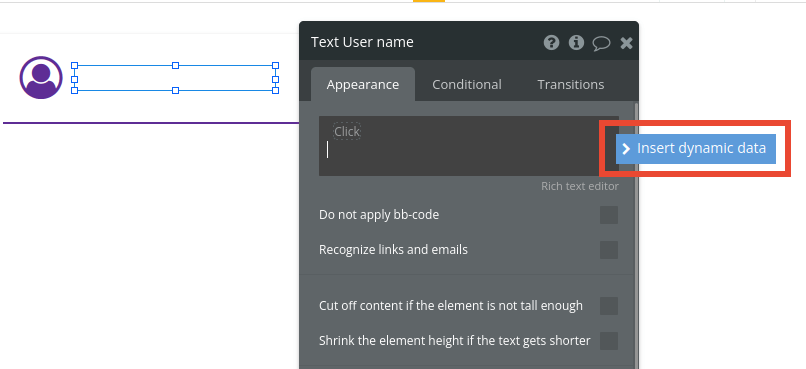
Choose “Current user” > “ ’s name.”
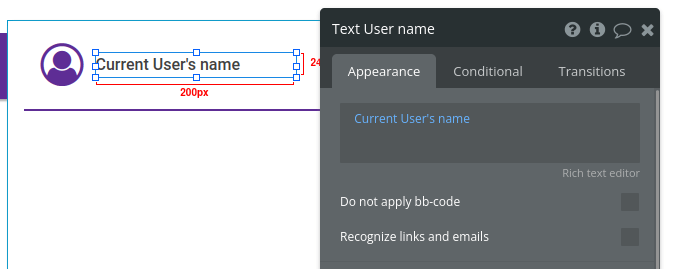
Add another text element and repeat the process, this time to display the total points of the current user: “Current user” > “ ’s points.”
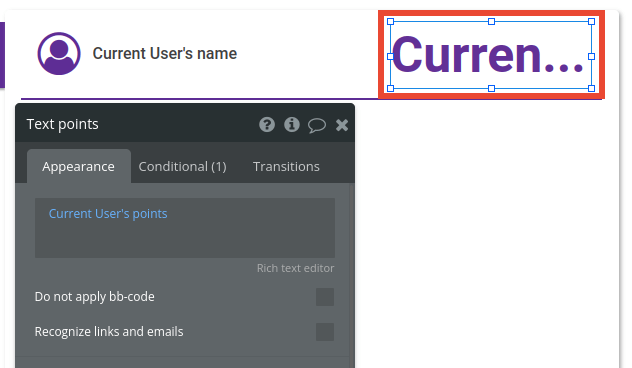
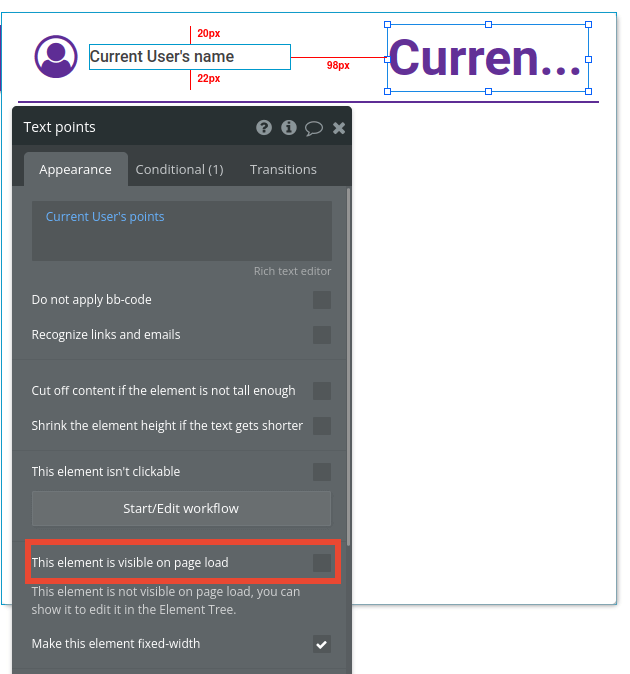
Our merchant users won’t need the points feature, so let’s set up a way to only show the point count to regular users. Untick “This element is visible on page load.”
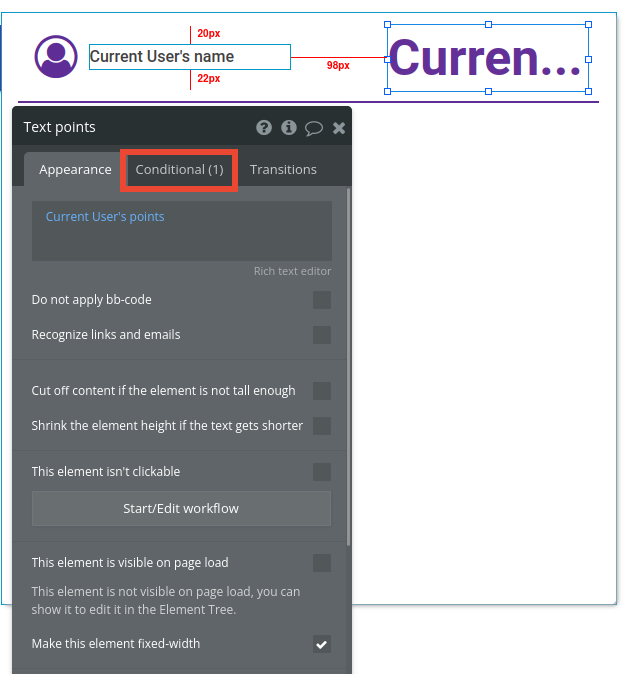
Now, click on the “Conditional” tab.
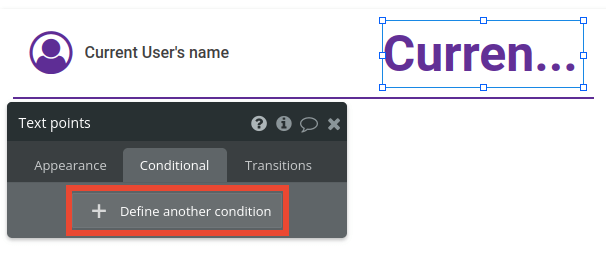
Click on “Define another condition.”
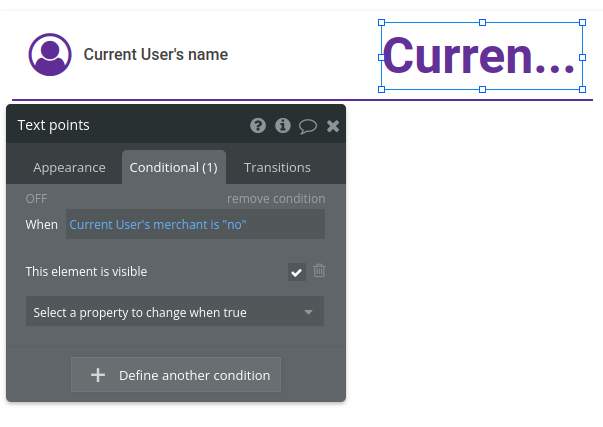
In the “When” field, set it to be “Current user” > “ ’s merchant” > “is ‘no’”. Click on the dropdown “Select a property to change when true,” select “This element is visible” and tick the box.
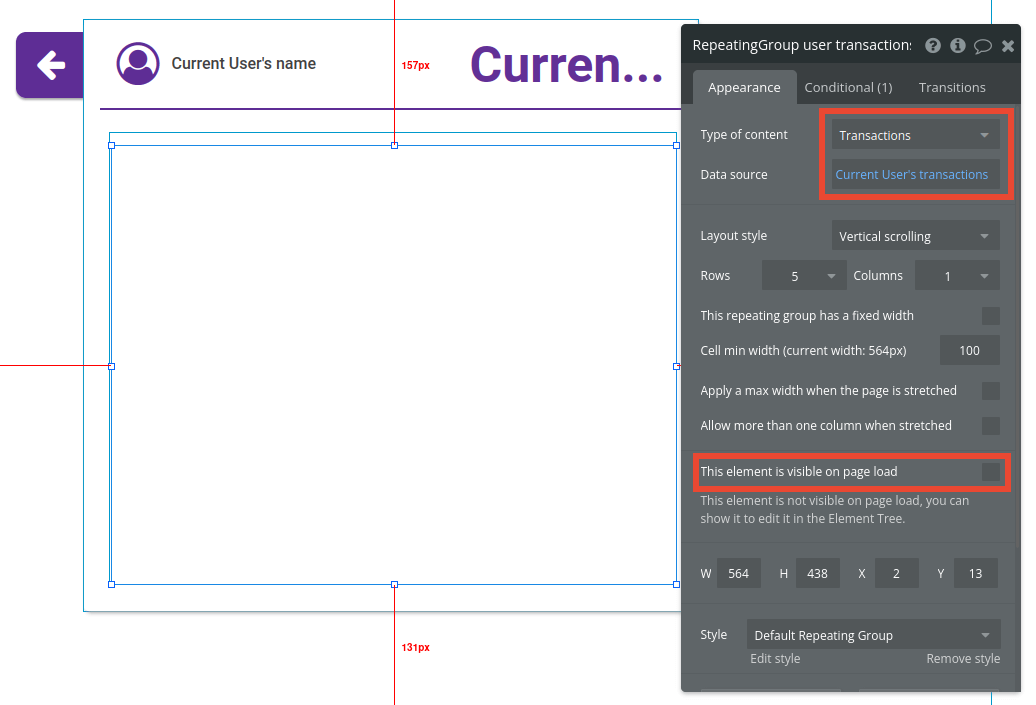
Next, we’ll add a list of transactions. Add a repeating group under the profile name and the point count. Set the type of content to Transactions and the data source to “Current user” > “ ’s transactions.” Untick “This element is visible on page load,” as we’ll hide this element for merchant users.
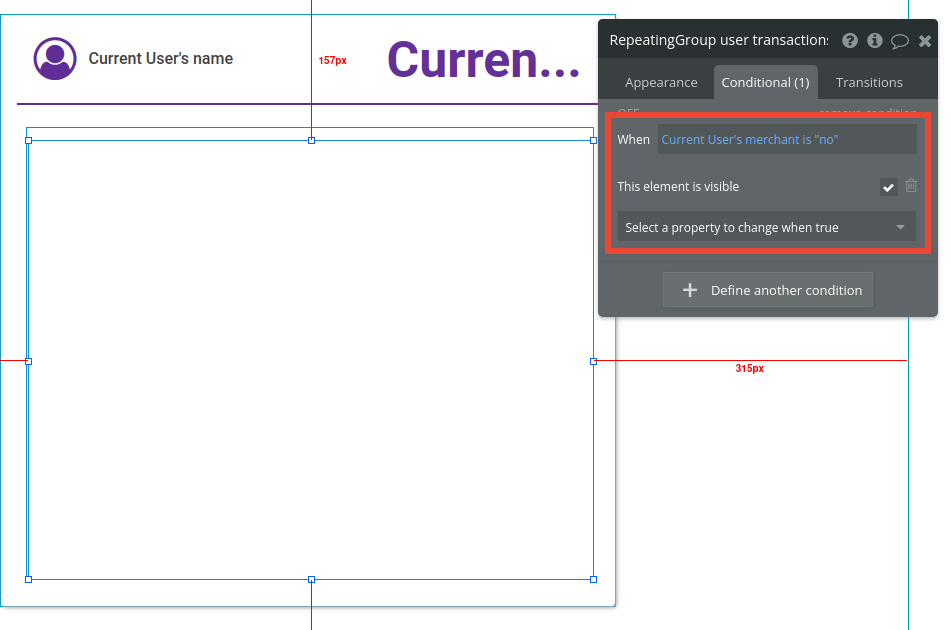
Click on the repeating group’s “Conditional” tab and add the same expression we added earlier for the points text field: “Current user” > “ ’s merchant” > “is ‘no’”; click on the dropdown and select “This element is visible”; tick the box.
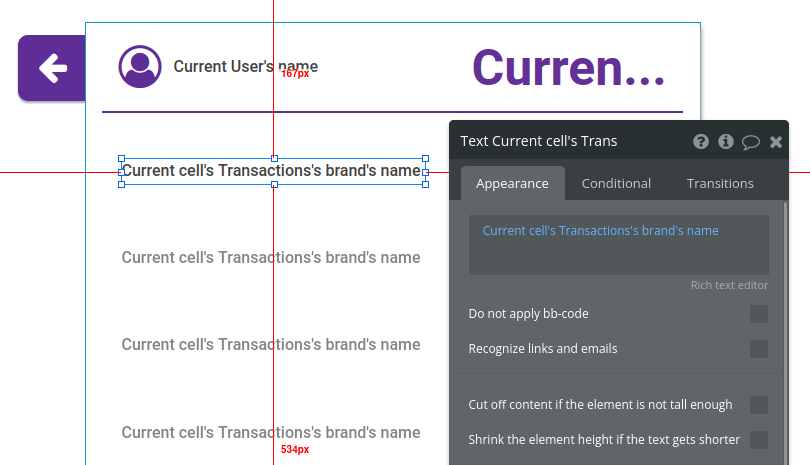
We need to place text fields inside the repeating group to show the transaction data.
Add a text field inside the first row of the repeating group, click on “Insert dynamic data,” and set it to show the name of the brand where the user made a purchase (“Current cell” > “ ’s Transactions” > “ ’s brand” > “ ’s name”).
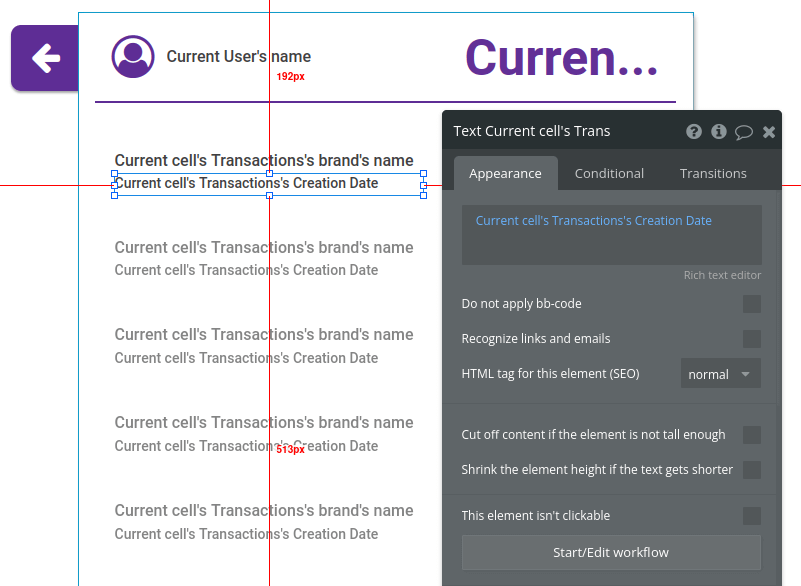
Repeat the process to add the transaction’s creation date (“Current cell” > “ ’s Transactions” > “ ’s Creation Date”).
Repeat the process for adding the price to the right of these elements (“Current cell” > “ ’s Transactions” > “ ’s price”).
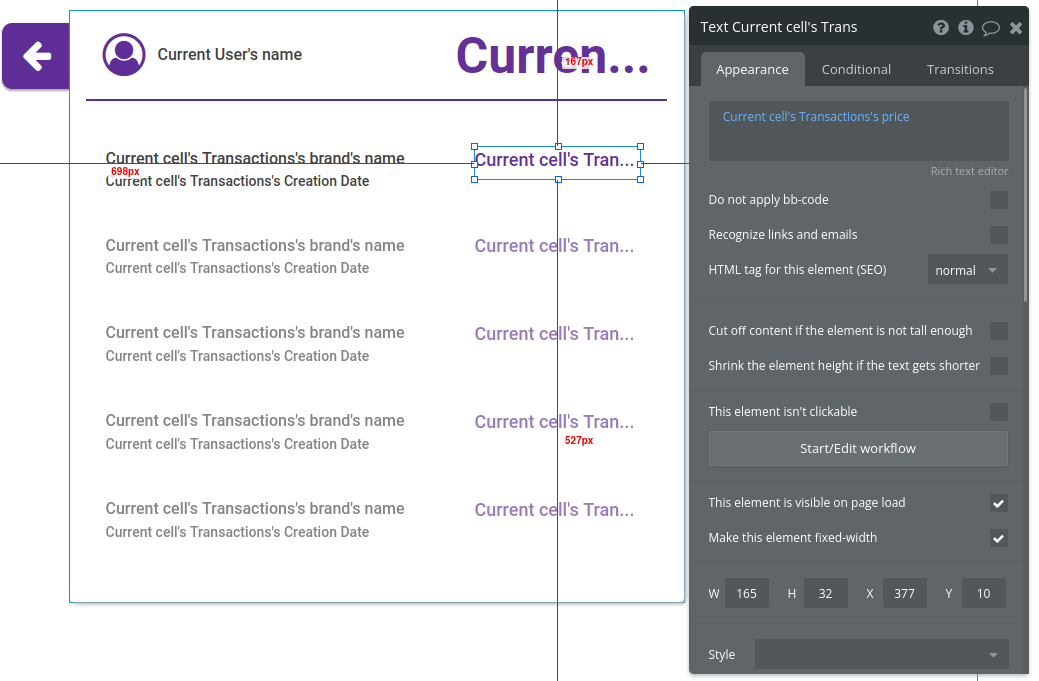
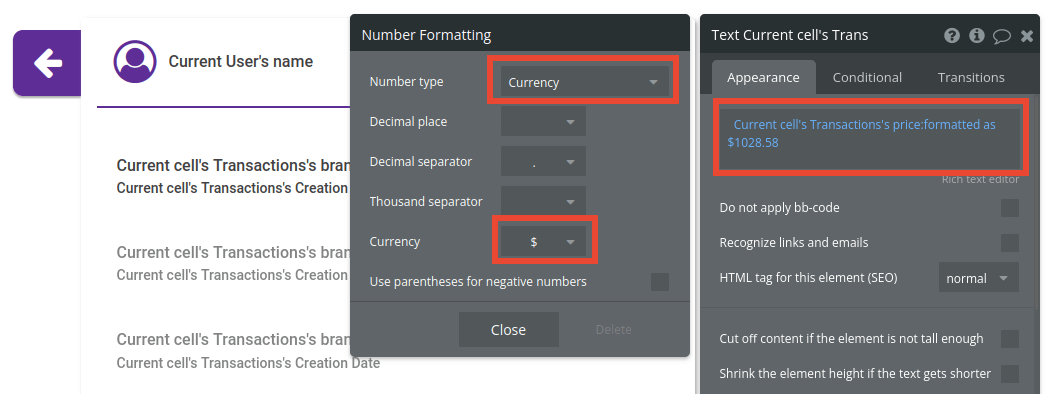
We need to display the price as a currency. After “Current cell” > “ ’s Transactions” > “ ’s price,” click on “More,” and select “:formatted as.” On the new window that appears, set the number type to “Currency” and the currency to “$.”
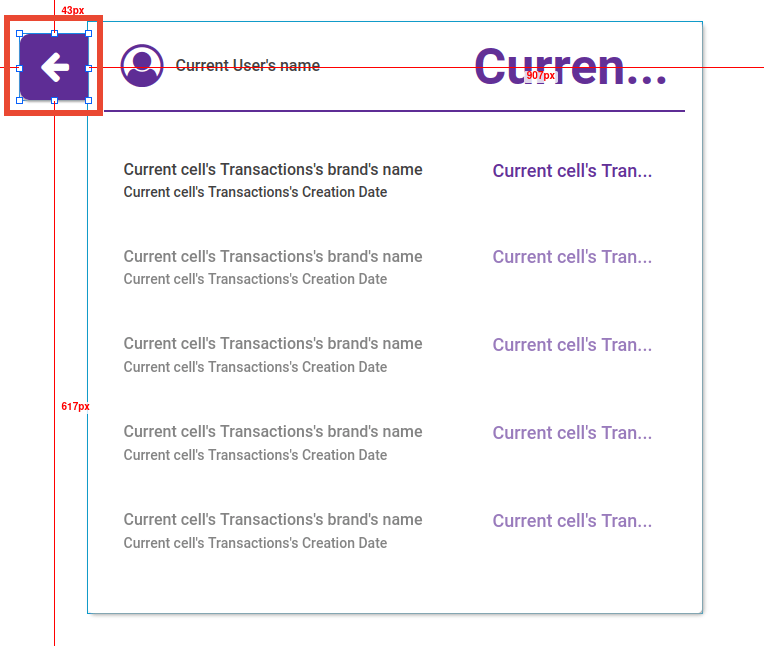
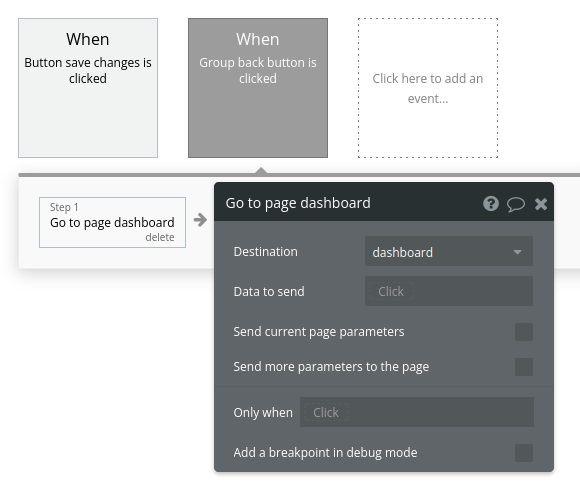
Finally, let’s add a button to let the user navigate to the dashboard. Add a new button to the page. Here’s an example design:
Right-click this element, and click “Start/Edit workflow.”
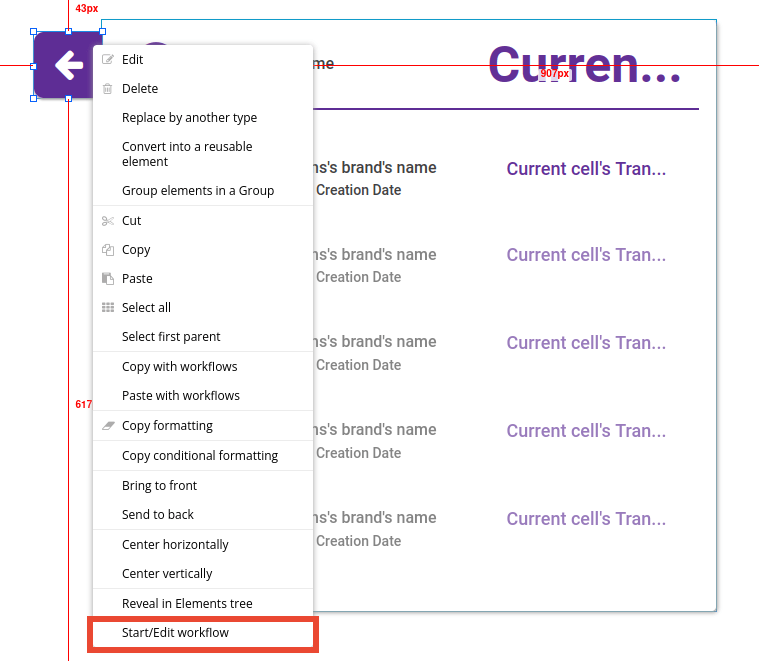
On the workflow page, click on “Click here to add an action.” Hover over “Navigation,” and click on “Go to page.”

A new window appears. Set the “dashboard” page as the destination.
The profile page is ready for our regular users. Next, we’ll add the elements that will allow merchant users to make changes to their brand details.
Adding brand details
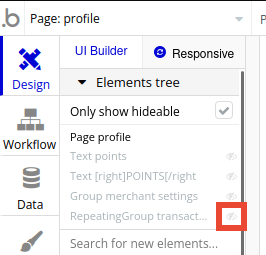
Before we add new elements to the profile page for the merchant user experience, we need to hide the repeating group with the regular user’s transactions.
On the top left of the screen, in the Elements tree, click on the eye icon in front of the repeating group we just configured. This has no effect on the final app; it toggles visibility for all the elements on the editor page to help us work on each of them as needed.
Now, we’ll add elements to the page to display the current brand details, allowing the merchant user to change them with a save button.
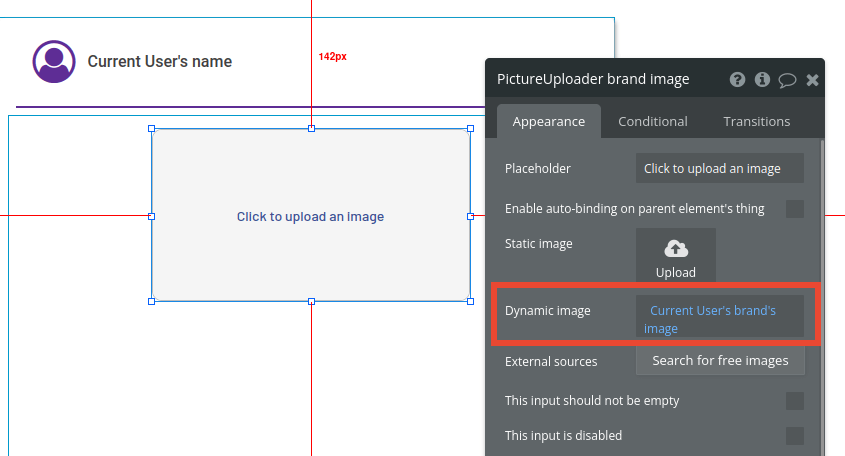
Add a picture uploader element to the page. Set the “Dynamic image” to the “Current user” > “ ’s brand” > “ ’s image”.
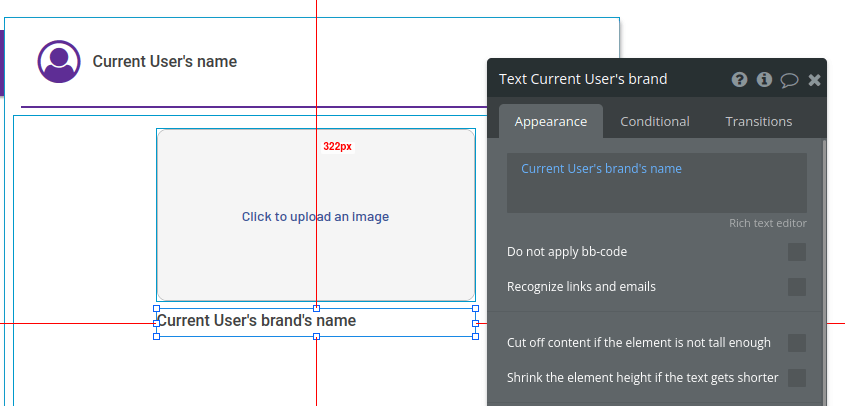
Add a text field, edit it to insert dynamic data, and set it to show “Current user” “ ’s brand” > “ ’s name.”
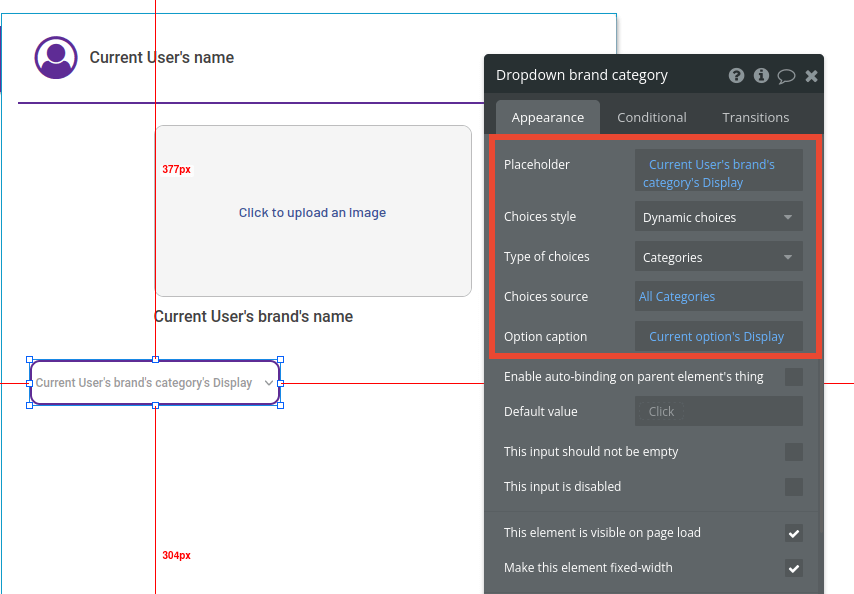
Add a dropdown element and:
- Set the placeholder to “Current user” > “ ’s brand” > “ ’s category” > “ ’s Display.”
- Set the choices style to “Dynamic choices.”
- Set the “Type of choices” to “Categories” (our option set).
- Set the choices source to “All Categories.”
- And the option caption to “Current option” > “ ’s Display.”
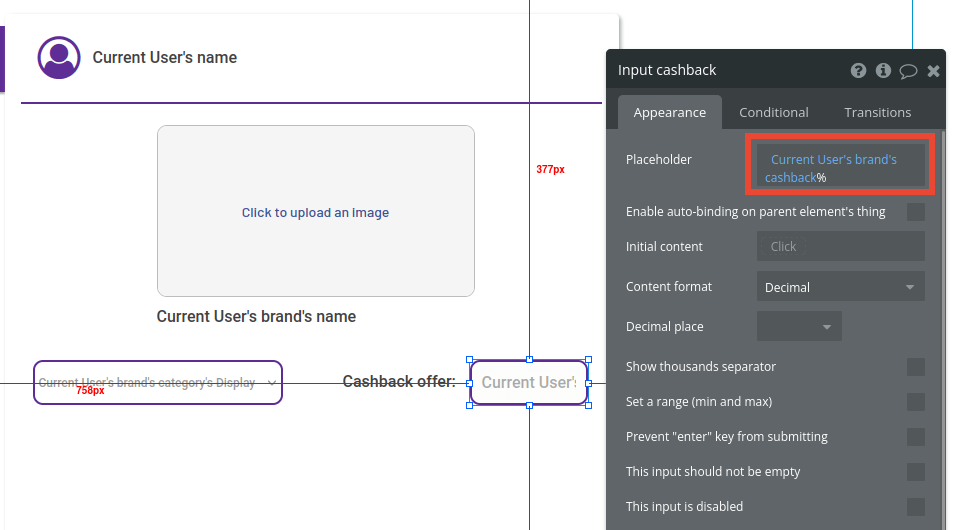
Add a text element and type in “Cashback offer:” followed by an input field to show the cash-back value. Set the placeholder to be “Current user” > “ ’s brand” > “ ’s cashback.” Once you’ve entered this expression, click at the end of it and type in a % symbol.
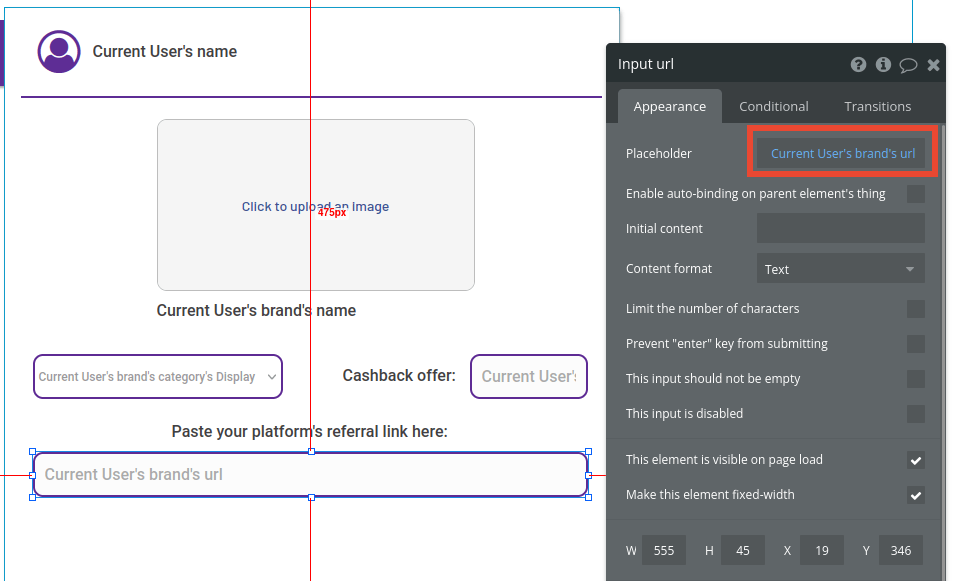
Add a text element and type in “Paste your platform's referral link here:” followed by an input field with the placeholder set to “Current user” > “ ’s brand” > “ ’s url.” This will allow us to later refer and link to the custom referral URL that a brand partner may give.
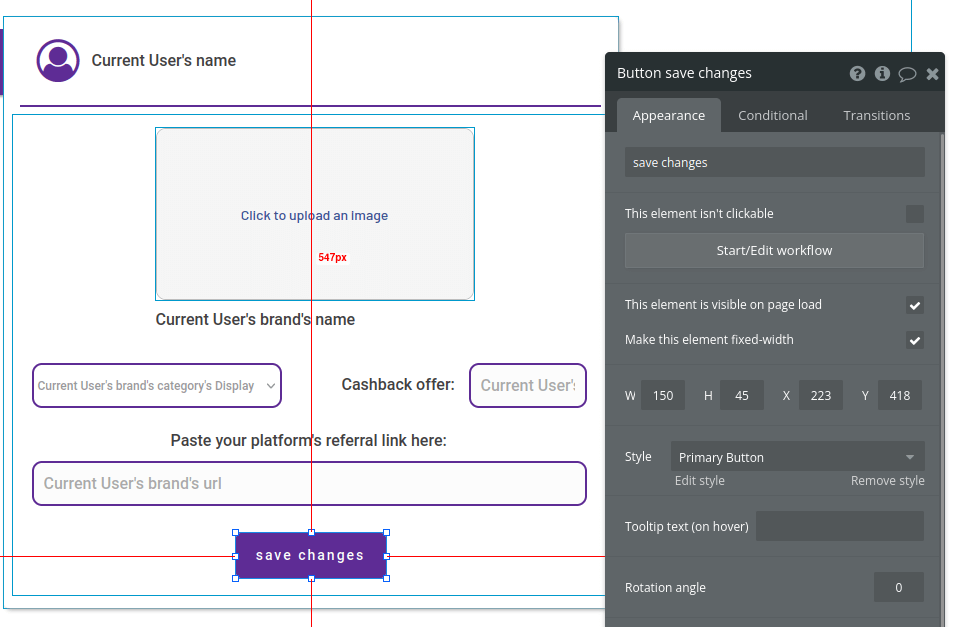
Add a button element and label it “save changes.”
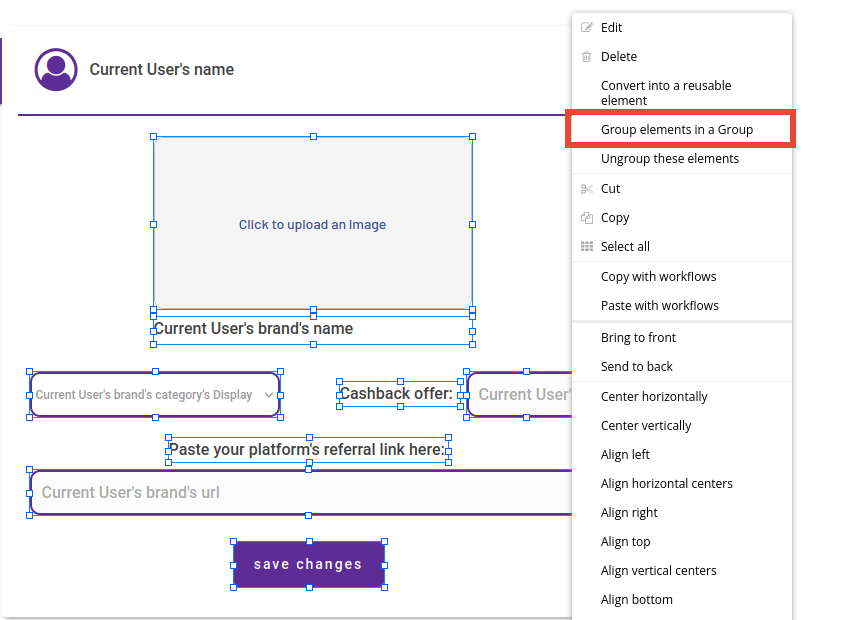
There’s one more thing we need to do. Hold SHIFT and click on all the elements we just added to the page, right-click any of them, and select “Group elements in a Group.”
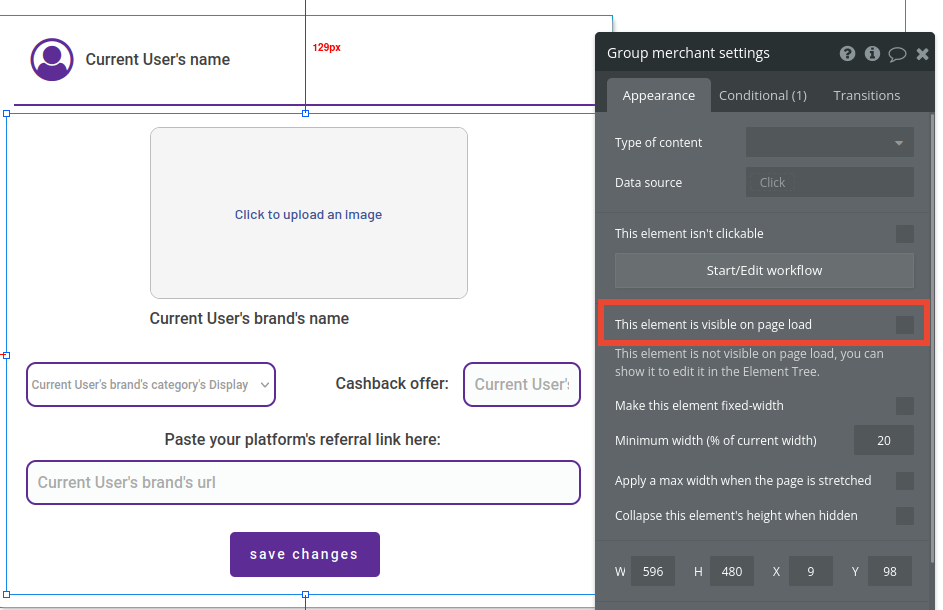
We want to show these elements only to users that have a merchant account. Right-click the group we just created and untick “This element is visible on page load.”
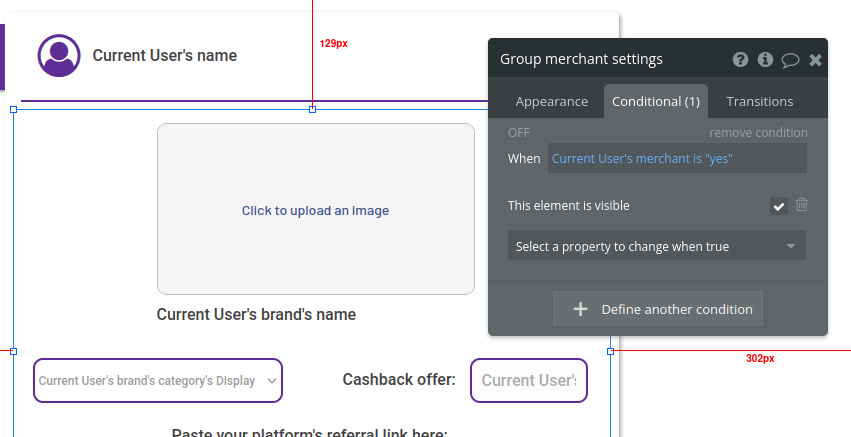
Next, click on the “Conditional” tab. Click to define another condition: When “Current user” > “ ’s merchant” > “is ‘yes’”. Then, click on the dropdown, select “This element is visible,” and tick the box.
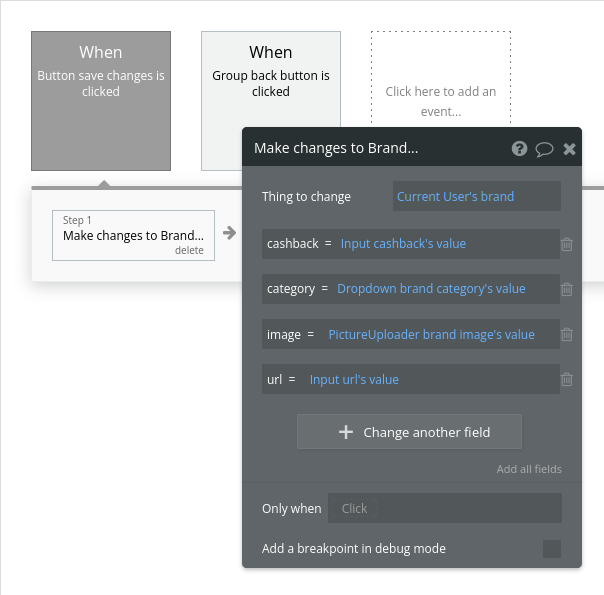
Finally, we’re going to build the workflow to save any changes the user decides to make. Right-click the “save changes” button and click “Start/Edit workflow.”
Click to add a new action. Hover over “Data (Things)” and select “Make changes to a thing.” Here’s how to set it up:
- Thing to change: “Current user” > “ ‘s brand”
- cashback = Input cashback > “ ’s value”
- category = Dropdown brand category > “ ’s value”
- image = PictureUploader brand image > “ ’s value”
- url = Input url > “ ‘s value”
Our merchant users can now edit their brand details whenever they need. It’s time to display these offers to our regular users.
Browsing available offers
We’ll be working on the dashboard page now. We’ll have a top menu to allow users to filter the offers by category, a search bar to search by brand name, and a profile button to take the user to the profile page.
Here’s an example design:
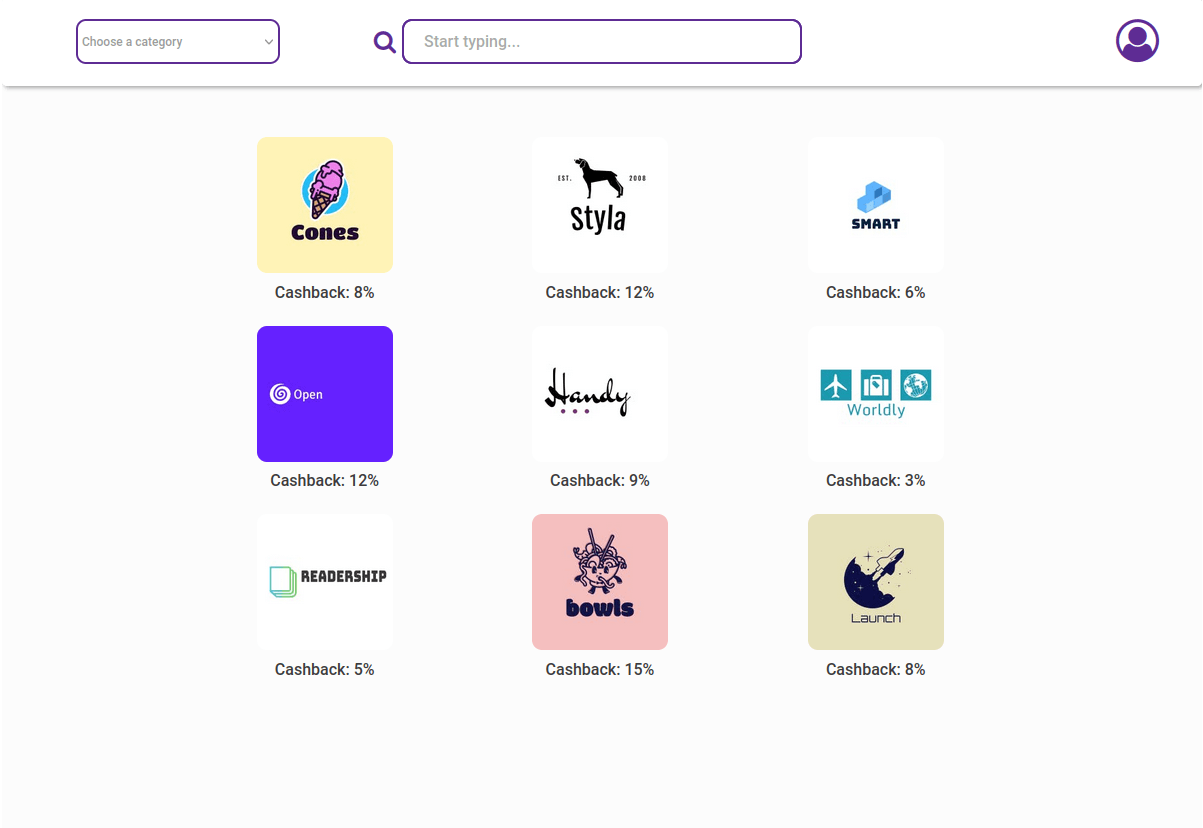
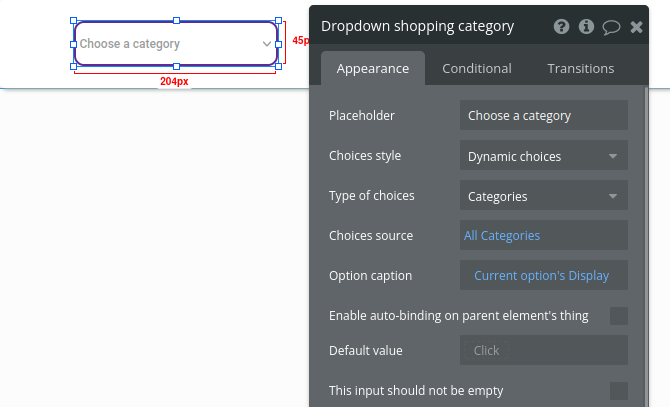
Let’s start by adding a dropdown with the brand categories. Here’s how to set it up:
- Choices style: “Dynamic choices”
- Type of choices: “Categories”
- Choices source: “All Categories”
- Option caption: “Current option” > “ ’s Display”
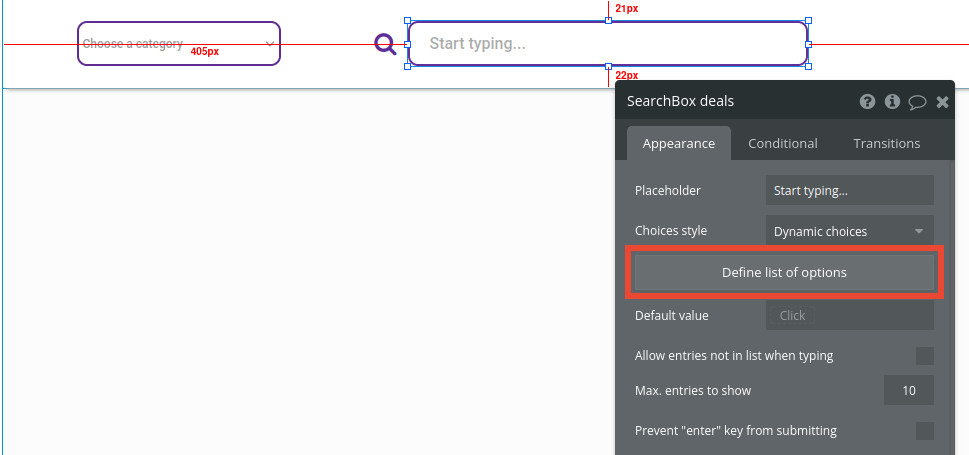
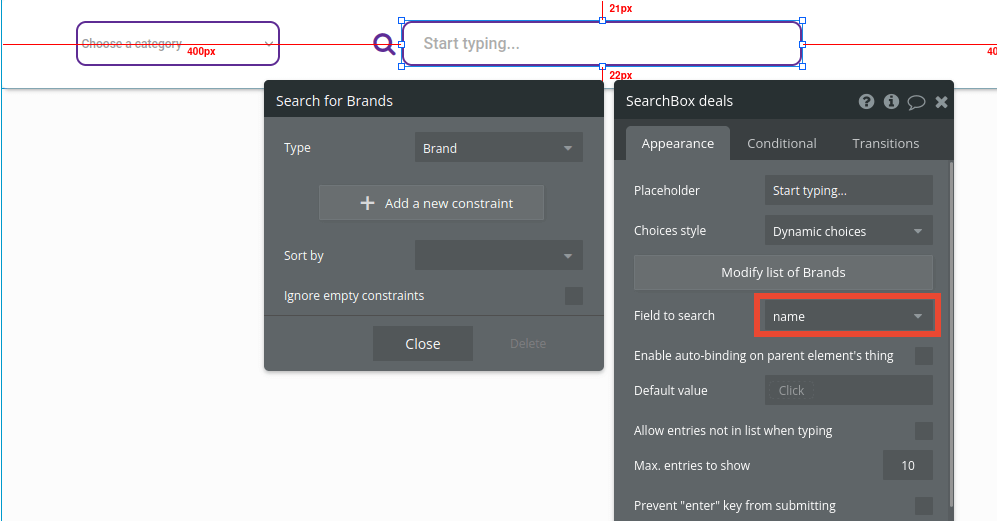
Add a search box element. Edit it and click on “Define list of options.”
Set the type of options to search for to “Brand.”
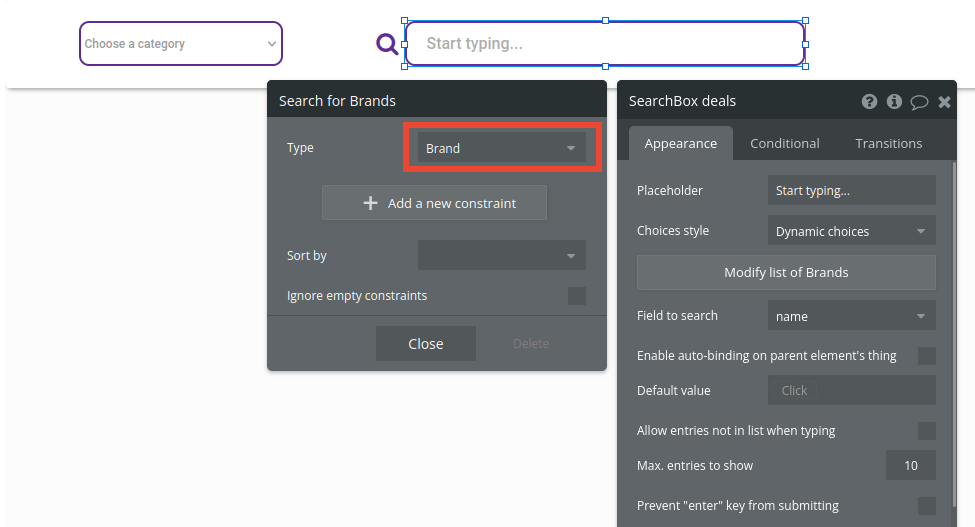
Set the field to search to “name.”
The search box is ready. Add a profile icon to the right side of the page to complete the top menu.
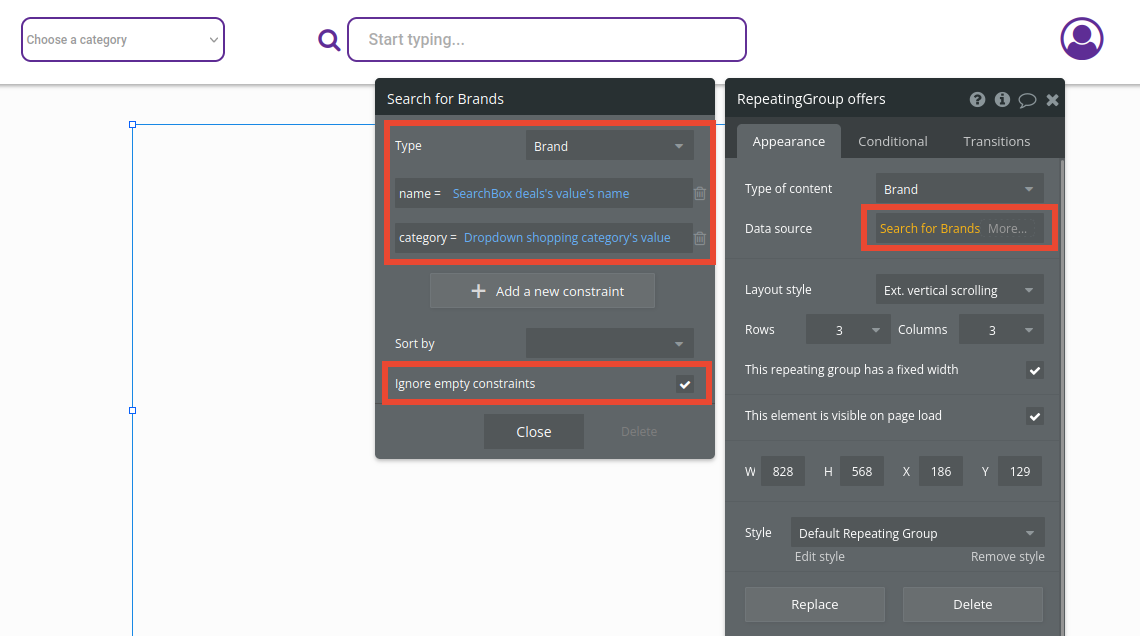
Add a repeating group under the top menu. Set the type of content to “Brand.” As for the data source:
- Select “Search for.” On the window that appears, set the type to “Brand.”
- Click to add a new constraint. Set the “name” > “=” > “SearchBox deals” > “ ’s value” > “ ’s name.” This ensures the user can use the search box to filter the results.
- Click to add another constraint. Set the “category” > “=” > “Dropdown shopping category” > “ ’s value.” This allows the user to filter the results by category using the dropdown.
- Tick the box “Ignore empty constraints” at the bottom of the window.
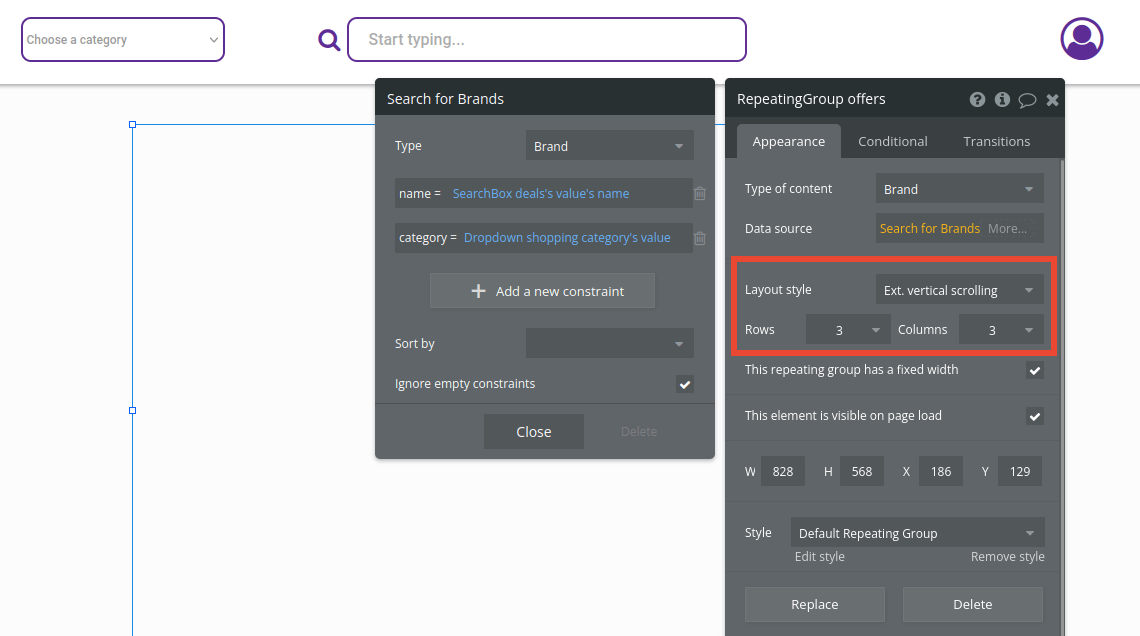
Below the data source, set the layout style to “Ext. vertical scrolling,” the number of rows to 3, and the number of columns to 3.
Now, add an image element to the first row on the top left of the repeating group. In the Dynamic image field, set it to be “Current cell” > “ ’s Brand” > “ ’s image.”
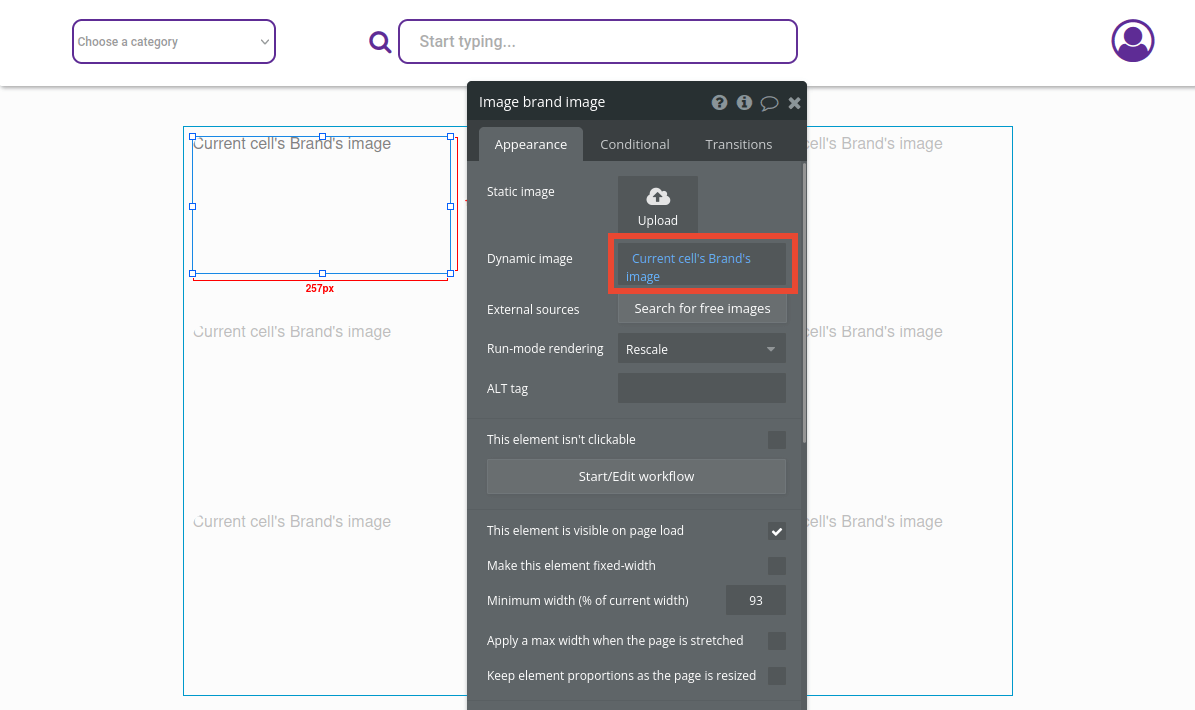
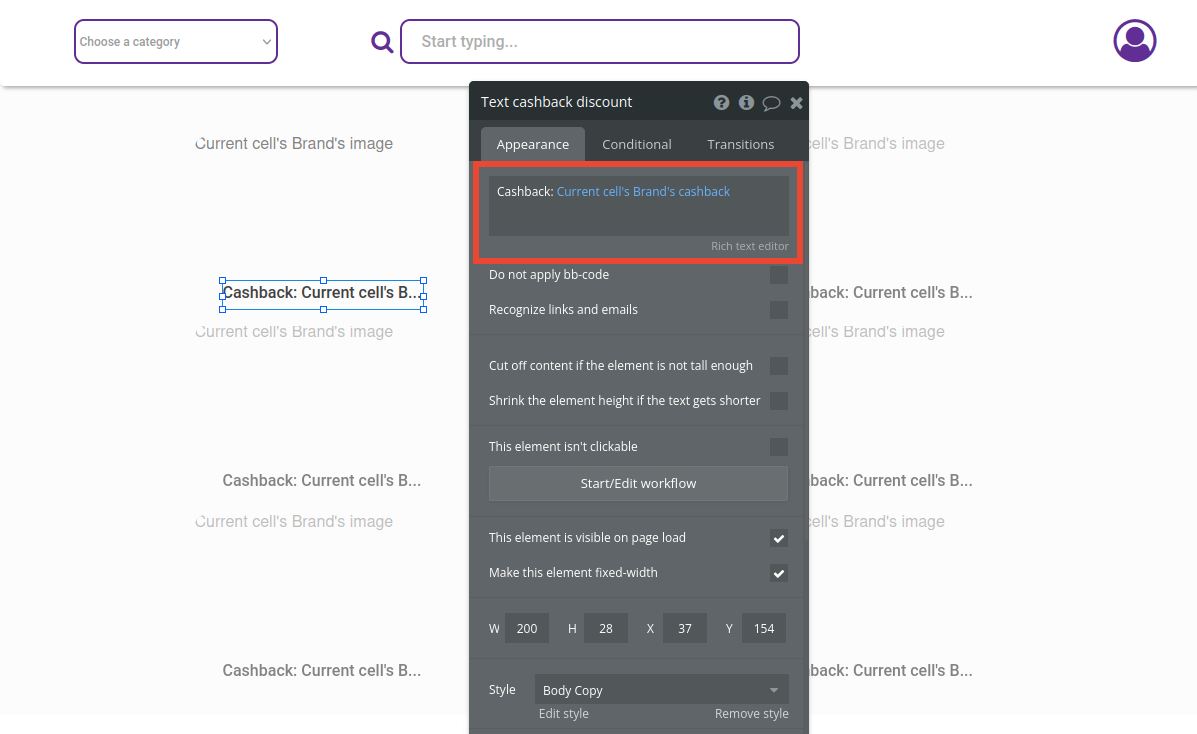
Under this image, add a text element. Type in “Cashback:” and then insert dynamic data to display “Current cell” > “ ’s Brand” > “ ’s cashback.”
We’ll now add the functionality to allow the user to click on a brand image and go to the merchant’s website through the tracking link.
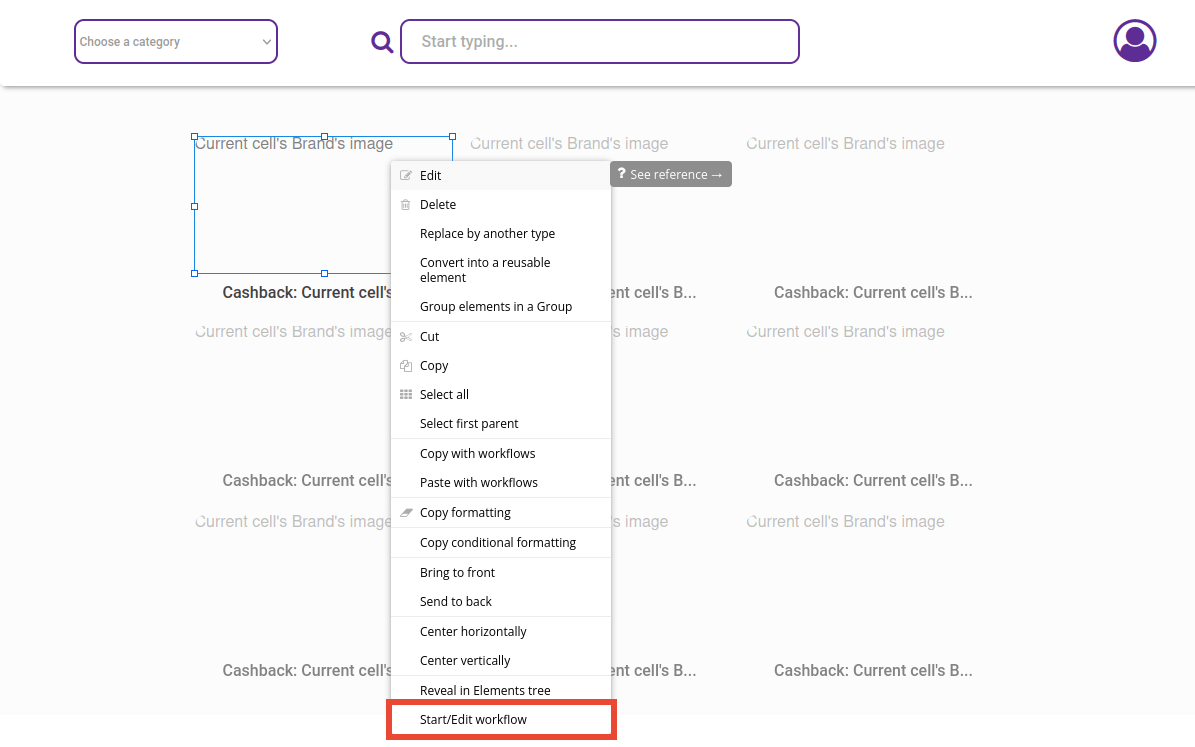
Right-click the image element inside the repeating group and “Start/Edit workflow.”
Click to add a new action. Hover over “Navigation” and select “Go to page.” Set the destination to be the “referral” page. Don’t forget to fill the “data to send” field with “Current cell” > “ ’s Brand.”

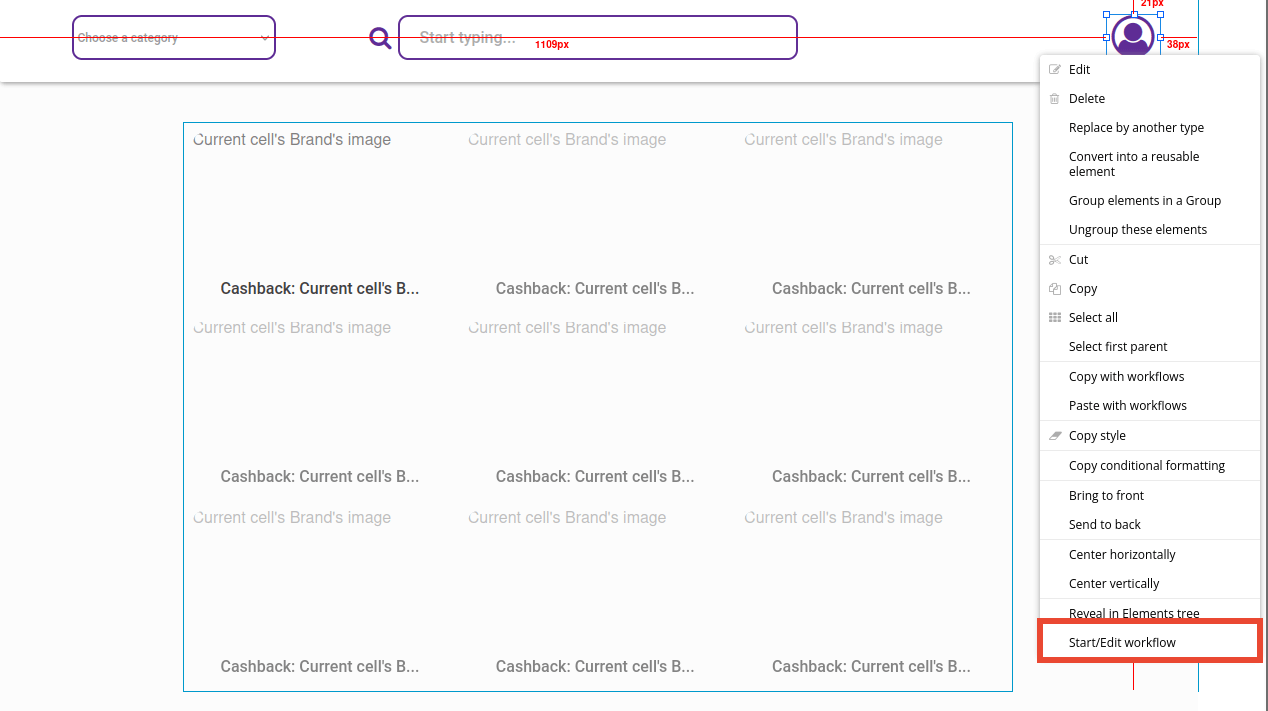
Before we move on, let’s set up the navigation for the profile icon as well. Go back to Bubble’s Design tab, right-click the profile icon, and “Start/Edit workflow.”
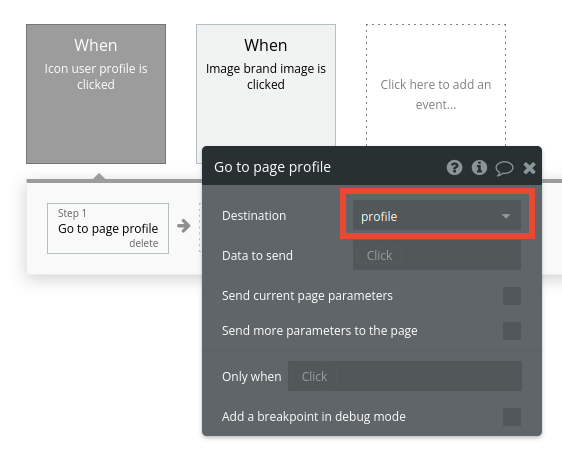
Click to add a new action. Hover over “Navigation” and choose “Go to page.” Set the “profile” page as the destination.
Now that the dashboard page is complete, we’ll configure the referral page, the last step before the user moves on to the merchant’s website.
How affiliate marketing links work
Before we continue the tutorial, let’s look a bit deeper into how cash-back apps and affiliate marketing platforms work.
If you'd like to skip this part, click here to go to the next section of the tutorial.
Affiliate marketing in a nutshell: You bring visitors to a merchant’s platform, and you get paid for doing so for each of them who makes a purchase. The amount you receive is usually a percentage of the sale price.
Running a cash-back app means that you’ll share this percentage with the users of your app in the form of points. Here’s an example:
- You set up an affiliate marketing agreement with a smartphone shop, where you receive 10% for each sale.
- You bring a visitor to their website, and they purchase a $100 smartphone.
- You receive $10, your affiliate marketing commission.
- You can now choose how many points to award to the visitor. If you decide that $1 = 1 point, then the visitor will get 10 points.
But how does the smartphone shop know which visitors come from your platform and people who come from a Google search page? This is done via a tracking link that puts a cookie on the visitor’s machine. This cookie will help identify which purchases were made by visitors you referred when compared to other traffic sources.
As you build your cash-back app, it’s likely that you’ll have to make some modifications to the way tracking links are set up. Depending on the brands you work with, you may be able to set APIs to automate this process. Since the affiliate marketing landscape is vast, it’s difficult to outline a single process to comply with each and every marketing platform’s terms, conditions, and technical requirements. But with Bubble, you can customize each link and API to integrate with whatever system your partner brands prefer. This tutorial’s examples show you a simple version using manual referral URLs, but there are other ways to track affiliate links.
Another important part of your app’s business model is what users can do with the points you award them. Do they receive a set amount of money for the points they earned? Can they buy discount vouchers with the points? Do they unlock perks or special privileges based on how much they spend? Keep these ideas in mind as you build the next cash-back giant.
Let's move back to the tutorial.
Redirecting to the brand's website
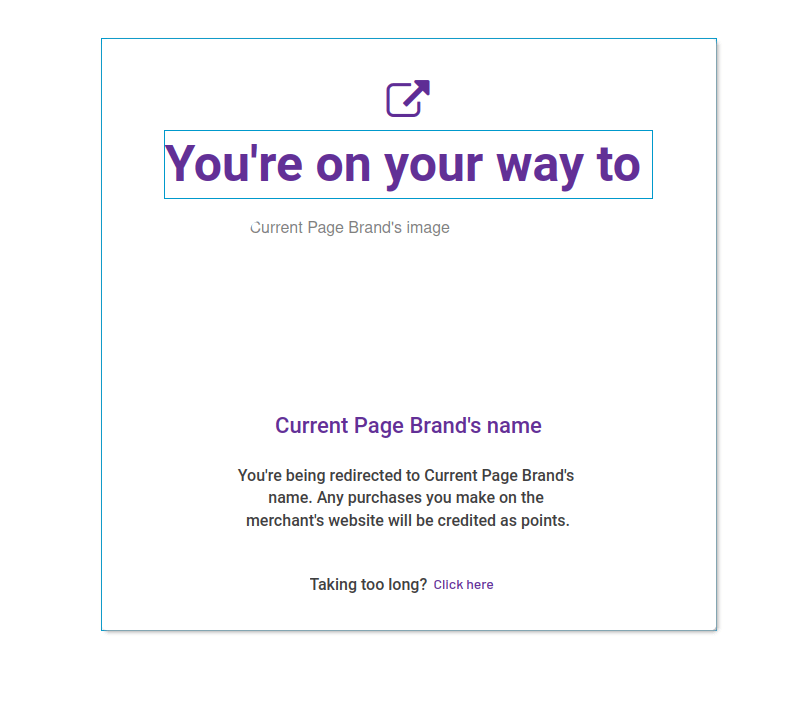
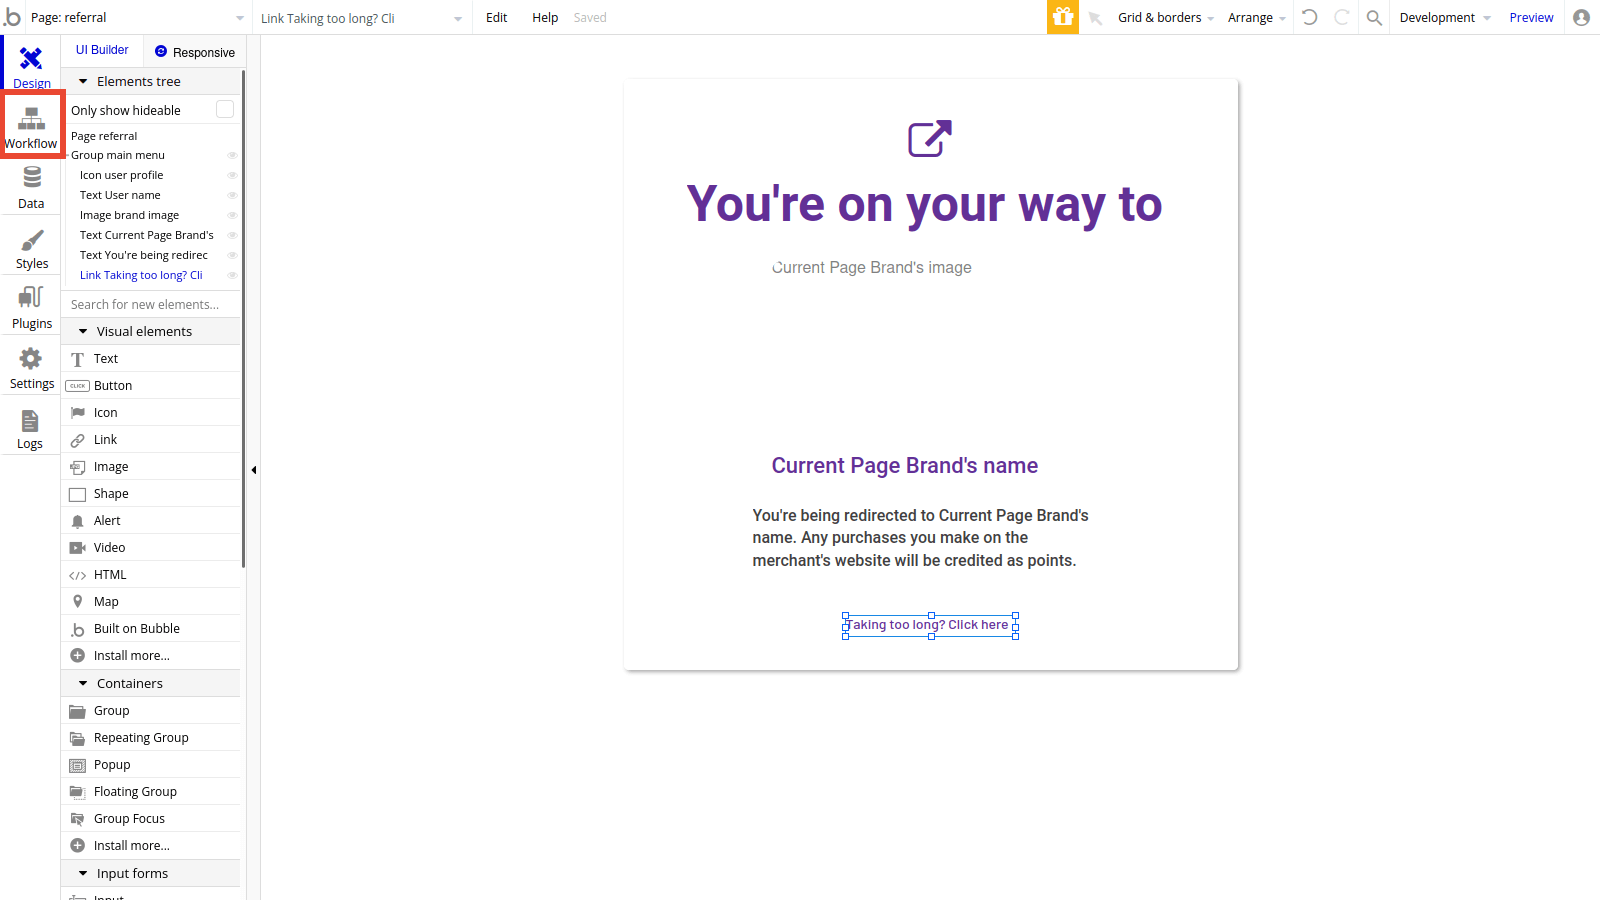
We’ll be working on the referral page now. This page will let the user know that they’re on their way to the merchant’s website and that any purchases they make there will be credited as points in your app.
Here’s an example design:
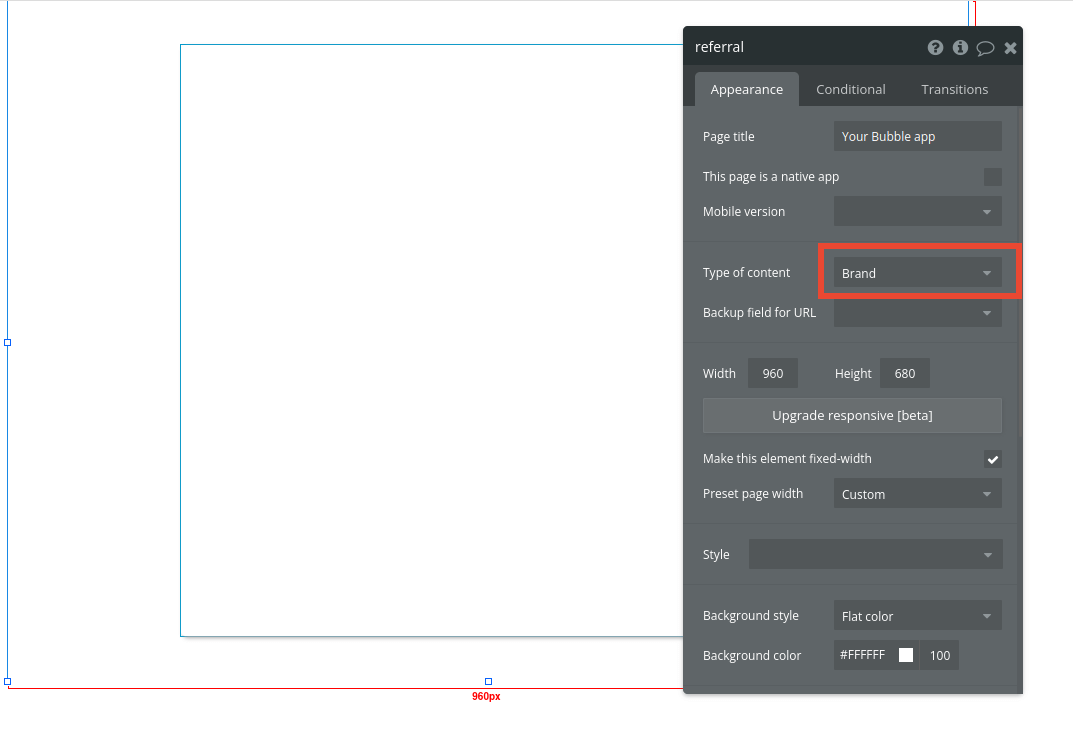
First, right-click the page background and edit it. Set the type of content to “Brand.”
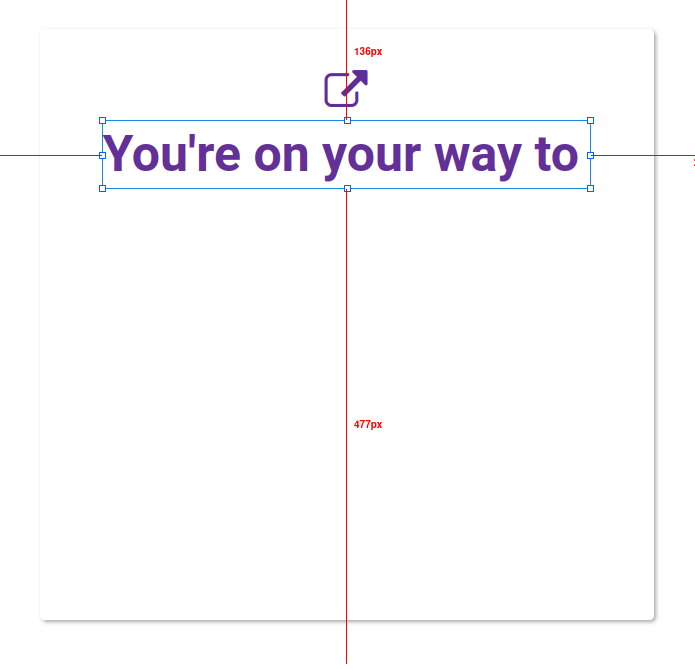
Next, add an icon that illustrates the redirect process and a text element describing what will happen when they navigate off this page.
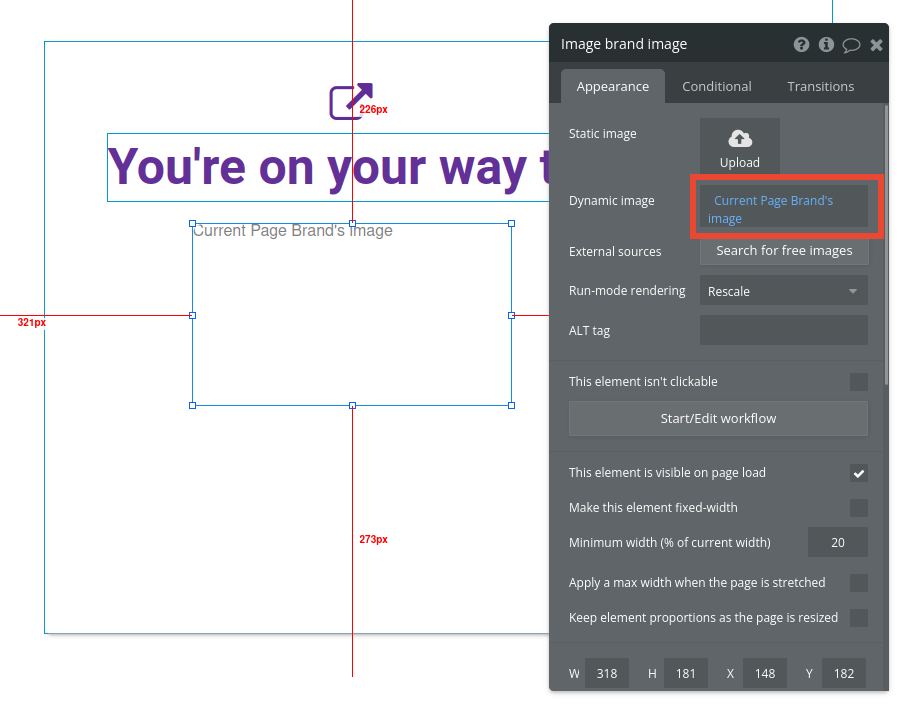
Add an image element. Set the dynamic image to display “Current Page Brand” > “ ’s image.”
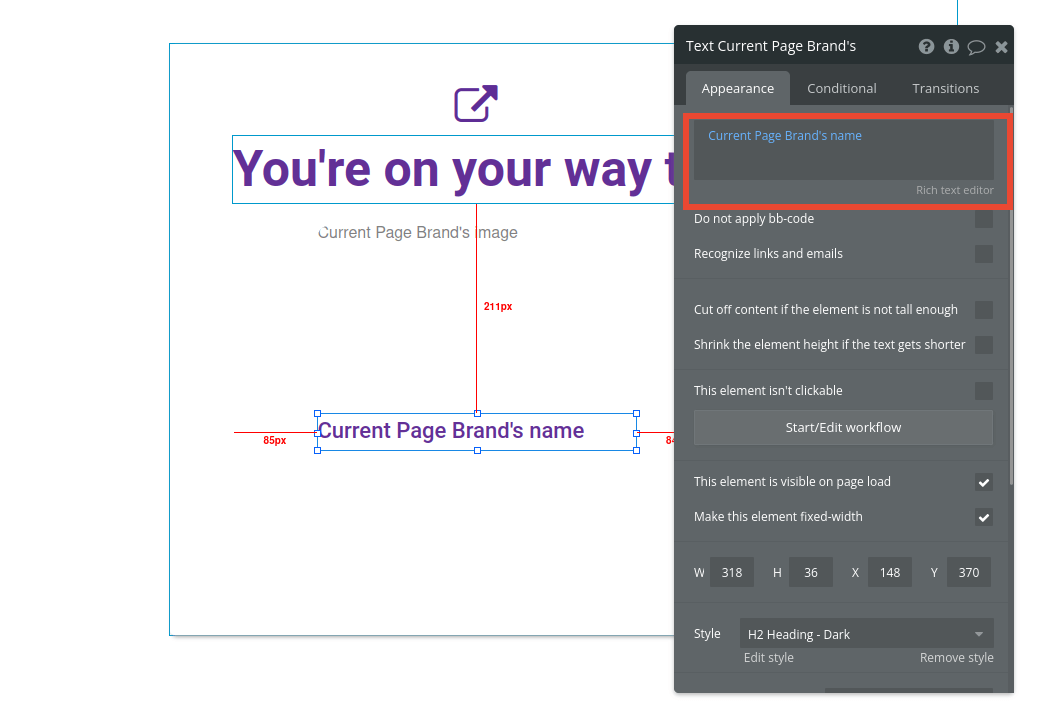
Add a text element, insert dynamic data, and set it to display “Current Page Brand” > “ ’s name.”
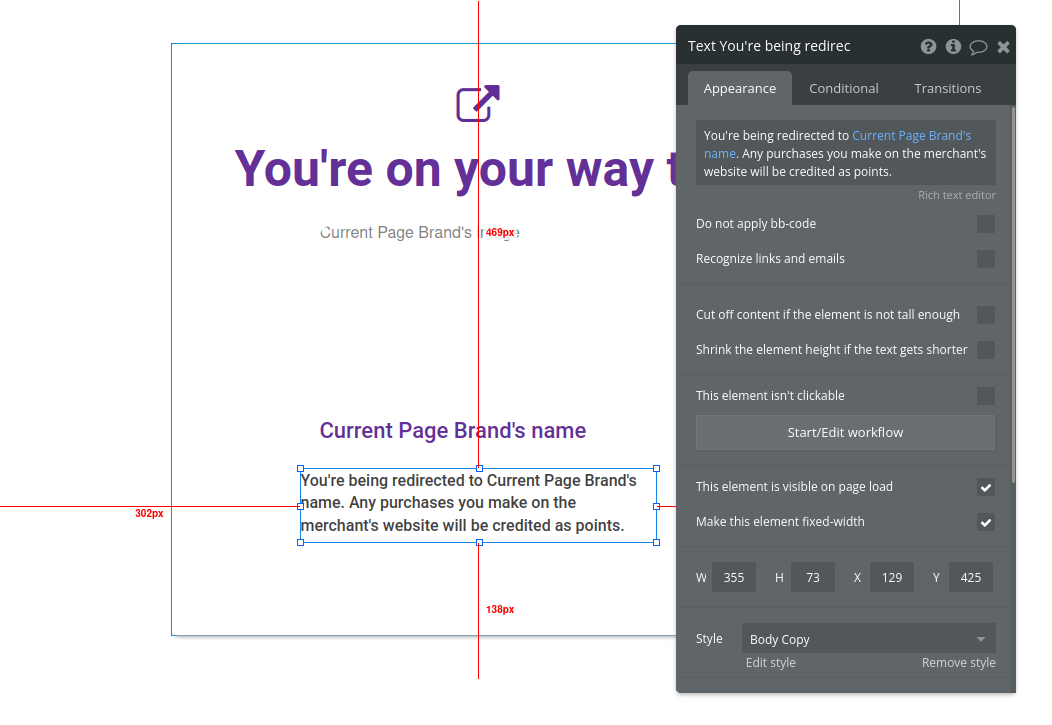
Add another text element. Type enough information to let the user know what will happen.
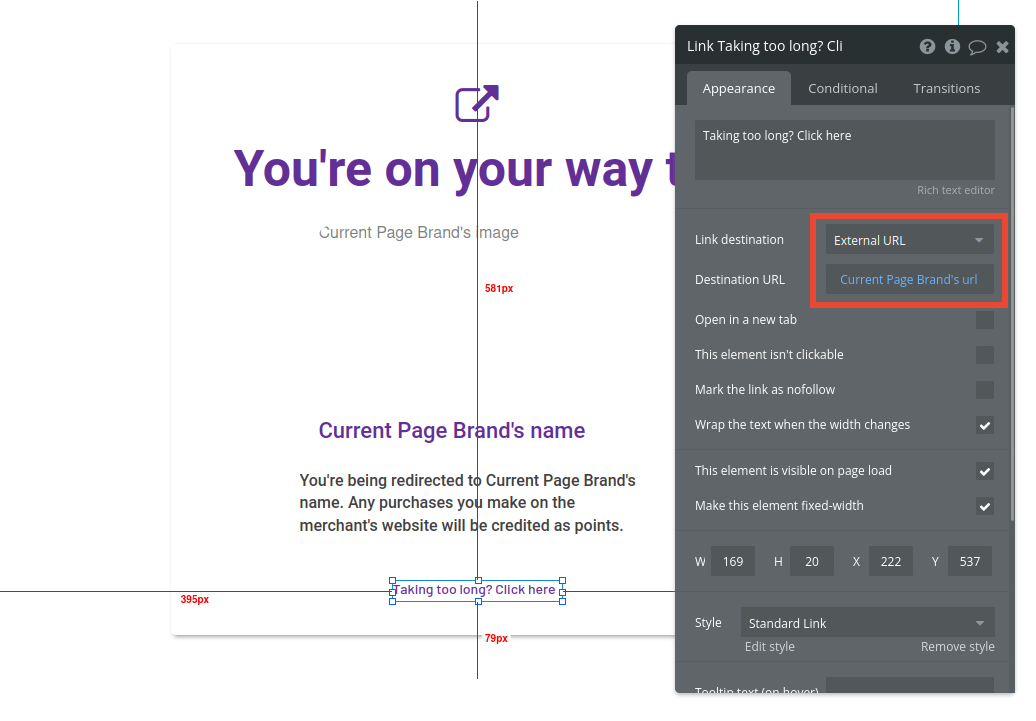
Add a link element to the bottom of the page as a failsafe, so the user can click away to the merchant page manually. Set the link destination to “External URL,” and set the destination URL to “Current Page Brand” > “ ’s url.”
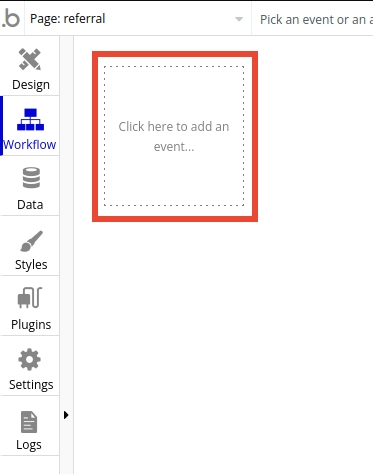
As the last step, we’ll set the workflow to do the actual redirect. Click on Bubble’s workflow tab.
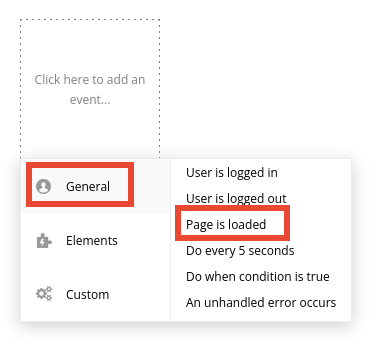
Click on the dotted square to add a new event.
Hover over “General” and click “Page is loaded.”
Click to add a new action. Hover over “Navigation” and click on “Add a pause before next action.” Set the pause length to 5,000 ms (5 seconds).
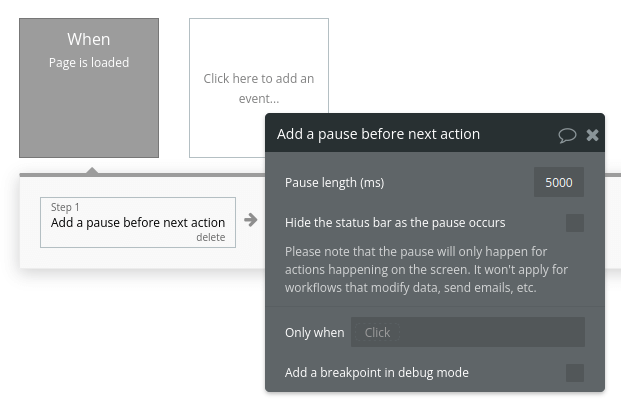
Add another action. Hover over “Navigation,” but this time click on “Open an external website.” Set the destination to “Current Page Brand” > “ ’s url.”

Additional features
Once you’re familiar with creating custom data fields and displaying dynamic content, you can start getting creative with the experiences you build. Additionally, you can:
- Set up an automation to draw transaction information from the merchant’s websites into your platform, converting the amount spent into points
- Build additional pages for special deals or time-sensitive offers
- Integrate APIs for custom tracking for partner brands
- Set up recurring workflows to update point counts for your users
- And much more!
Privacy & Security
Now that you have the basics of your app, don't forget to start setting some privacy rules and conditions to keep your data secure - starting with roles in the 'Privacy' section of your data tab. You can also check if you're unintentionally exposing any data with an API checker.
Launch
Hiring a developer or dev team to build this app would cost thousands, if not tens-of-thousands of dollars. As you launch and grow in users, paid plans allow you to host the app on your own custom domain, and these start as low as $25 per month. Some templates and plugins may cost more, but you can build all the functionality of Rakuten without any additional costs.
Start building
Bubble can help you build a Rakuten clone or any other product you choose! It’s never been easier to build something incredible without having to code.
Ready to join the no-code movement? Register your free Bubble account and get started today. If you’d like additional help when building your product, our thriving community forum is a great place to source actionable advice and resources. Any maker is encouraged to ask questions within the community to help empower their no-code journey.