You’re deep into building out a complex page or feature for your Bubble app and you think to yourself, “If only I could go back to this earlier spot and start over.” If that sounds familiar, you’ll be happy to know that it is possible.
When it comes to building an app, you can never be too careful. That’s why the savepoints function is so valuable for Bubblers. Savepoints let you revert your app back to a previous version during your development process, so you can safeguard your progress, quickly recover from errors, and easily test out different versions of your own app.
What are savepoints?
Savepoints are part of Bubble’s built-in version control system, which is available on the Starter plan ($32/month) or above. As the name suggests, they let you easily save and revert to earlier versions of your app, as long as they’re within your retention window. (That window is 2 days on the Starter plan and 14 days on Growth.)
With version control, you (and anyone else working on the app with you) can organize the various versions of your app across “branches.” And on any branch, you can manually create savepoints whenever you want. For example, maybe you have your app in a really great place, and now you want to experiment by building a new feature in your “Main” development branch. You could start by adding a savepoint to your branch so that if the new feature doesn’t work out the way you thought, it'll be easy to restore your app back to that version that was working well.
Bubble also automatically creates savepoints for you whenever certain changes happen to one of your branches. These usually coincide with important version control processes, like whenever you sync or merge one branch with another. Or when you publish your main branch live for users (aka deploy your app).
Savepoints, alongside other features like timestamp-based version backups and database restoration, give you full control over your app’s development history.
Walk-through: Create and restore a custom savepoint
Here’s an interactive walk-through that shows you how to use savepoints with a hypothetical project management app. Click through each step to learn:
- How to create a savepoint manually to capture the current state of your app
- How to revert to a previous savepoint if you make a mistake or want to go back to a previous version of your app
If you’d like to read through the individual steps, we’ve got you covered there, too.
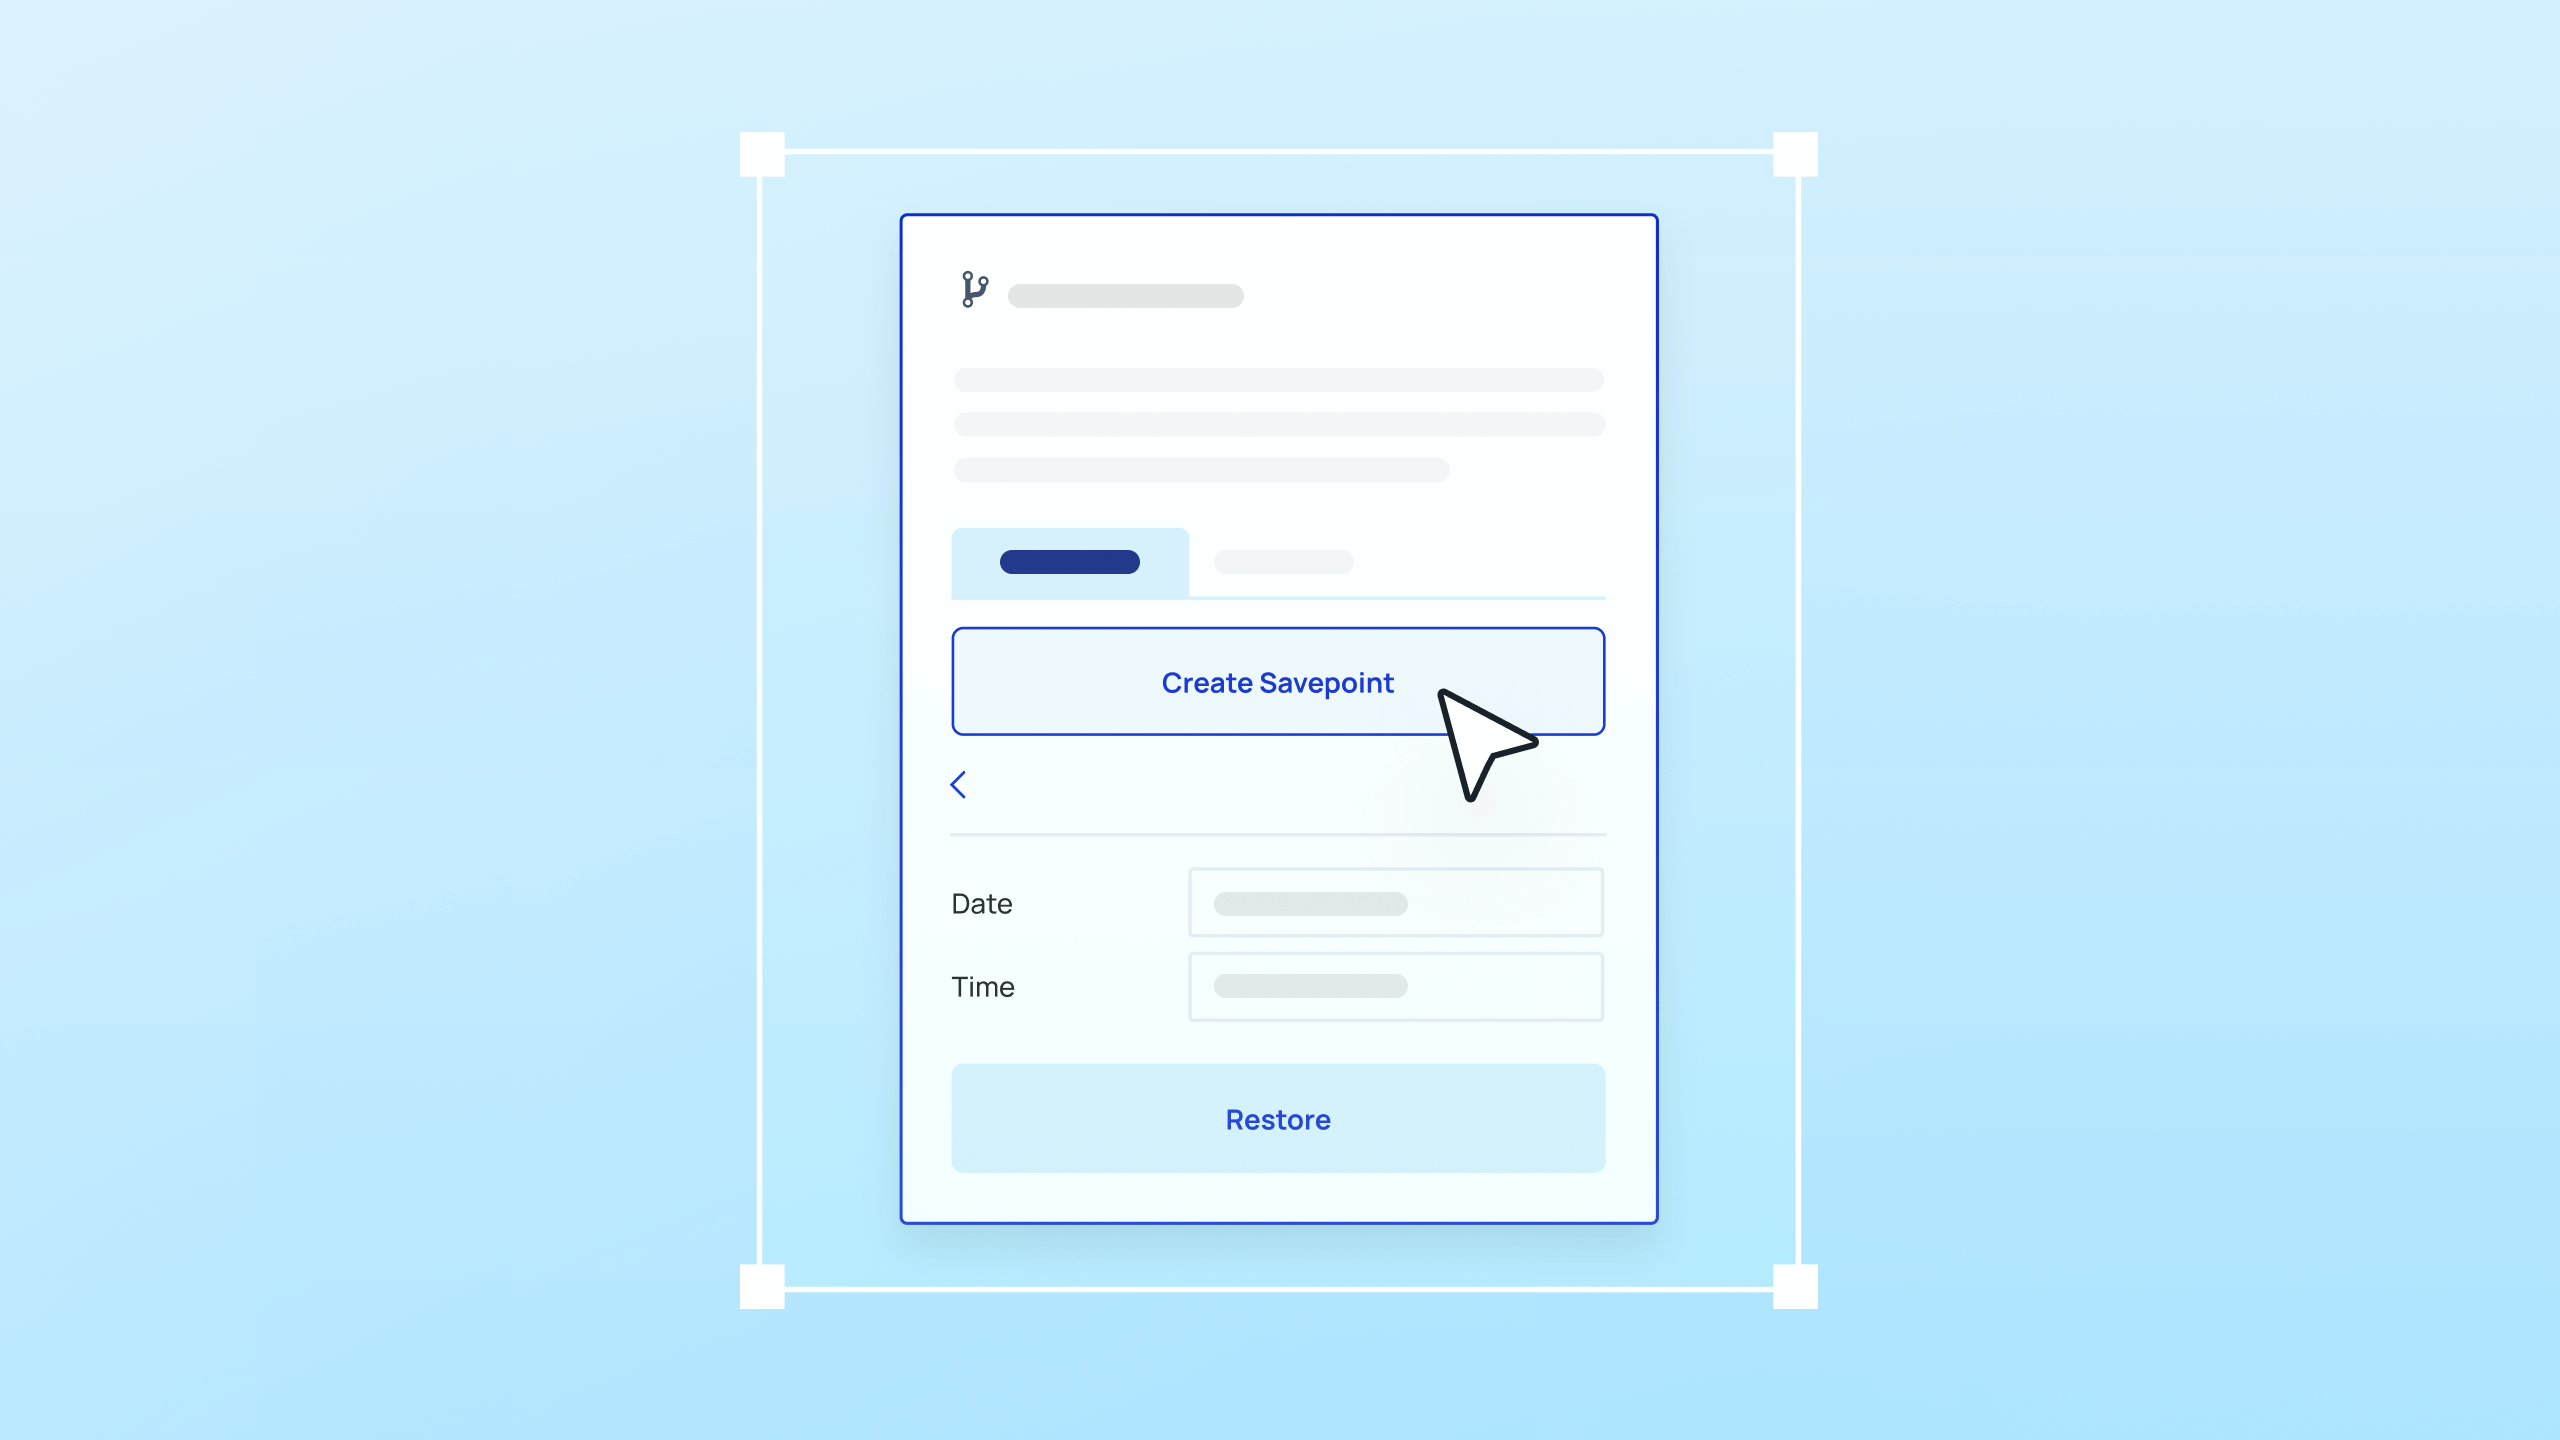
Creating a savepoint:
- First, open the version control panel by clicking on the branch name in the top menu of the editor.
- Use the dropdown arrow and select Create a Savepoint.
- Add a description for your new savepoint, then click on the "create" button.
Reverting to a previous savepoint:
- Click on the History tab in the version control panel.
- Select the savepoint you want to revert to from the list of available savepoints.
- Click Restore to this savepoint to revert to that version of your app.
How to get started
The Starter plan comes with basic version control features, including automatic and custom savepoints on your branches. It also extends your app’s retention window from six hours to two days.
Don’t miss out on the opportunity to protect your work and experiment with different changes to your Bubble app — start a free trial of the Starter plan today! Or compare all plans by visiting our pricing page.