You’ve got a website idea, now you just need to bring it to life.
The good news: Building your own website is a lot easier than you think — even if you don’t have a technical background!
We’ll walk you through the basics of building your own website from scratch — without coding — in ten simple steps.
Websites vs. web apps
Before we get started, we have one important clarification to make: Not everything you think of as a website is actually a website.
Many websites are really web apps.
The difference?
A website is a group of mostly static web pages linked under the same domain. Popular types of websites include blogs, event websites, and sites for local restaurants and small businesses.
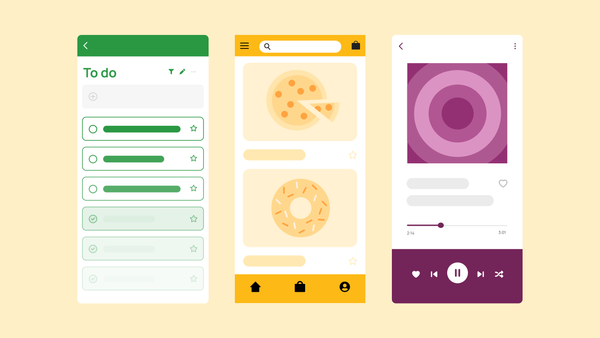
A web app is an interactive piece of software that runs in your browser. Examples include everything from Facebook to Quickbooks to tools like Asana, Gmail, or Etsy. These sites offer interactive functionality and allow you to complete tasks and perform a variety of actions.
Websites are best for sharing information or marketing. Web apps are best if you have a specific goal or task you’re trying to help your target audience complete.
Not sure which you need? Read our websites vs. web apps breakdown to decide first before diving into the building process.
What you need to know before you create a website
Once you’ve determined you want to create a website and not a web app, you should figure out these three things first:
- What type of website you’re building
- Who your intended audience is
- What the goal of your website is
The concept
Figuring out the concept for your site will first help you determine if you need a website or a web app. If you go forward with a website, it can also help you decide what type of website will best suit your needs.
For example, do you want to build:
- A simple landing page?
- A brochure or portfolio site?
- A blog?
- An industry publication?
Like most things, the purpose of your website should inform the design, so start here.
The audience
Narrowing down the audience for your website will also help you make smarter decisions about content, UX, and more.
For example, designing a website for “everyone on the internet” isn’t likely or realistic for most companies, and it won’t help much with your design and decision-making process.
Instead, do preliminary research on your target market. A target market is the type of people, businesses, or customers you want to attract to your site.
Ask yourself:
- What problem are these people trying to solve?
- What information are they looking for?
- How can I help them solve it on or through my website?
Try to get a sense of who your audience is, what they need, and what other existing solutions exist. This will give you a solid foundation for setting your website or company apart from the competition.
The goal
Keeping your goal in mind from the start makes it easier to achieve it.
Websites can have many different goals, from trying to sell a product or service, to sharing your ideas online, to providing information, solving a problem, collecting event signups, or something else entirely.
Just make sure that you know what your goal is before you start building. Doing so will save you tons of time (and resources!) since you’ll be able to align your build with your needs from the start.
How to make a website in 10 simple steps
Many tools focus on either designing websites or building web apps — Bubble lets you do both!
In this article, we’re going to focus on how to do each of these steps with Bubble’s no-code website builder, but you can use these basic steps with any website builder.
Phase I: Technical preparation
Before you start building, you need to lay the foundation and make some decisions about your site’s structure and design.
Step 1: Choose your website approach
While you can build your website from scratch with traditional code, there are plenty of low-code or no-code website builders available today that make the process a lot faster and easier.
For example, Bubble lets you build websites or web apps without coding using a drag-and-drop visual editor. Other website builders include tools like Wix, Squarespace, and Wordpress.
Once you’ve chosen your approach, you then need to choose a domain name and a hosting provider.
Your domain name will be the URL of your website, like “bubble.io” or “bubble.com.” You can buy a domain name online through a variety of companies, like Domain.com or GoDaddy. Some website builders allow you to purchase a custom domain name directly through them as well.
Next, you’ll need to decide where your website will be hosted. If you’re using a website builder like Bubble, your website will be hosted on Bubble. If you’re slow-coding your website, you’ll need to find an independent hosting option, such as Github Pages or Netlify.
Step 2: Decide what kind of database you need.
Are you familiar with Excel tables? If yes, then you’ve already interacted with a database before.
A database is simply a bank of stored data. If your website needs to store data about visitors (like their email addresses), you’ll want to use a website builder that gives you a built-in database. You can also try connecting your site to a database service. If you are simply creating static landing pages for your business or portfolio, you may not need a database.
On Bubble, all sites come with a built-in database to create your own custom data and workflows. Once you’ve determined the concept and goal of your website (see above), you’ll be able to determine what types of user data you need.
Sketching out the types of data you need will help you in the building phase. Even before that, it can help you make sure you’ve chosen the right website builder to support your goals.
Step 3: Design your content architecture
Next, you’ll want to start planning the user interface (UI) and user experience (UX) of your website.
The UI and UX of your site determines what kind of experience your visitors will have. It should be shaped by the goals, purposes, and audience of your site, as determined earlier.
That is, is your site more about consuming content (like a magazine or Buzzfeed, for example)? Is it a shopping experience? Is it for marketing or finding information? The purposes and goals of your site will shape your UX and your content planning.
For example, if you are creating an online store, you may want the UI/UX to allow the user to do the following:
- Select a product
- Add it to cart
- Enter their credit card
- Check out and purchase products
Most static websites won’t offer much functionality, but good UI is still necessary to make your site look appealing. Good UX will help users navigate and engage with your site more easily.
At this step, you’ll also want to plan the web content needed for your site. This both shapes and is shaped by your UI and UX decisions. You want to decide things like:
- What site pages do I need to accomplish my goals and meet my audience’s needs?
- What do I want people to see when they first visit my site?
- What do I want people to click on when they visit my site?
- What else do I want people to do when they visit my site?
- What kinds of information does my site need to have?
Step 4: Execute content creation and design
With pen and paper or a software you’re comfortable with, you can now start sketching the outline of your site and what you want the user to do when they visit.
This includes mapping out:
- What pages you’ll have
- What those pages will look like
- Key site templates and page components
- Basic copy for your webpages
- Core customer journeys on your website
For example, you might decide that, for launch, you need the following webpages on your site:
- Homepage
- About
- Contact
- Services
- FAQs
For each of these pages, you’ll need to create the web page design and the copy. The design is obviously what the page looks like. The copy is the words and text that goes on that page.
Keep in mind that you don’t need to do all of this from scratch for each page!
Designing key pages and templates first can then give you a foundation for creating other pages for your site. For example, you might create a basic page template that lays out the UI and design, and then use that template for the “About Us,” “Services,” and “FAQs” pages.
No-code website builders like Bubble make this stage even easier by including pre-built templates and component libraries. You can work from these and customize them to meet your needs. This way, you don’t have to reinvent the wheel. Instead, you can start from a solid foundation of good UI, UX, and design principles to create pages that fit your brand and goals.
✅ A plan for how you’re going to build your website
✅ A domain name and hosting provider
✅ A basic sketch of your database and data types (if needed)
✅ A list of pages needed for your site
✅ A sketch of the site design, and UI and UX for each of the launch pages
✅ Copy and images for each of the launch pages
Phase II: Build your website
Now it’s time to put everything together!
Bubble’s AI page designer can help you move through these steps even faster. Tell it your idea, and it'll help you navigate the building blocks you need, learn our editor faster, and design great webpages your audience will love
Step 5: Build your website pages
If you’re done the technical preparation well, you should be well set-up for the actual build.
At this stage, you want to take everything you’ve sketched out — your webpages, the copy, the design, and so on — and build them out in your website builder.
On Bubble, this is super easy because you use the same editor to sketch out your design and build the backend databases that power your website. So instead of two steps, it’s really just one.
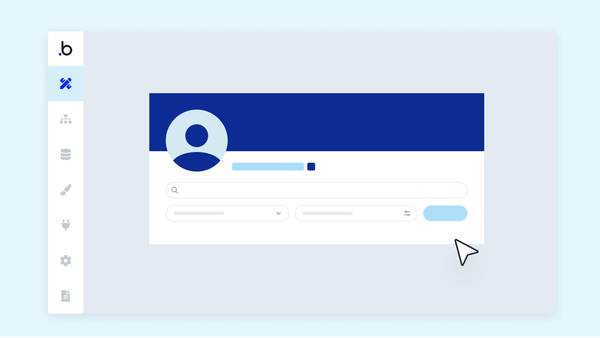
Bubble also uses a no-code visual editor which makes it easy to drag, drop, and design your pages entirely visually — you won’t need to code. Some common tips for web development on Bubble:
- Use styles to reduce editing time. This also comes in handy when updating fonts and primary colors on your site.
- Use reusable elements as much as possible.
- Group your workflows based on pages or site functionality. This will make it easier to locate your workflow actions. This is significant when debugging or reducing workflows to custom events.
- Use custom events to reduce the number of workflows by reusing common actions.
- Implement backend workflows to improve UX by taking actions away from the user’s browser and instead running them under the hood (server). An example is sending a series of emails when your user fills out the “Contact Us” form.
Overall, you want to follow the best practices of the platform you’re using. If you’re not sure about how to build something, ask the community!
Step 6: Preview and test your website
Once your site is built, it’s time to test it before everything goes live. Use a staging environment at this point to help you make sure everything is working as intended before you go live.
If your site has functionality or workflows, you’ll also want to do quality assurance testing to make sure it functions the way you expect it to. If QA testing is done correctly, you can spend less time in development and put more focus toward other things, like marketing or sales.
It’s also a good idea to have your site tested by a closed group of users via beta testing, user testing, and/or usability testing.
User testers help you unravel bugs you didn’t find while developing your website. They can provide feedback on your UI and UX as well. For example, you may realize that most users prefer to use your site in a web browser as opposed to downloading the native version of your app. This can help you allocate resources more effectively going forward and get valuable feedback for future iterations.
Step 7: Go live
Having gone through all the above steps, you’re ready to release your site to a broader audience. Your first website visitors are critical, and getting feedback from them is a great way to source feedback for the second round of iterations to your website.
Whether you continue to run dedicated user testing or not, it’s important to track what’s happening on your website. Basic websites should track their views/visits and other website-relevant data through something like Google Analytics.
You can also use built-in feedback tools like Hotjar or Mixpanel to get more data on user behavior for future iterations.
✅ Key webpages live and tested
✅ At least one round of QA testing and some type of user testing completed
✅ All critical backend workflows in place for your site’s main function
Phase III: Ongoing optimization and promotion
Building a website isn’t a one-and-done project. Here’s what to consider and plan for once your site is live to keep things growing and improving.
Step 8: Consider how to optimize for search engines (SEO)
SEO (Search Engine Optimization) is a discipline on its own. Thankfully, you don’t need to become an SEO expert before you can start building great websites!
However, it’s a good idea to understand the basics of SEO if you want your website to show up in search engine results — for example, when someone searches for relevant keywords to your business.
Many website builders — including Bubble’s — will help you set up basic SEO best practices, such as page titles, meta descriptions, a solid site map, and more to get you started on the right foot. Doing so allows you to get more organic traffic to your website and reach more of your target audience.
Step 9: Decide how you’ll market your website
“Build it and they will come” is poor advice in today’s world.
You need to invest in marketing your website to make sure people know about it and get value from it. Luckily, you don’t need to be a VP of Marketing to get started with a few basics, like:
- Adding your new website to business cards and email signatures.
- Posting about your website on your LinkedIn or company social media pages
- Sharing about your new website or tool in communities or networks relevant to your industry or solution
When you’re ready to really get the word out, you can work with dedicated marketing specialists to set up some integrated marketing tools and ramp up optimization and promotion.
Step 10: Plan your content maintenance
Finally, you should think about maintenance. For content-heavy websites, that includes both:
- Existing content (how will you keep content up-to-date?)
- New content (what new content will need to be created over time?)
To answer these questions, you’ll need to go all the way back to step one, and consider the purpose and goals of your site.
If you’re creating a website for a local restaurant or small business, you may not need much new content over time. However, you’ll want to schedule regular intervals to update existing content and do basic site maintenance.
However, if you’re creating a blog or a magazine website, you’ll want to be updating and adding new content regularly. Mapping out a plan for content maintenance and updates will make it much easier to execute.
✅ A growing audience
✅ A plan for marketing and optimization
✅ A plan for keeping your website updated
Create a website quickly with Bubble
Voila! With no-code tools at your fingertips, building a website is much easier and more enjoyable, even if you don’t have a technical background.
Bubble’s full-stack development platform removes a lot of decisions right off the bat, such as:
- What type of builder is right for your goals (Bubble lets you build all kinds of websites or web apps)
- Where to host your website (on Bubble!)
- How to create a database for your site (a built-in feature on Bubble)
- How to build the best UI and UX for your site (start from Bubble’s pre-built site templates or use our AI page designer, then customize as needed)
- How to protect your end-users’ privacy
Plus, using Bubble’s visual editor speeds things up significantly, allowing you to work visually (drag-and-drop) rather than in code. Use site templates, pre-built components, and more so you don’t have to start from scratch — or try our AI-powered page designer to get started.
If you get stuck at any point, just tap our knowledgeable community via the Bubble Forum. You can also check out our build guides to get custom step-by-step directions for building all kinds of apps.
Even better: You can build on Bubble for free until you launch — giving you all the time you need to get things right before you go live. But take our word for it: With Bubble’s simple editor and this guide in hand, you’ll need less time than you think.