There’s plenty of great calendar applications in existence to suit the broad needs of day-to-day users. But what if you who want to build your own calendar application? Fortunately, it’s easier than ever to start developing your own custom product with no-code tools like Bubble. Makers from any background can quickly build powerful software to facilitate their own specific needs.
Bubble’s unique platform has streamlined the process of developing software without having to write a single line of code. Our customers are using Bubble to build marketplaces, directories, and even social networks.
Throughout this guide, we’ll cover how to build your own calendar application - like Google Calendar. Our step-by-step instructions will make it easy for you to follow along and build your own unique app from scratch.
Steps to build a GCal clone without code include:
Getting Started
Before you start, you’ll need to first register your free Bubble account. Then you can follow along as we build our product together.
Register your account on Bubble
We also recommend completing our introductory lessons, which will guide you through the step-by-step process of the most common Bubble features. This will help you get a running start when building your Gcal clone.
Configuring your database
When building our calendar app, the first thing we’ll need to do is configure our database to support the content that will power our product.
Bubble’s pre-built database makes it easy to create different data types with unique fields. For our Gcal MVP, we’ll need to create the following data types & fields:
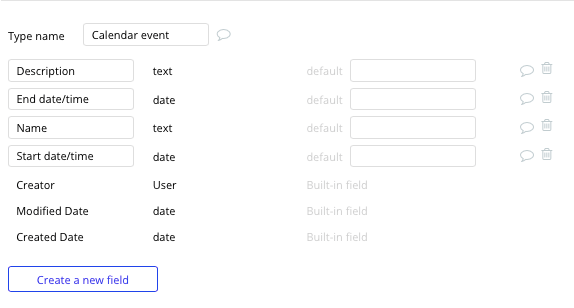
Data type: Calendar event
Fields:
- Name
- Description
- Start date/time
- End date/time
Building a calendar
The first core feature we’ll build within our application, is of course, the calendar itself. Using the Bubble editor, you can have a calendar up and running in a matter of seconds.
One of the key features within Bubble is the library of plugins that can seamlessly integrate with your application. Plugins are a powerful way to streamline the build time for common features, allowing you to work on the ones that are unique to your product.
For our MVP, we’ll be using our free calendar plugin to get started.
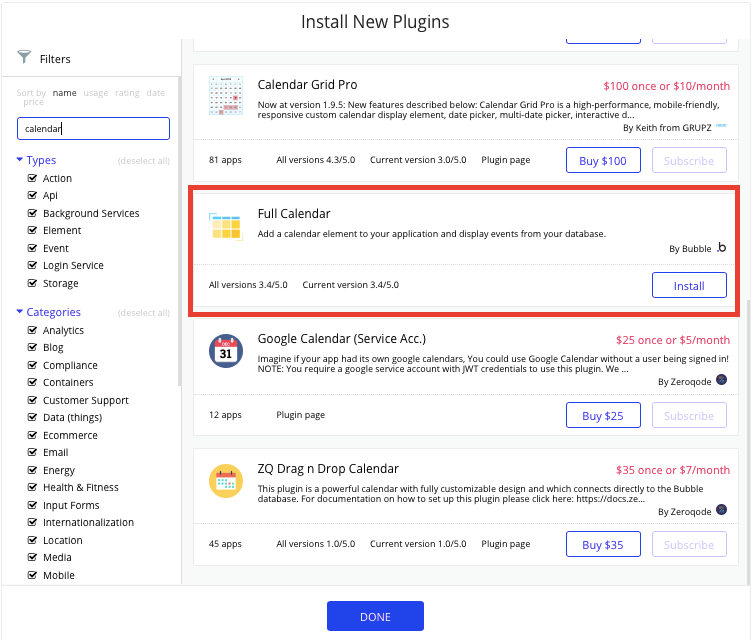
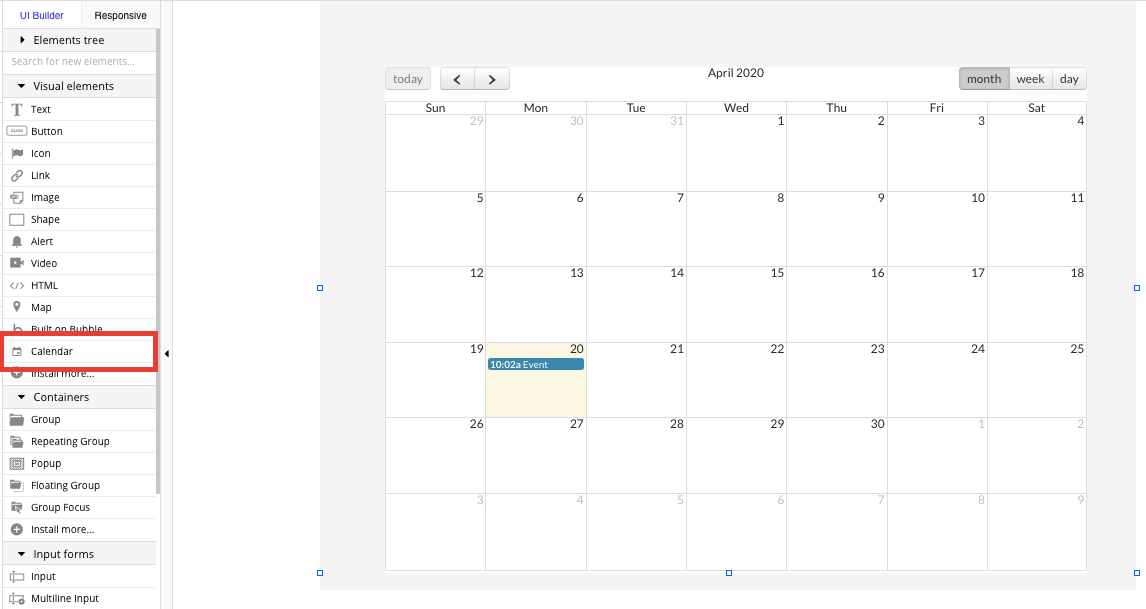
Once you’ve installed the plugin, you can now add a calendar to any page by using the calendar element.
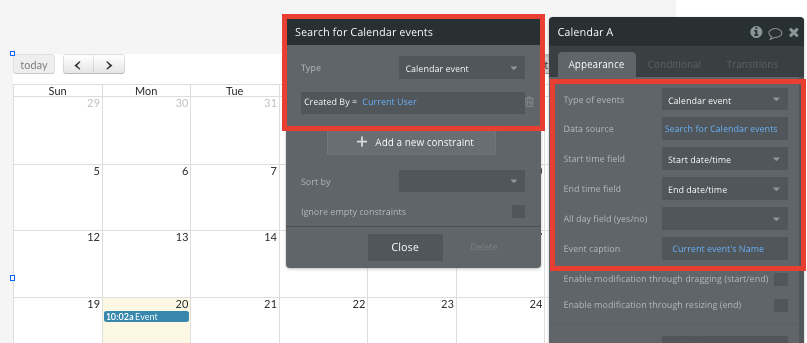
Now that you’ve added the calendar element to your page, you’ll need to configure its data source to match your database. In this case, we’ll want the calendar to display the calendar events data type you’ve created. We’ll also add an additional constraint to display only the events created by the current user.
We’ll also need to configure the start time and end time fields from the relevant data properties we created for each event.
Next, we’ll match the event caption field to our event name data field for every event.
Finally, we’ll configure our date input elements to split between date & time. This will be necessary for attaching specific times to each event we create.

Creating new events
Once you’ve configured the UI of your calendar, it’s time to start building the core workflows you’d expect within any calendar app.
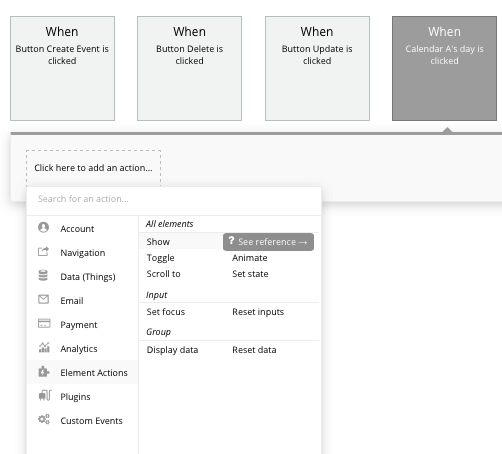
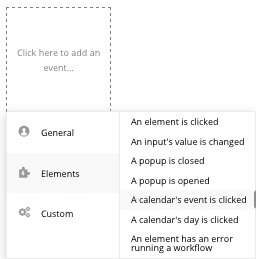
The first workflow we’ll build is a function to create new events. Within our workflow editor, we’ll create a trigger when a user clicks on a calendars day.
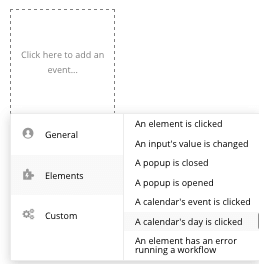
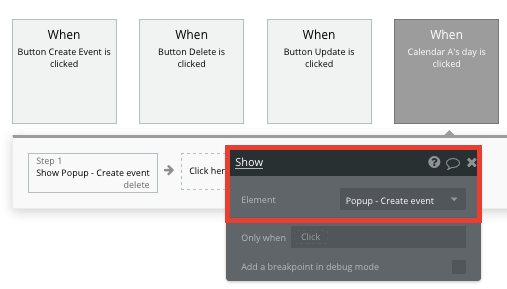
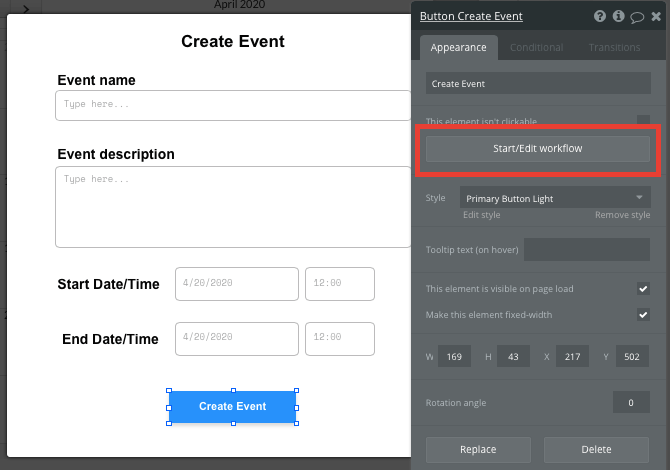
The next step within our workflow will be to display a popup element. Popups are a useful way to display information or create events without directing the user away from the current page.
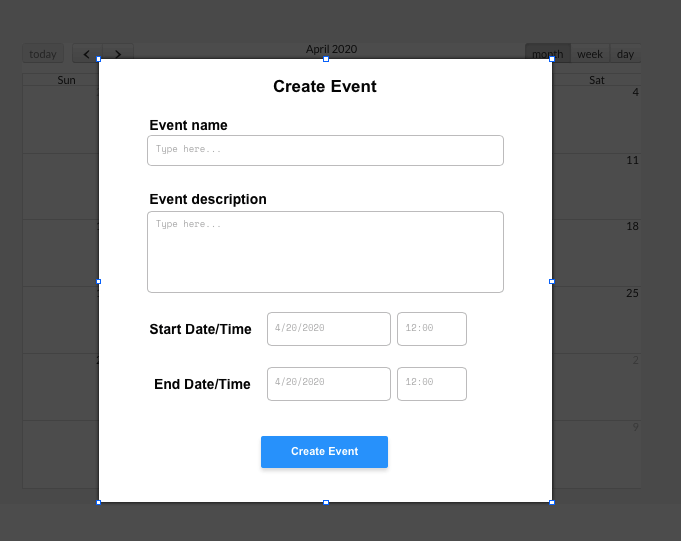
Within our popup element, we’ll use a combination of a text input, multiline input, and date/time elements. This will enable a user to add the specific details to their new event.
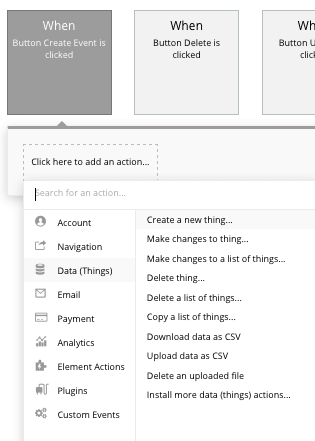
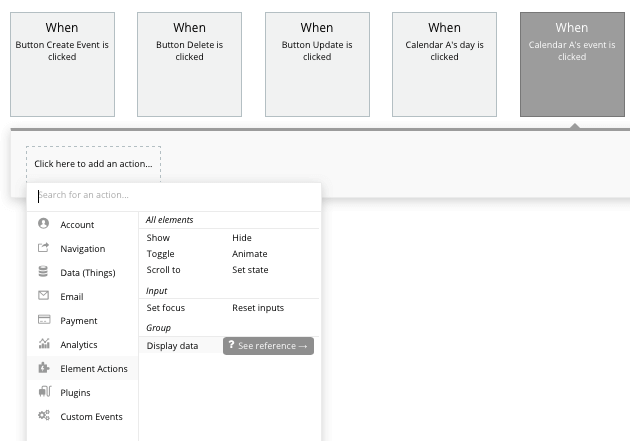
Next, we’ll create a new workflow once the create button is clicked.
Within this workflow, we’ll want to create a new thing. The thing we’ll want to create, is an event.
Next, you’ll match the on-page elements to the data fields we’ve created for our calendar events.
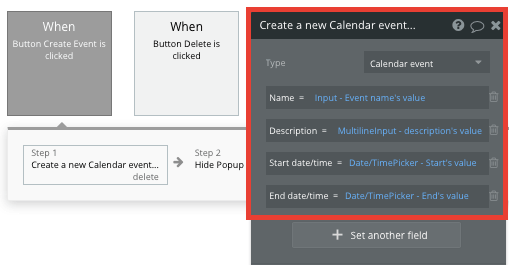
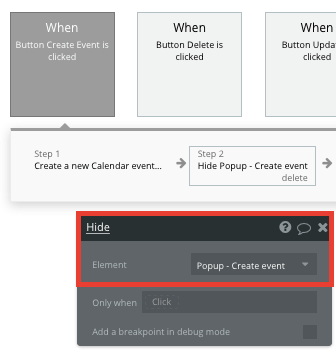
Finally, we’ll add an additional step to our workflow, hiding the popup element once a new event has been created.
Viewing event details and making edits
Our calendar app wouldn’t be complete if you couldn’t reschedule those coffee meetings you always seem to miss.
Using another popup element, we’ll build a feature that allows users to view the details of an event, as well as make changes to any of its data fields.
Start by creating a workflow that triggers when a user clicks on a calendars existing event.
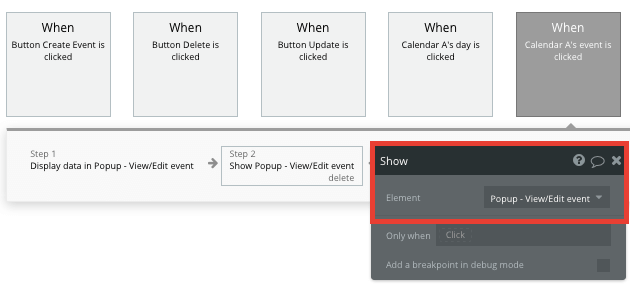
Next, we’ll want to display a separate popup where users can review the existing content from a specific event. Before showing this popup, we’ll need to first send through the data for this chosen event.
The content we’ll want to display is the calendars current event.

Once this content has been sent to our new view/edit popup, we’ll need to once again create an additional step in our workflow to show this popup element.
The design of this popup can be replicated from our first version, only this time, we’ll need to configure the data source for this element.
As we want this popup to display existing data, we’ll update the data type to be an event, then add the data source to be our calendars current event.
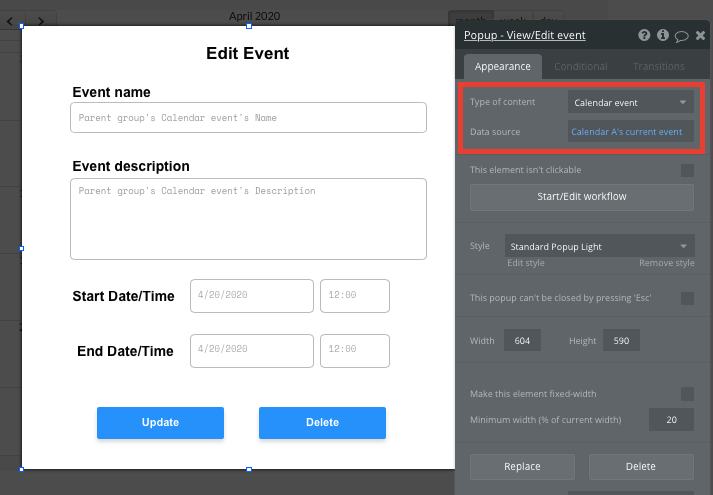
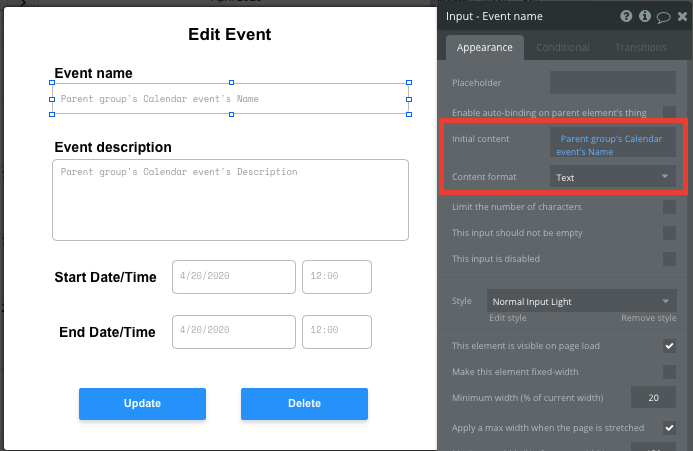
We’ll also need the event input fields to display the existing content that was added when the event was created.
We can easily add this by configuring the initial content field for each element. The content we’ll want to display is also that from the calendars current event.
Once a user makes a change within one of the input fields, we’ll need to then create an additional workflow that updates this calendar event when the update button is clicked.
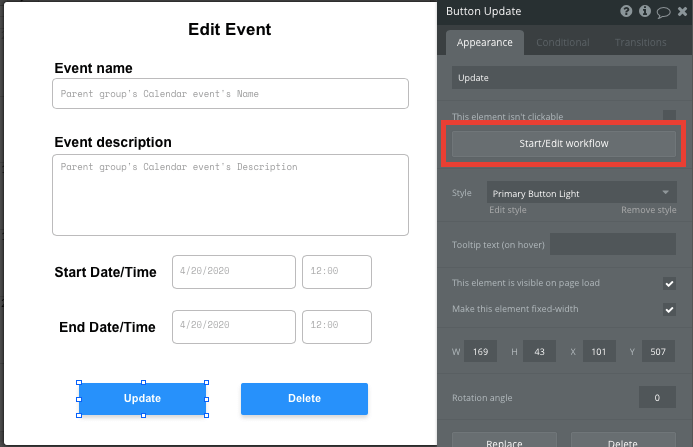
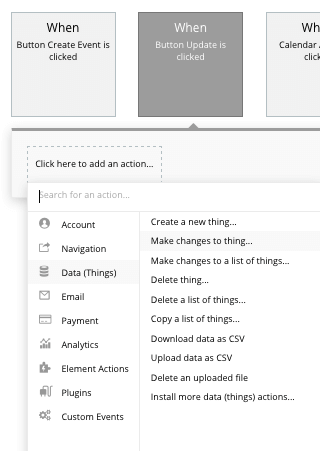
This workflow will be similar to creating our calendar event, only this time, we’ll want to make changes to a thing instead of creating a thing.
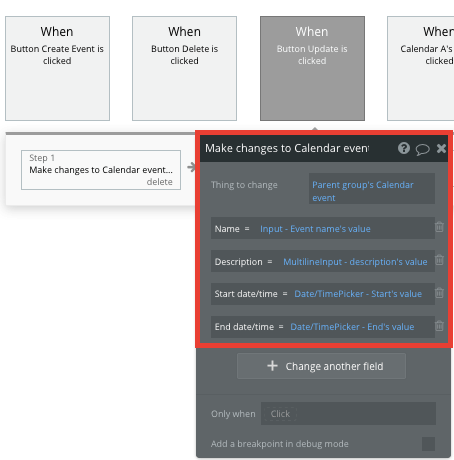
Once again, you’ll map each of the on-page elements with relevant data fields within your database.
Finally, you’ll add the additional step to close this popup element once the changes have been made to this event.
Deleting an event
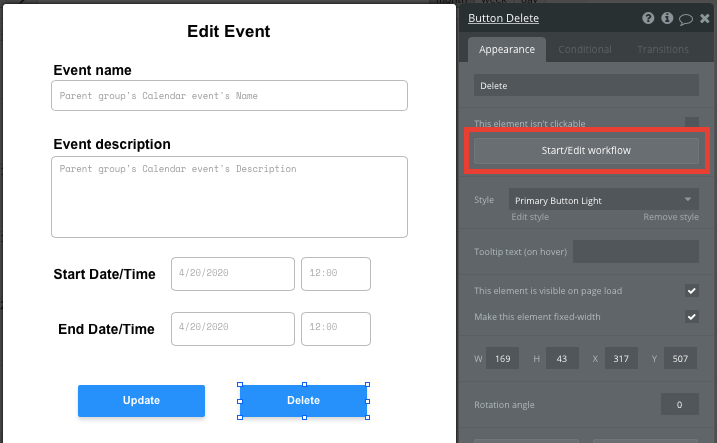
The last feature we’ll add is a function to delete events, because sometimes things don’t always go as planned.
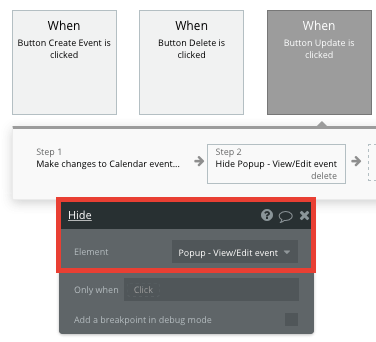
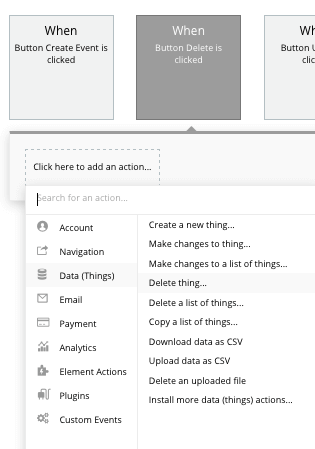
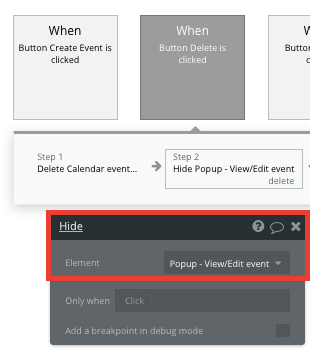
Building off the same view/edit popup, we’ll create a workflow when the delete button is clicked.
Next, we’ll select to delete a thing.
The thing we’ll want to delete is the calendars current event.
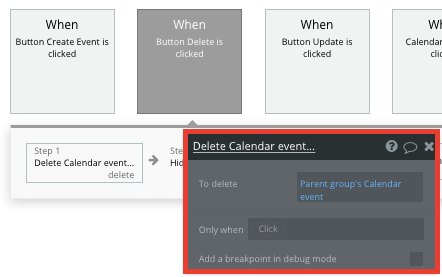
Don’t forget to also add an additional step to then hide this popup element once the event has been deleted.
Additional features
Privacy & Security: Now that you have the basics of your app, don't forget to start setting some privacy rules and conditionals to keep your data secure - starting with roles in the 'Privacy' section of your Data tab. You can also check if you're unintentionally exposing any data with an API checker.
Once you’re familiar with building custom data fields and displaying dynamic content, you can start getting creative with the features you add to your calendar app. For some additional features, you can:
- Add additional content to each calendar event - maps, links, photos
- Enable users to invite others to join their events
- Build integrations with third-party applications and workflows through the Bubble API
Launch
Traditionally, it would cost thousands, if not more, to hire a development team to build a Google Calendar clone. In this case, Bubble is free to build your product and costs only $25 per month once you’re ready to launch on a custom domain. Some templates and plugins may cost more, but you can build all the functionality of an event platform without any additional costs.
Templates
If you don’t want to build your Google Calendar clone from scratch, you can purchase one of the templates made by our community members. Some similar templates include:
- Calendar Application by Dot Studios
- Drag & Drop Calendar by Mind For Apps
- Task Planner + Calendar by Mind For Apps
Start Building
Bubble can help you build a Google Calendar clone or any other product you choose! It’s never been easier to build something incredible without having to code.
Ready to join the no-code movement? Register your free account here and get started today.
If you’d like additional help when building your product, our thriving community forum is a great place to source actionable advice and resources. It’s not only a great place to search through our existing Bubble examples, but any maker is encouraged to ask questions to help them on their journey.
Build for as long as you want on the Free plan. Only upgrade when you're ready to launch.
Join Bubble