If you’re looking to find the perfect restaurant or bar, platforms like Yelp, Zagat, or Zomato (Urbanspoon) can help you choose from thousands of food options.
If you were interested in building your own version of a restaurant review site, however, Bubble is the only platform you’ll need.
No-code tools like Bubble are revolutionizing how everyday makers can build software. Bubble’s powerful platform has made it easier than ever to start building software without having to write a single line of code.
Our visual programming tool makes it possible to quickly design and build working software that goes beyond static experiences. Makers are using Bubble to build marketplaces, directories, and even social networks.
This post will cover the step-by-step process of building a no-code restaurant review site using Bubble. Whether you’re looking to replicate the entire product, or you’re just interested in utilizing some of the core features of the platform, this guide will share how to build the necessary workflows to get your product up and running.
The steps to building a Yelp-style with no code include:
Get Started
To get started, you’ll need to register your free Bubble account.
Register your account on Bubble
New to Bubble? Follow along on our Crash Course introductory videos to get familiar with the basics of Bubble.
We also recommend completing our introductory lessons, which will guide you through the step-by-step process of the most common Bubble features. This will help you get a running start when building your no-code restaurant review app.
We also recommend understanding how to create and edit user accounts. We’ve previously covered this in more detail in our other How To Build Guides.
When kickstarting your project, you can choose to begin by wireframing your product design, or building the necessary fields within your database.
In this guide, we’ll start by using Bubble’s visual design tool to shape the user-interface of our product. If you’re replicating a version of Yelp or Zomato, some of the core pages you’ll want to include are:
- Upload page - a backend portal where you can upload new restaurants
- Home page - displaying a list of restaurants and a search bar
- Search results page - displaying a list of restaurants and categories once a user has searched a location
- Individual restaurant page - a page showcasing the full information for each restaurant
- Review submission page - a page where users can submit a restaurant review
A major feature within Bubble is the ability to send data between pages. This allows you to create one generic version of a page, then dynamically display the relevant content from your database when it’s required.
In the case of your site, you’ll only need to create one page to showcase your individual restaurants. We can then create the necessary workflows to display only the relevant restaurant on each page when it’s needed (we’ll cover this in more detail soon).
Configuring your app
Once you’ve mapped out the display of your product, you can focus on creating the necessary data fields to power your application. We’ll rely on these data types, fields to connect the workflows behind your product.
Bubble’s pre-built database makes it easy to create different data types with unique fields. When building a Yelp-like restaurant app as an MVP, we’ll need to create the following data types & fields:
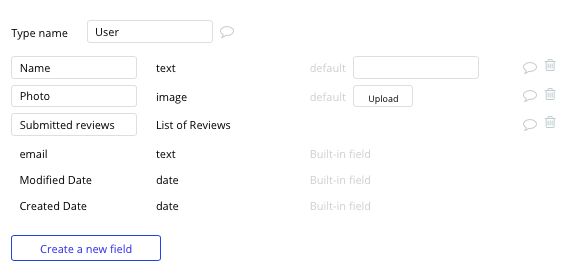
Data type: User
Fields:
- Name
- Photo
- Submitted reviews - List of reviews. Note: Creating a field as a list based on a separate data type allows you to seamlessly integrate all of its relevant data fields. This saves you from having to recreate all of the additional data fields
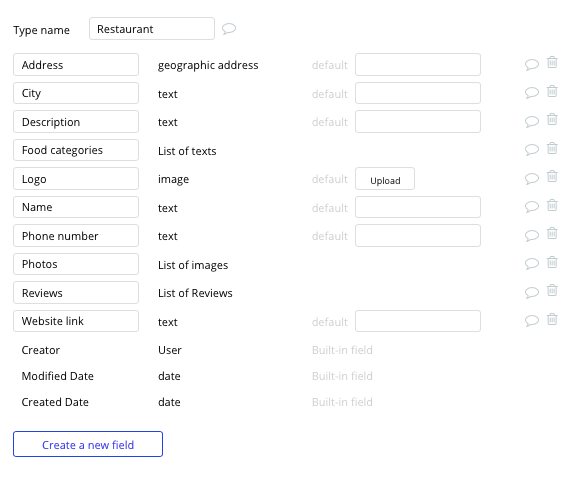
Data type: Restaurant
Fields:
- Name
- Description
- City
- Logo
- Website link
- Phone number
- Foot categories - List
- Address
- Featured photos - List
- Reviews - List of reviews
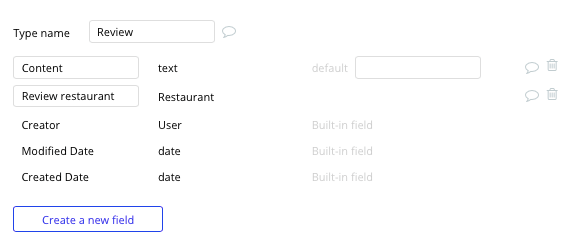
Data type: Review
Fields:
- Content
- Restaurant - Restaurant
Adding a restaurant to the platform
Now that you’ve configured your database, we can start building the workflows that will power your application. The first feature we’ll create isn’t something that users will directly engage with, but is instead a back-end tool for adding new restaurants to the platform.
By building a dedicated portal to upload listings to your database, you can streamline the process of adding new restaurants to your directory.
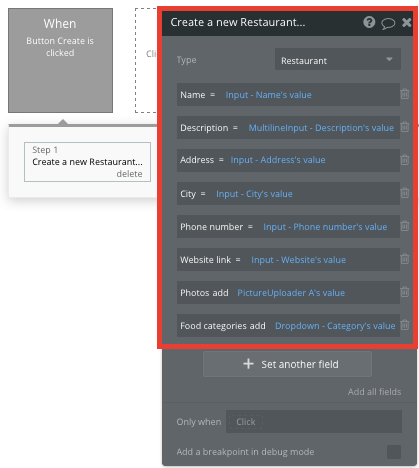
On your upload page, you can use a combination of input fields to map the required data for each new restaurant. Once the create button is clicked, this will trigger a workflow that will add this collective data as a new restaurant within your database.
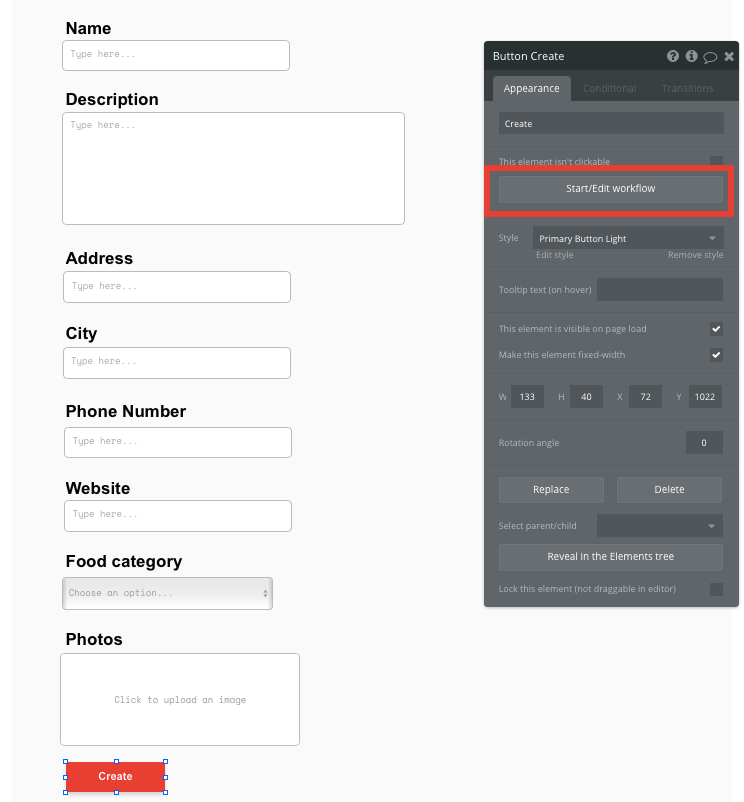
When building your workflow, we’ll need to create a new thing, configuring the data type to a restaurant.
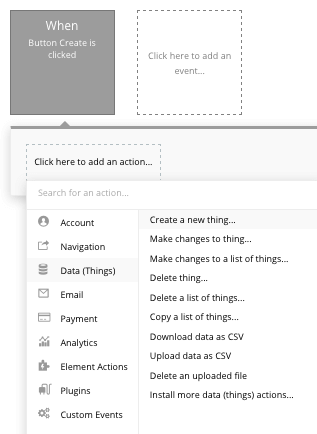
You’ll then match the relevant elements on your page to the data fields under the restaurant type in your database.
Displaying dynamic content
Once you’ve uploaded a catalog of restaurants, it’s time to start displaying these on a public-facing page that users can access.
Using Bubble’s repeating group element, you can display a list of dynamic data from your database - such as your existing restaurants.
Note: Repeating groups are structured as a vertical format by default, but it’s also possible to reconfigure the element to display horizontally.
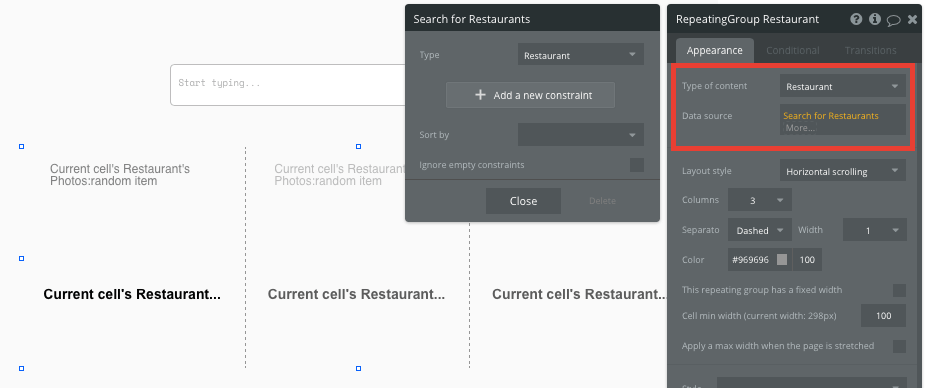
Before you begin adding content into your repeating group, you’ll need to link the element to a data type within your database. This will help it identify the specific content it will display.
The type of content we’ll need to display, is of course, the restaurants in your database.
Next, we’ll need to identify a data source so the Bubble editor knows which specific restaurants to display. For our MVP, we’ll only display a list of all the current restaurants, but you can easily add constraints to this data source to filter restaurants by their city or food categories.
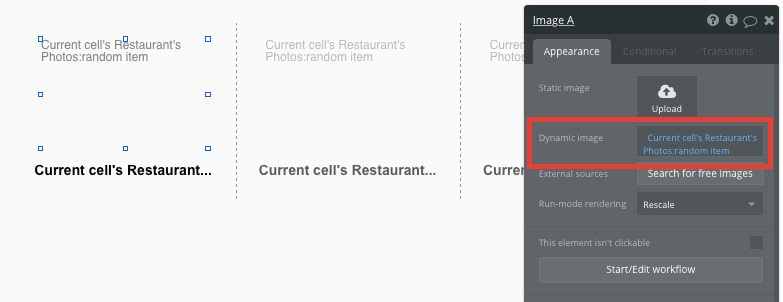
Once you’ve properly configured the repeating group, you’ll then need to start adding any dynamic content elements you’d like to display inside each cell. Within our MVP, this will include a restaurant's title and featured photo.
As a restaurant can have multiple featured photos, we’ll configure the dynamic content to display one of these photos at random.
Sending data to dynamic pages
With our home page only displaying a preview card for each restaurant, users will need to click-through to a dedicated showcase page for each restaurant to view its full content and reviews. This additional information will be hosted on the restaurant page of your application.
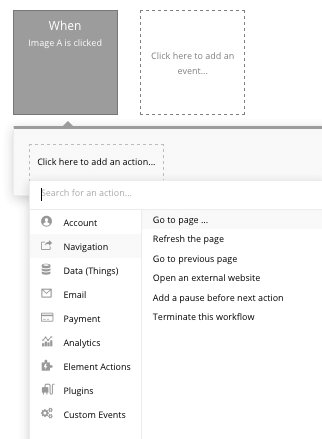
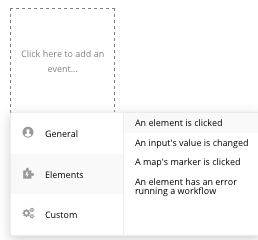
From our repeating group, it’s possible to create events based on actions taken within each individual row. This feature will become useful when building navigational features across your platform.
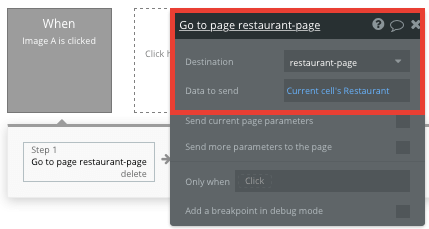
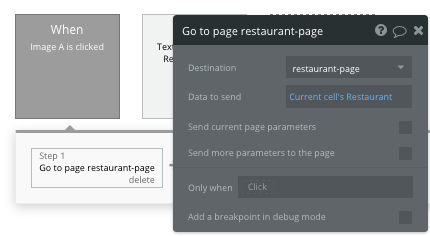
To direct a user from the homepage to a specific restaurant showcase page, you’ll need to build a navigational workflow that’s triggered when a restaurants featured image is clicked.
You’ll then need to send additional data to this page, allowing the Bubble editor to identify which specific restaurant to display. The data you’ll choose to display will be pulled from the current cell’s restaurant.
Display dynamic content on the preview page
Once data has been sent to the restaurant page, you can easily pull the relevant information and display this content for each restaurant.
You’ll first need to ensure that the destination page type matches the data property that you’re sending within the workflow. In this case, the restaurant page will be configured to a restaurant property.
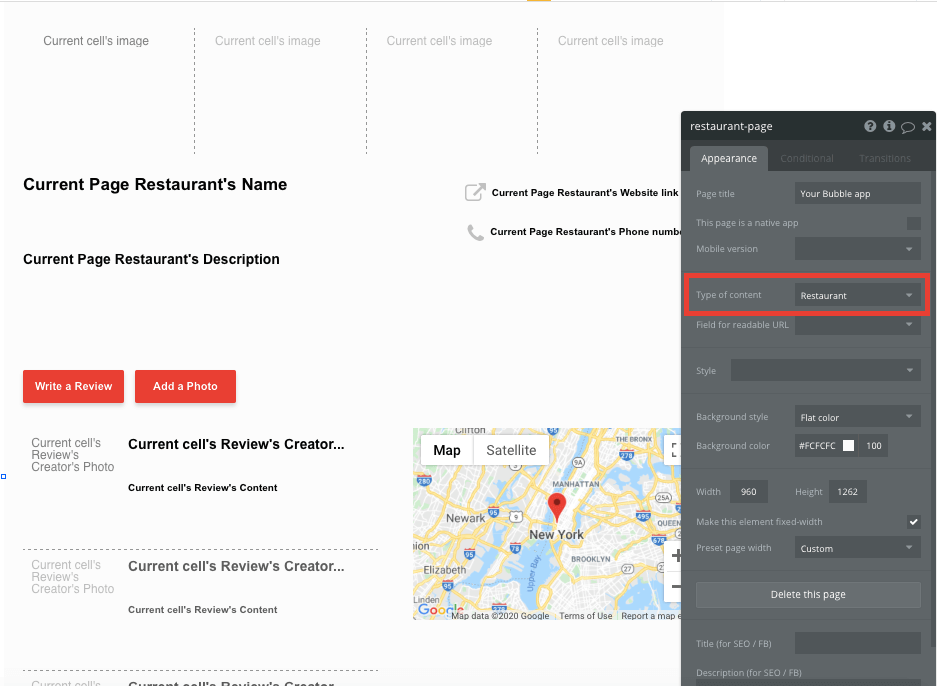
By classifying the type of content on a page, Bubble can easily pull and send relevant data from existing sources.
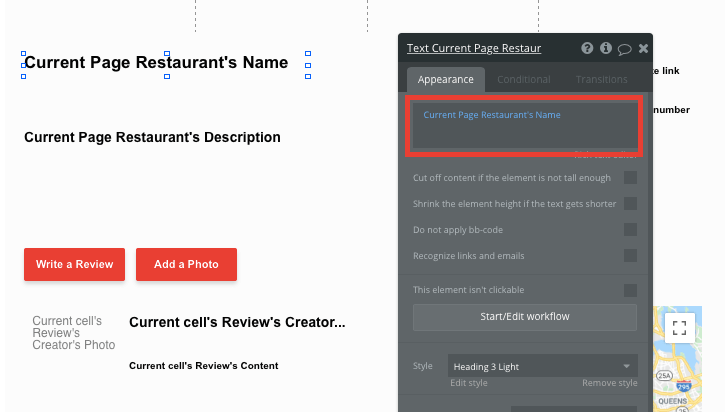
You can now start adding dynamic content into the fields that display information from the current page’s restaurant.
Searching for content
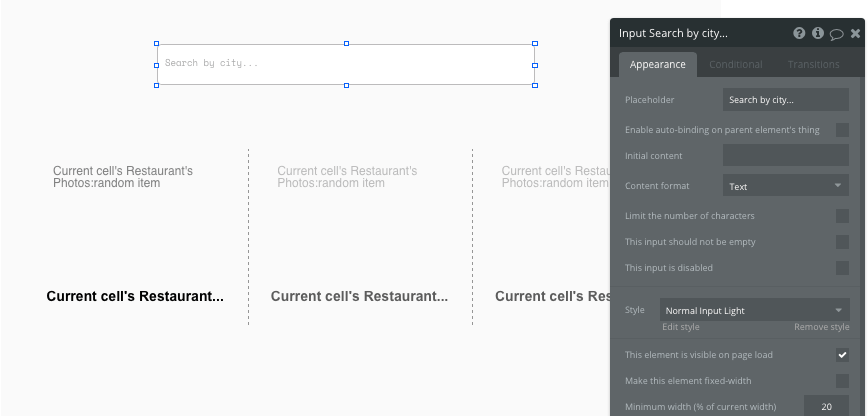
Taking a step back to our homepage, we’ll also need to build a feature that allows users to search for restaurants based on a city. This can be achieved by adding an additional text input element that we’ll treat as a search bar.
From here, we’ll create a new workflow that classifies a user's search term, then passes this data through to a separate page dedicated to this search query (more on this page soon).
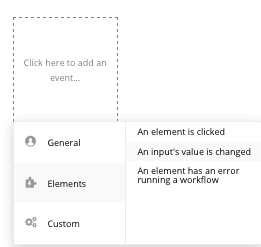
To power this workflow, we’ll create an event trigger that recognizes when an inputs value is changed. The element will, of course, be the text input field.
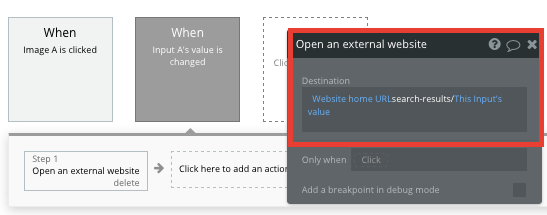
When sending the user to our search results page, we’ll need to add a unique search query to our URL string, allowing the following page to retrieve this data.
Instead of opting to send a user to a specific page in this workflow, we’ll choose to open an external website. This will allow us to customize the URL path between pages.
The URL we’ll be sending the user to will be the current website's home URL + the URL of our search results page + the dynamic query value from our text input field.
Next, we’ll finish building our dedicated search results page within our application. When building this page, we’ll need to configure the page type to a restaurant as we’ll be wanting to display a list of matching restaurants.
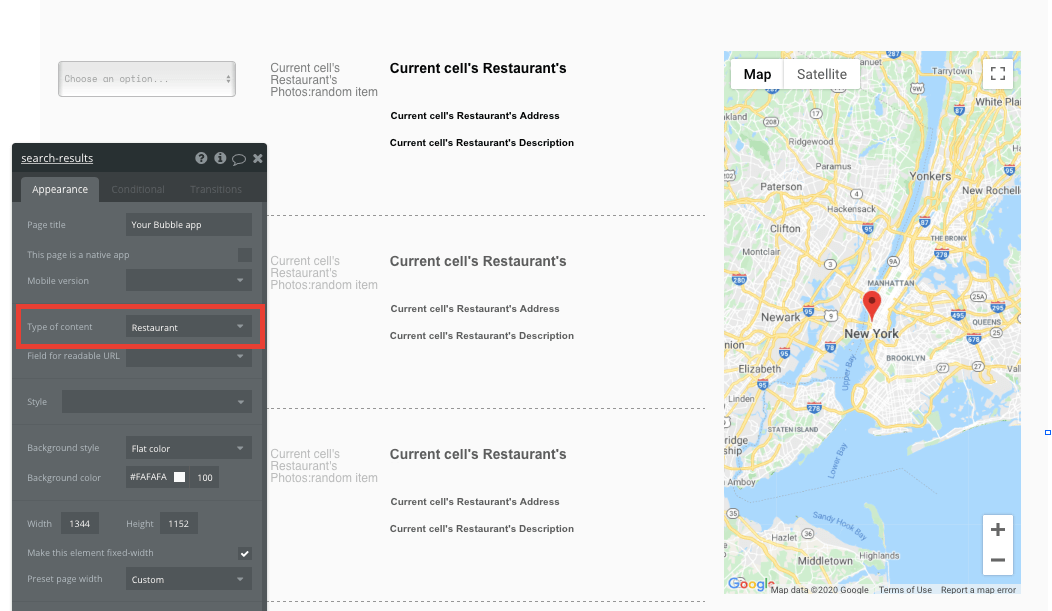
When designing this page, we’ll first include a repeating group element to display a list of restaurants. Unlike our first repeating group, we’ll need to update the data source of this repeating group to match the search query from our URL string.
Start by configuring the content type to be a restaurant. Next, update the data source to display only the restaurants that include our URL strings text in their city field.
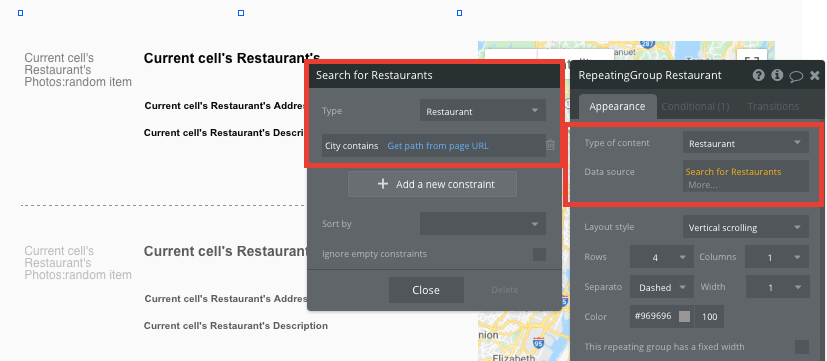
This will now display only the restaurants that match the city from the users search query.
Next on this page, we’ll want to update the marker on our map whenever a restaurants title is clicked, allowing users to visually see its address.
To build this function, use Bubble workflow edit to create a custom event that recognizes when a restaurants title is clicked.
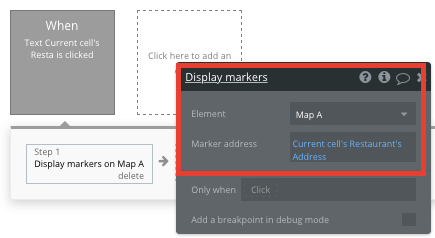
From here, we’ll choose the action to display markers.
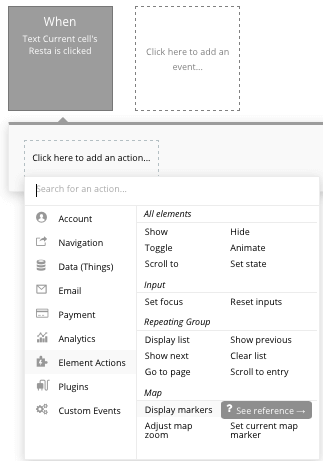
Now, we’ll select to display the marker for our on-page map, configuring its data source as the current cells restaurants address.
The final key feature we’ll need to add to our search results page is a category dropdown, allowing users to filter through restaurants by the categories of foods they serve.
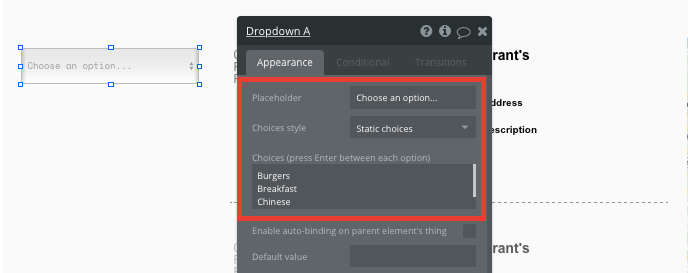
Once you’ve configured the options for the dropdown menu, we’ll need to add a condition to our repeating group, allowing it to respond to the dropdowns selection.
The logic for this condition will identify when the dropdowns value isn’t empty. When this occurs, it will then update the data source of the repeating group.
The new data source will once again include a search for restaurants, adding the same condition for the cities URL string. We’ll also add another constraint, ensuring that the restaurant's food categories also contain the same value as the dropdown menus selection.
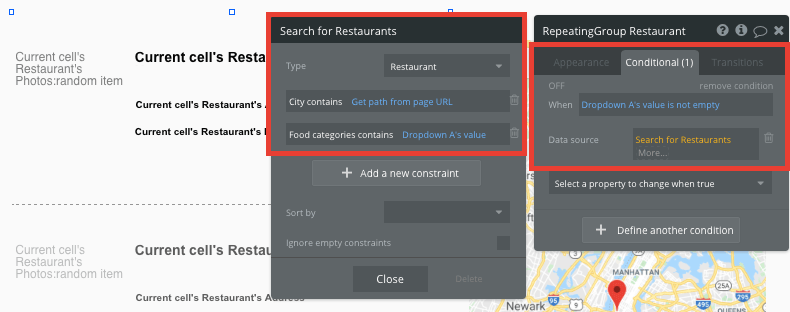
Now when a food category is selected, this repeating group will automatically update with the most relevant results.
The last function we’ll need to add to this page, is another navigational event that directs a user to our dedicated restaurant page when a restaurants image is clicked.
We’ll replicate the same navigation workflow we created from our homepage repeating group.
Adding reviews to a restaurant
Once a user has found a new favorite restaurant (thanks to your no-code app), they may want to contribute a review, sharing their experience with the community.
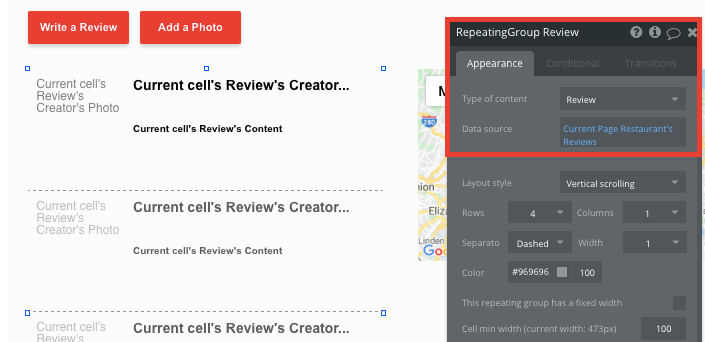
On our restaurant page, we’ll add an additional repeating group below the restaurant's information. This repeating group will be used to display a list of the restaurants current reviews.
When configuring this repeating group, the data type will be set to a review, and our data source will pull all the reviews from the current pages restaurant.
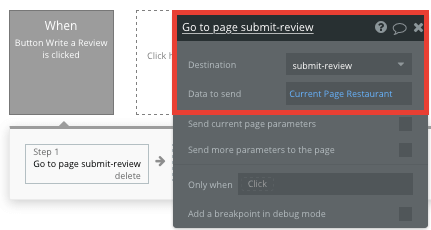
From here, we’ll create a new workflow when the add review button is clicked.
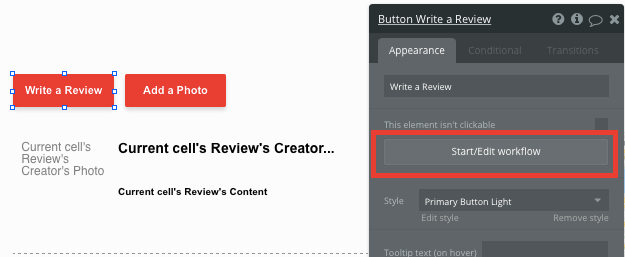
This workflow will redirect a user to a dedicated page where they can create a new review. When sending a user to this page, we’ll also want to pass on the data from the current pages restaurant.
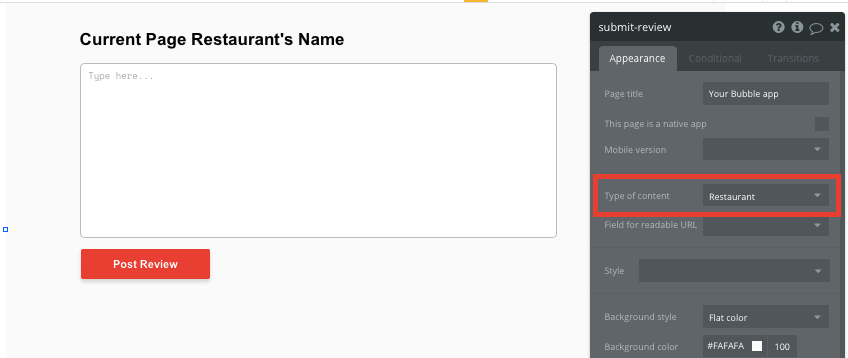
On our submit review page, we’ll need to update the page type to also be a restaurant, allowing us to pull the current restaurants data.
Finally, we’ll then need to create another workflow that triggers once the post review button is clicked.

This workflow will be used to create a new thing - a new review.
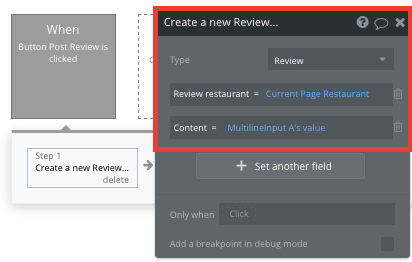
As you’ve done before, you’ll then match the on-page elements with the necessary data fields to create a valid review.
Once a new review has been created, it will automatically be added to the repeating group back on the restaurants page.
Additional features
After building the core features for your MVP, you’ll become familiar with the process of creating custom data fields and displaying dynamic content. If you’d like to continue adding additional features to your directory, you could consider:
- Adding a feature for users to submit photos to a restaurant page
- Creating user profiles - displaying a list of the users account details and the reviews they’re created across the platform
Launch
Hiring a developer or dev team to build this app would cost thousands, if not tens-of-thousands of dollars. As you launch and grow in users, our paid plans allow you to host the app on your own custom domain for as little as $25 per month. Some templates and plugins may cost more, but you can build all the functionality of a directory without any additional costs.
Templates
If you don’t want to build your restaurant review theme from scratch, you can purchase one of the templates made by our community members. Some similar templates include:
- Canvas Reviews Platform by AirDev
- Location Based Reviews by Rapid Dev
- Directory & Listing by Rapid Dev
Start Building
Bubble can help you build a restaurant review site or any other product you choose! It’s never been easier to build something incredible without having to code.
To get started for free, sign up here.
You can also connect with other passionate makers building with Bubble on our community forum.