Great news: The official Make plugin for Bubble is finally here, and it’s just as powerful and flexible as we’ve all dreamt it would be. With just a few clicks, you can now directly connect your Bubble app to 1,700+ systems and tools without coding or relying on traditional developers.
A visual workflow automation tool
Traditional no-code platform-as-a-service (PaaS) tools are often linear and non-intuitive. With Make, you can visually create, build, and automate API calls and workflows without limits.
Make enables you to visually build workflows to solve complex problems — the way you imagine them in your mind.
How the Make plugin for Bubble works
With the Make plugin for Bubble, developed in collaboration with Makeitfuture, you can control your Make organizations directly from your Bubble app. Through behind-the-scenes and lightning-fast API calls, you can configure actions to:
- Invite new users
- Activate and deactivate scenarios
- List organizations
- List teams
- List scenarios
- List scenarios logs
- Get execution logs
- Manage the users of your organization
- Create a backup of your scenarios
- Store execution logs
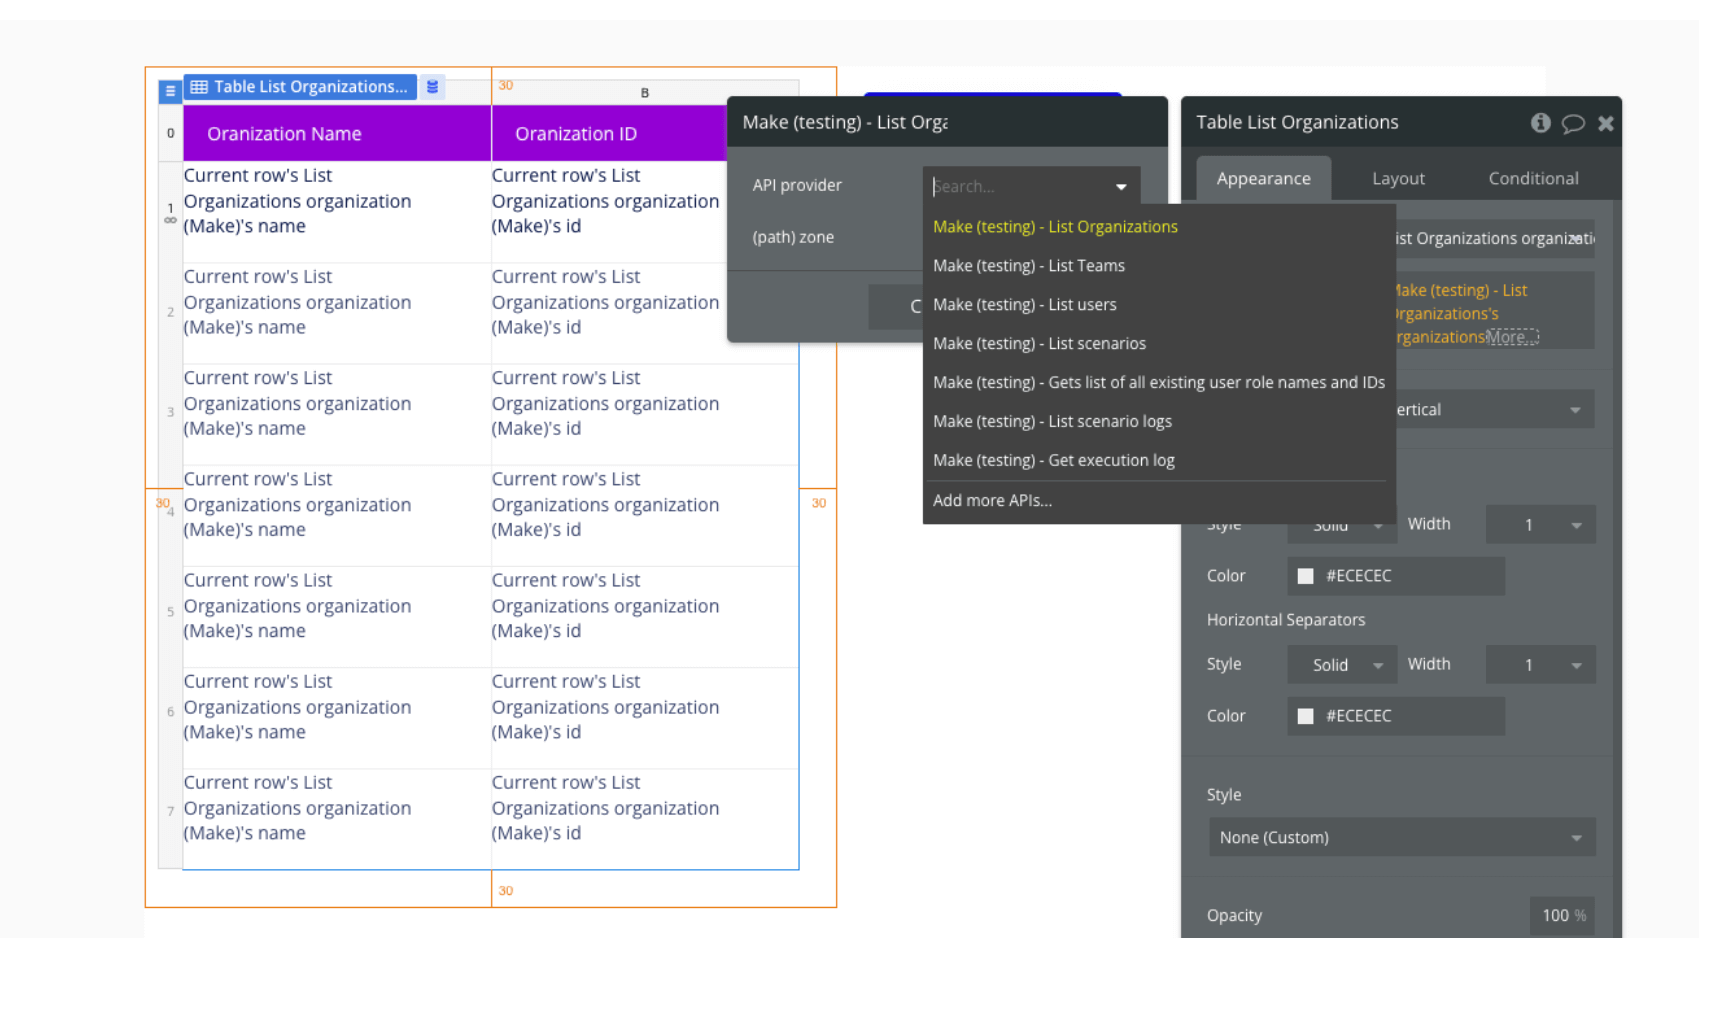
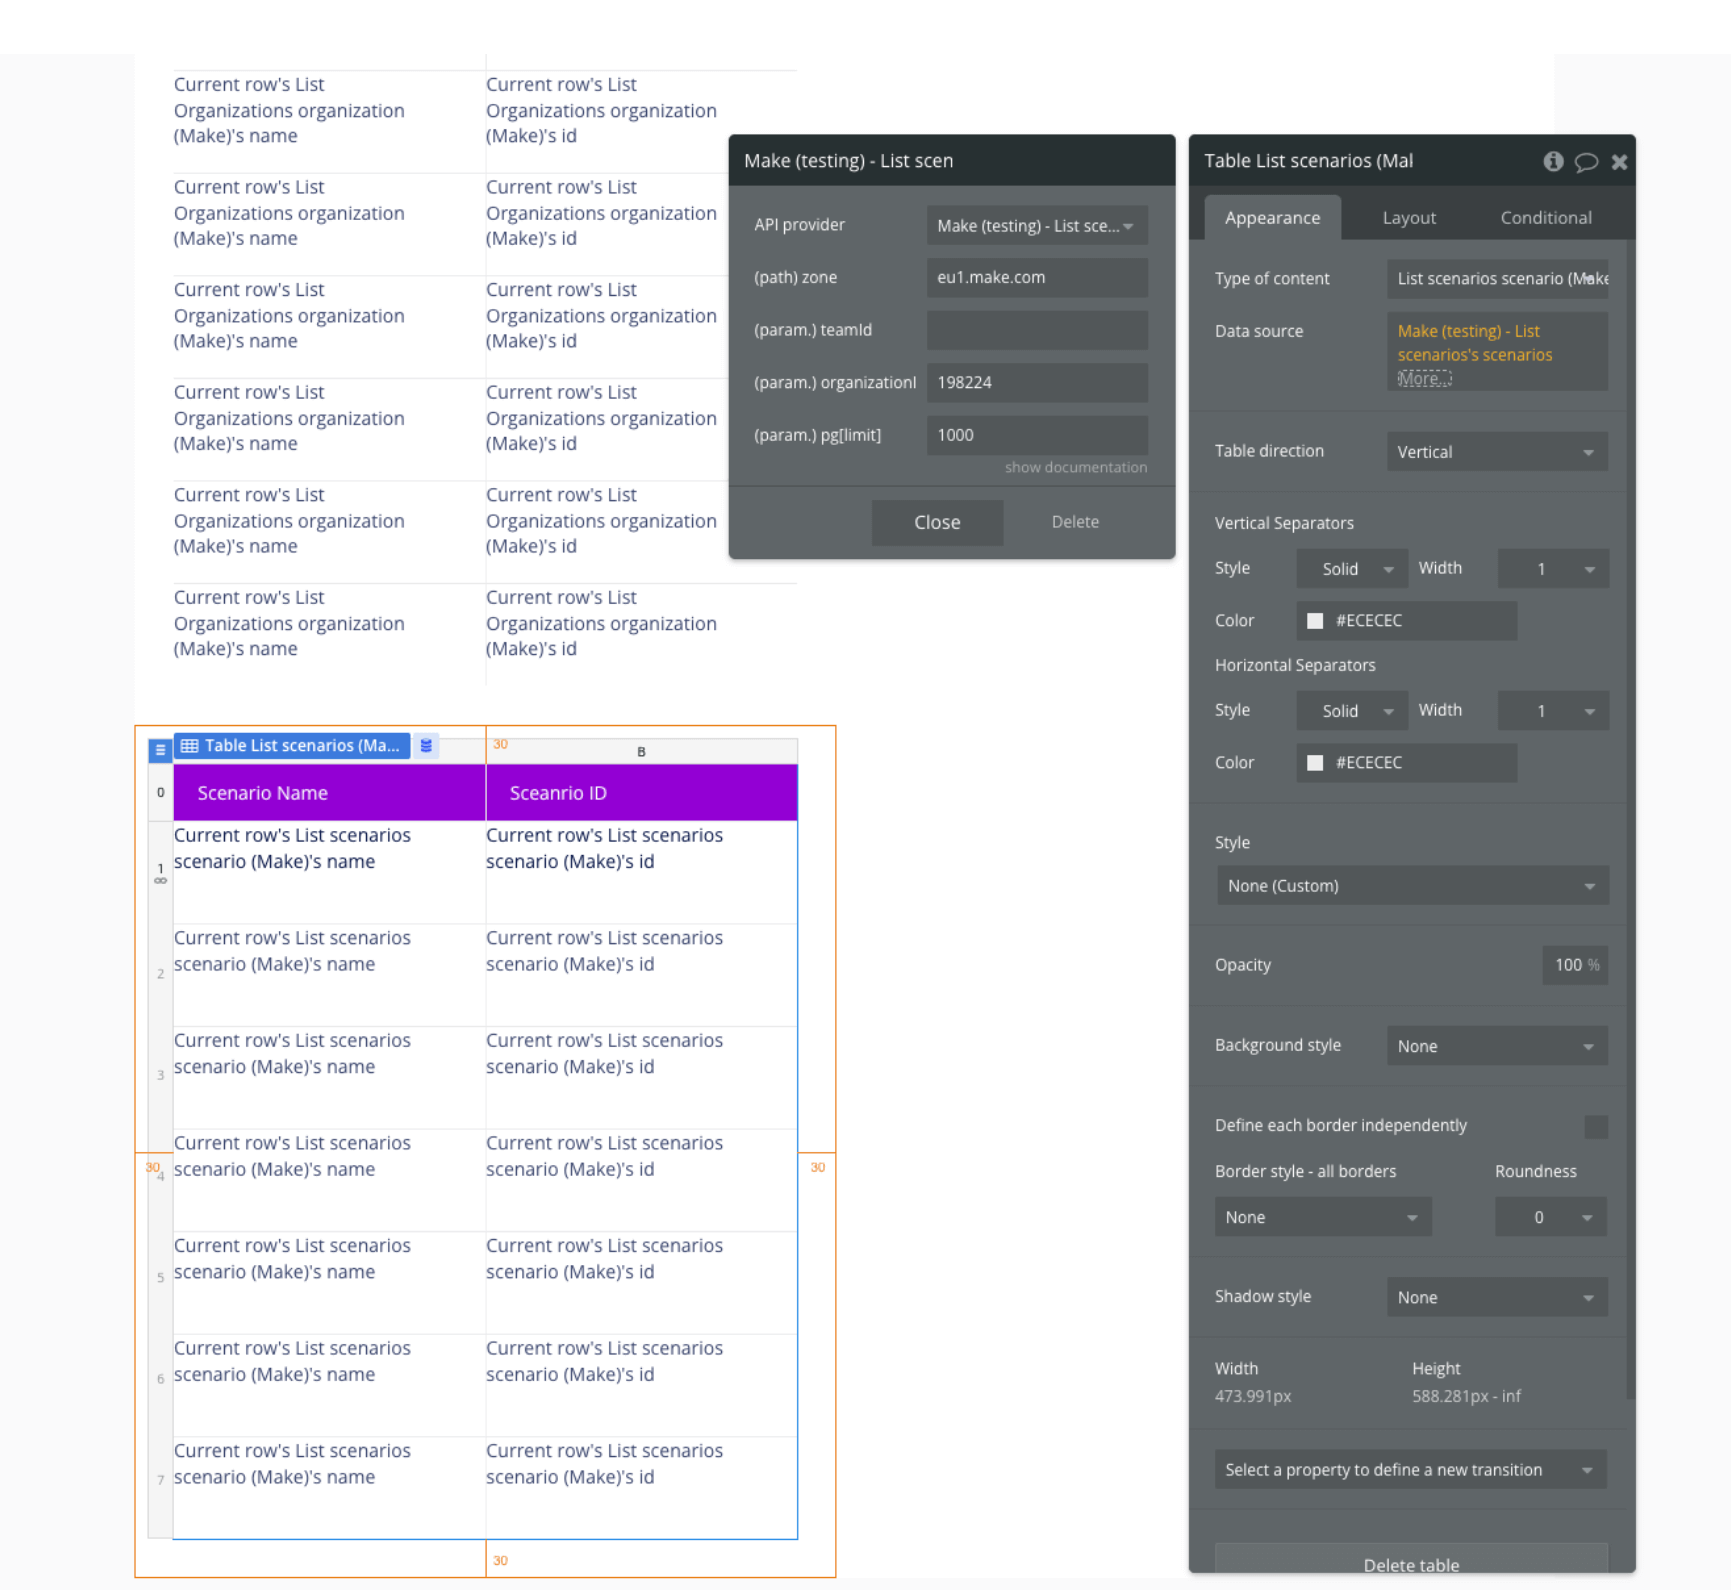
For example, you can create a table to display your Organization Name and Organization ID. In Bubble’s property editor for the table element, edit the Type of content and Data source to set up your parameters. After configuring your data source, you can use the new data in rows, columns, text, etc.
Getting started with Make for Bubble
To start using Make in your Bubble app:
- Sign up for a Make account if you haven’t already.
- After you login, click on your profile icon in the bottom left corner. Click on the three dots and select Profile from the overflow menu.
- From your profile view, click on the API tab and select Add token to open the token configuration window. Choose a name and purpose for your token.
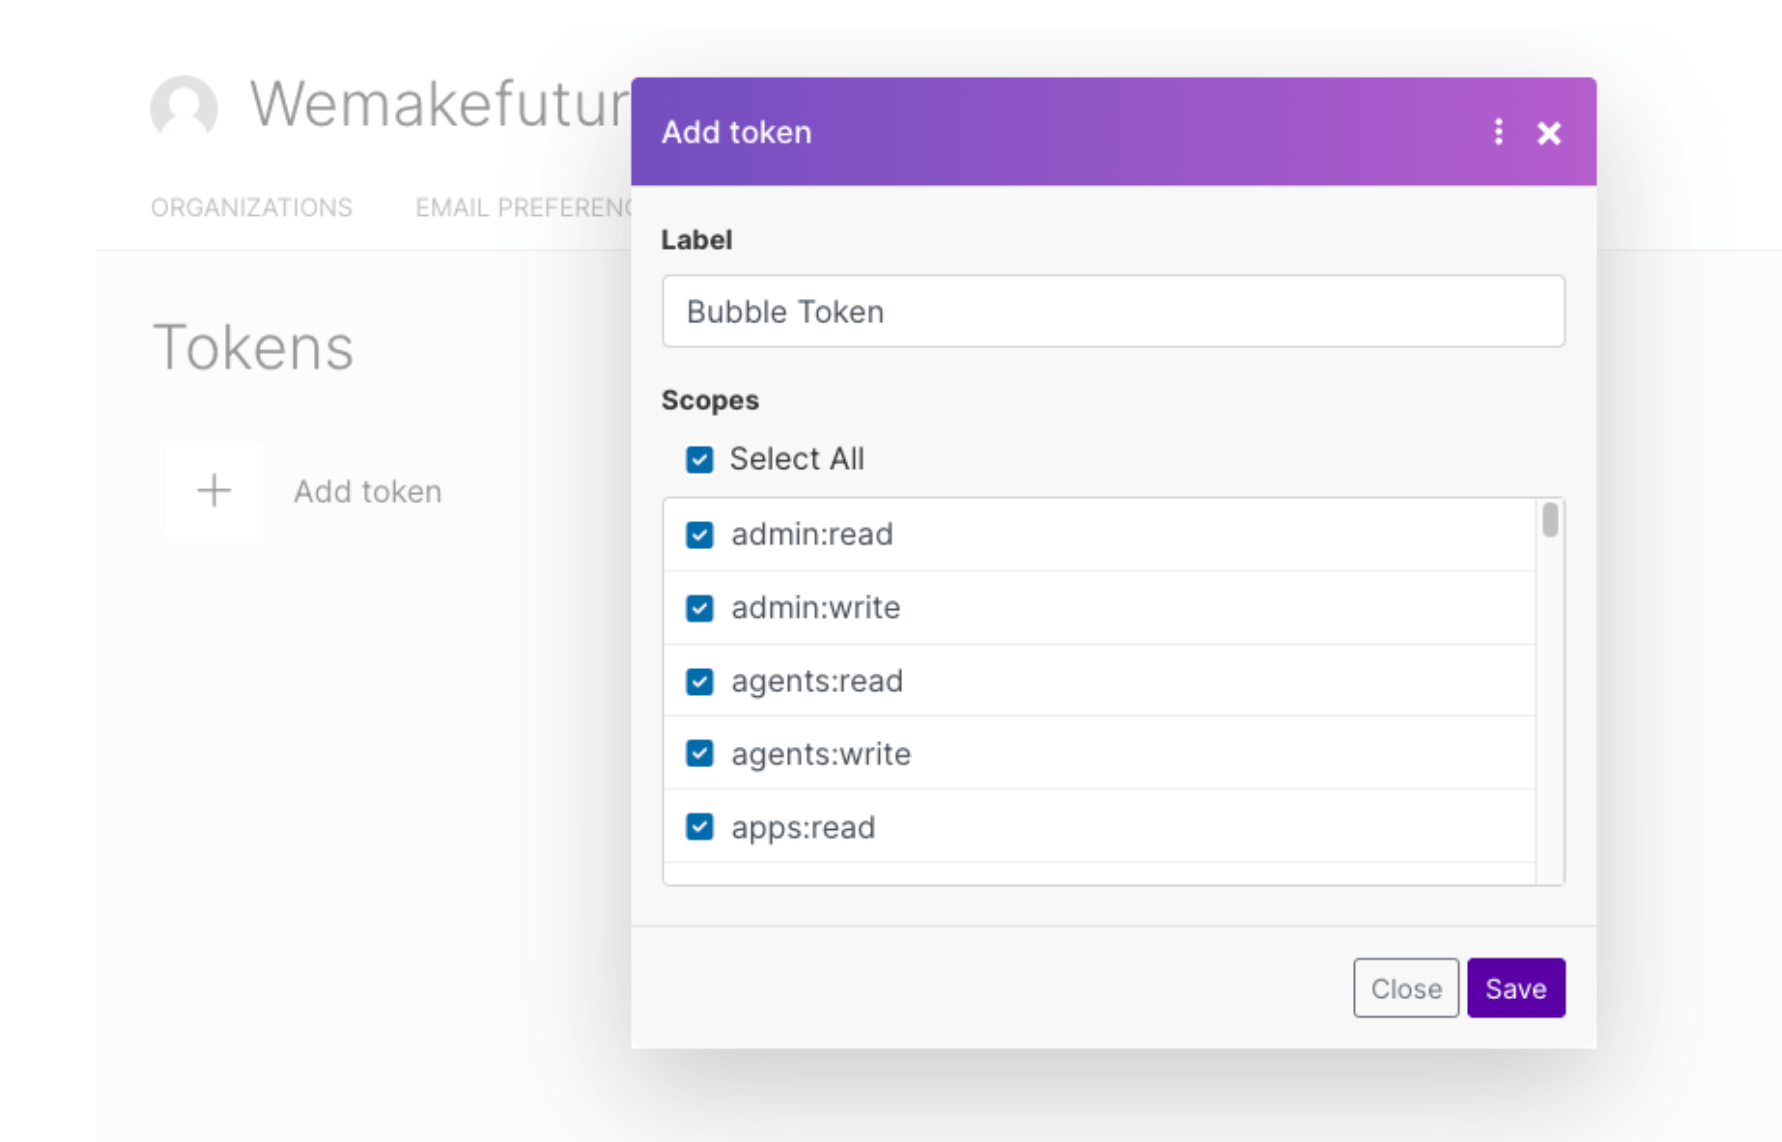
- Click Save to see your newly-created token.
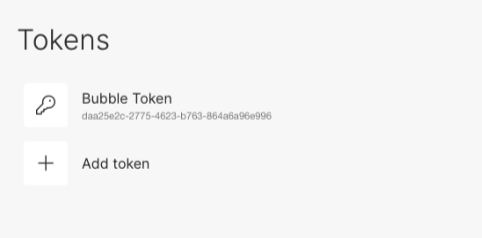
- Copy the token and get ready to connect it to your Bubble app.
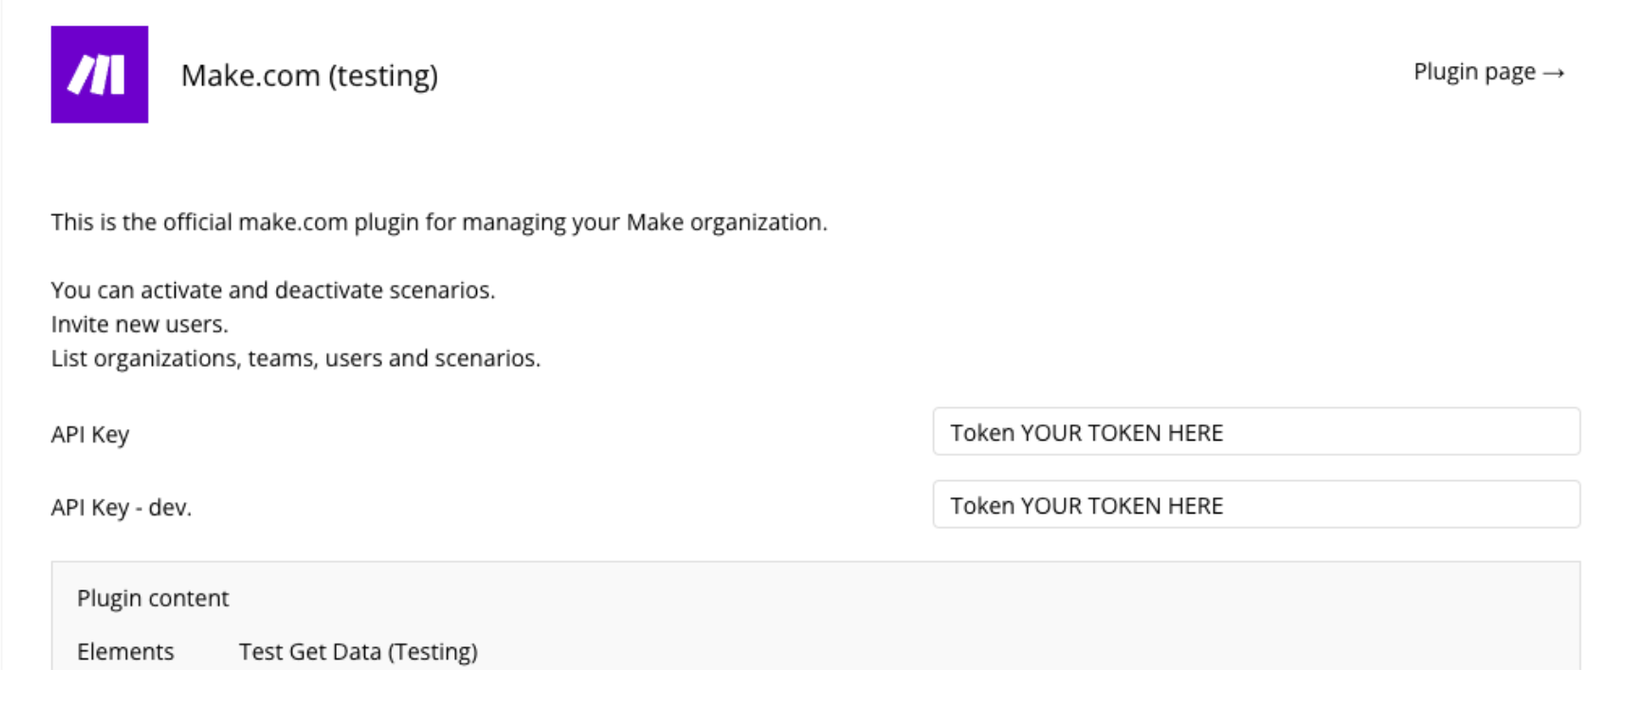
- From your Bubble editor, install the Make plugin.
- After installation is complete, add your token to the API Key field. Make sure you leave the word "Token" at the beginning.
That’s it! You’re ready to start using the Make plugin with your Bubble app to automate your workflows, support complex processes, and boost productivity.
Build for as long as you want on the Free plan. Only upgrade when you're ready to launch.
Join Bubble