Prototypes are obviously necessary for physical products — but we’d argue they’re even more necessary for digital products like mobile apps.
Imagining how a self-warming mug might function seems pretty straightforward.
Imagining how an app might function can take many different directions.
Thus the value of a mobile app prototype. In this article, we’ll break down exactly what mobile app prototypes are, why all startups should create one, and how to build an effective app prototype, step-by-step.
What is a mobile app prototype?
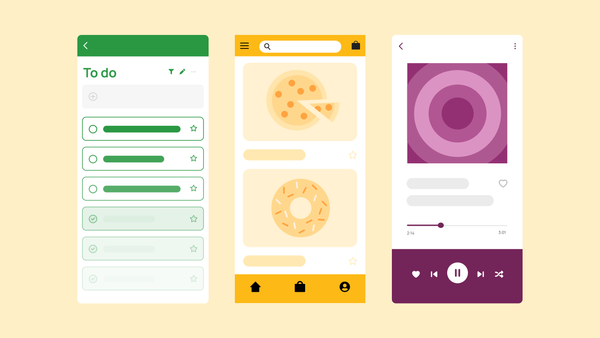
A mobile app prototype is an interactive mockup of the mobile app you’re planning to develop. They serve multiple purposes:
- giving your developers a blueprint to work from during app development
- showing investors an outline of your app idea when raising funding
- doing initial user testing and validating core concepts and features
A great mobile app prototype shows off your app’s basic functionality and the user interface. It also provides a rough idea of the app’s design and the user's journey. However, features in most mobile app prototypes are simply simulations or animations, not working functionality.
Of course, at Bubble, we think of prototypes a little differently. You shouldn’t have to spend a lot of time and energy on prototypes and MVPs that are designed to be scrapped.
Instead, with Bubble, startup founders can build an app prototype without code that has real functionality right from the start. Creating a functional mobile app as a prototype reduces your launch and product development timeline and generates more valuable user feedback sooner.
Why build a prototype of your app?
App prototyping is a must for startups, even for (especially for!) those trying to move fast. Building on a platform like Bubble makes it easy to speed up your product development process, but starting with a prototype (of sorts) still provides a lot of benefit.
Better visualize and share ideas
One of the biggest and most recognized benefits of prototyping is that it allows you to better visualize, communicate, and share your app ideas.
“[Prototyping] helps to visualize your ideas to get you in the right visual context for planning the execution and implementation. In our mind, we picture the idea [of our app] very generally, and the prototype helps to put those ideas into something more tangible and more concrete to act upon.” - Vlad Larin, Co-Founder at Zeroqode
As Vlad Larin points out, it’s much easier to test and iterate on a tangible prototype than on a nebulous concept. Whether you’re sharing ideas internally or communicating your idea to stakeholders, an interactive prototype gives you a starting place to communicate from.
Another benefit of clearer communication of your ideas and core concepts is that you can get your whole team on the same page earlier in the development process.
“A prototype can be a really useful way to align on the UI and UX of the product, whether it’s an MVP or a larger build.” — Vlad Leytus, co-CEO of Airdev
Mobile app prototyping ensures your development teams are all working toward the same goal, provides a roadmap for development, and reduces the amount of pivots and major changes you’ll need later.
Of course, if you’re building on Bubble, you don’t need a whole development team — many founders build their app or prototype themselves, or with one or two other product developers. In any case, a good prototype helps you stay focused on your big idea and reduces the amount of major changes needed down the road.
Validate ideas and feasibility
Creating an app prototype also enables you to better estimate the costs associated with the final product’s development.
“Prototyping allows you to visualize ideas, communicate design concepts clearly, and gather early feedback. It helps identify usability issues, refine user experience, and can significantly reduce the time and cost of development by catching potential problems early.” — Rodrig Naska, Product Lead at Revido
Catching potential problems — both product-related and technical — in the prototyping process can reduce the cost of building. But having a clearer picture of what your real app will need also makes it easier to understand the resources needed and the feasibility of your project.
You can also validate ideas throughout the entire process with user testing. Although user testing at this stage is by necessity pretty controlled (since your app prototype generally isn’t functional), it can still provide valuable feedback and direction for iteration before you launch.
And, if you build on Bubble, you can create functional prototypes and launch for real users, allowing you to go deeper with user feedback sooner.
Reduce technical debt
Validating ideas early also helps reduce technical debt and expenses from having to make more changes down the line.
“Prototypes are lightweight ways to test out a concept before committing it to your product. Building and rebuilding in your actual app can become messy and create tech debt over time, so you can minimize that by starting with prototypes.” — Maria Posa, Bubble Development Manager
The earlier in the app development process you can test your designs and potential functionality, the earlier you can make the necessary changes and adjustments. Since it’s much easier and faster to implement changes in app prototyping tools than in a fully-built product, prototyping allows you to iterate faster and with less expense.
How to create an app prototype in 6 simple steps
Creating a prototype doesn’t have to be a complicated process. Here’s how our team — and other product developers we talked to — broke it down.
1. Do some user research
For the most effective app prototypes (and product-market fit), start with your users. According to Sania Saeed at Chakor, this is the most important stage of the prototyping process.
“[The most important step is] definitely the definition stage, where you are gathering information, doing market research, and analyzing your product requirements.” — Sania Saeed, Product Manager at Chakor
The goal here is to make sure you’re building for actual user needs and problems — not what you think the problem is. Strong research from the beginning can help you get a clearer understanding of the user’s perspective and what you need to create a successful product.
As a result, it becomes easier to define core features for the next step.
2. Identify the big problem to solve and core features
Once you’ve gotten the research you need on your user’s core needs, you can identify the core problem your app is solving — and what must-have features are needed to solve that.
Essentially, you’re trying to answer:
- What is the big problem your app is solving? What does your app do to solve that problem?
- What are the most basic functionalities you need, given that problem?
- How will these essential features look and work together?
A prioritization framework, such as the RICE framework or the Effort x Impact matrix, can help make this decision-making process easier. It can also help you scope out exactly where in the product development timeline certain features should land.
Remember to start small — after all, even Amazon started as just an online bookshop!
Your prototype doesn’t need to be a grand realization of your fully-fledged product idea, but instead a V1 of your product that you can use to start testing. With Bubble, you don’t even need to scrap your prototype after testing — you can just keep iterating and growing on it over time.
3. Start with a sketch
Once you’ve got your user research complete and the core features in place, it’s time to start making some rough sketches of your product.
“The most important step in building a prototype is first deciding on the high level architecture of your product. That means mapping out the exact screens that your application will have, along with the features on each of the screens.” — Vlad Leytus, co-CEO of Airdev
At this stage, you don’t need to worry too much about nailing the final design. Instead, focus on getting all the key screens and UI components down on paper. Then figure out how all the screens will connect to each other.
Even if you’re going to build a simple prototype next, a low-fidelity wireframe helps your design team know exactly what to do when building your digital prototype.
4. Choose a prototyping tool
Finally, it’s time to move your simple sketches into an actual prototyping tool. Finding the right prototyping tool allows you to:
- share your prototype more easily with external stakeholders or potential investors
- manage user testing more easily
- collaborate on design and functionality with your team
- develop high-fidelity prototypes
The goal is to find the prototyping app that meets your needs and goals for your prototype. Different platforms allow you to build different types of prototypes: some focus on low-fidelity wireframes, while others allow you to build clickable prototypes or interactive prototypes.
When choosing a mobile app prototyping tool, consider both your current needs and the long-term fit. You don’t want to start in one tool only to have to transfer your designs to several other tools before you’re ready to build your product.
That’s one reason we’ve thought of prototyping differently at Bubble. Instead of designing a high-fidelity prototype that then has to be converted into an MVP, and then rebuilt into your actual product, what if your prototype could serve you long-term?
On Bubble, you can build your prototype as V1 of your actual product to consolidate your tech stack — and the amount of time you spend building.
5. Start to build your prototype
With the right prototyping tool on hand, you can start building a digital prototype that can be used and tested.
Start by building all the main app screens that you need from your sketches. Then you can move to building all the UI elements that users need to navigate around the app and complete basic tasks.
Once you’ve created the basic app design, you’ll want to add in other features that will give your users a better idea of what your actual product will look like. These can include things like geolocation features, text fields, colors, and animations.
For mobile apps, it’s especially important to simulate core app elements and features such as gestures, navigational functionality, and native features.
Even at this stage, most clickable prototypes aren’t going to include actual functionality. Generally, all of your UI features and elements are going to be simulations and animations.
However, that’s not to say you can’t make things functional at this stage. With Bubble’s no-code tools, creating functional databases, logic, and features is about as easy as creating high-fidelity designs in other programs.
6. Test and share your app prototype
Finally, your prototype is built — now it’s time to start testing your app with users and sharing it with potential users and investors.
“The most important step in testing a prototype is gathering unbiased user feedback. This involves conducting user tests with people who match your target audience, observing their interactions with the prototype, and asking for their honest feedback on usability and the overall experience.” — Rodrig Naska, Product Lead at Revido
For mobile app prototyping, it’s especially important to make sure that you can test your app on native devices. While testing on desktop works OK for controlled scenarios, the best way to get user feedback is from real-life scenarios.
Another benefit of building functional prototypes: more valuable user testing, faster. With working prototypes, users can provide feedback from controlled, dedicated tests. Even better: you can also use techniques like A/B testing and other in-app, behind-the-scenes tests to see how users perform in real-life situations.
Finally, you should share your prototype with investors. Functional prototypes have an added layer of success here, too. When your potential investors can see that your prototype is already up and running, gaining users, and solving real user problems, you’ll be able to stand out from the competition, making it easier to secure funding.
Consider the case of CircleHome: David built the first version of CircleHome — a working prototype — in just four months on Bubble. Though their first version was basic, it was functional — and allowed them to land a spot in Startupbootcamp (a major startup accelerator), €120,000 in pre-seed funding, and 60,000 potential users.
Sure, you could make a basic prototype just for testing. But why test in isolation when you could launch your basic product and start growing your user base, raising funding, and testing all at the same time?
Get started building your prototype today
When you’re ready to build a prototype — with real functionality — there’s no better place than Bubble. Visual, no-code software lets you build your prototype faster and easier than ever, launching your product to real users sooner and making it easier to grow your audience and secure funding.
Start with your prototype and then benefit from a seamless iterative process to develop your actual product.
