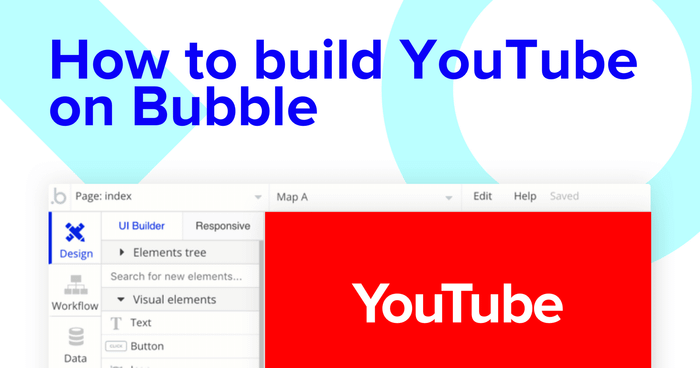
After getting started with the first video being simply titled ‘Me at the zoo’ back in 2005, YouTube is now a cornerstone to modern video content consumption. In seconds, users can find world class educators and free video content in every niche imaginable, as well as millions of hours of entertainment. In this article, we will walk through a tutorial to build YouTube clone using Bubble, a no-code web app development platform, no programming experience required!
In this guide for building your own no-code YouTube platform, we’ll cover the following topics:
The steps to building YouTube with no code include:
Getting Started
What is Bubble?
Bubble is a no-code tool that empowers our users to design, develop and host fully-functional web applications without writing a line of code. Applications built on Bubble can range from simple prototypes to complex marketplaces and platforms, completely replacing the programming languages and frameworks traditionally used for web development. Bubble’s powerful point-and-click editor gives users the complete power and ability to design fully customizable applications and workflows; from there, Bubble handles the infrastructure, DevOps, and scaling automatically.
Before you start, you’ll need to first register your free Bubble account. Click the button below to get started, then you can follow along as we build our app together.
Register your account on Bubble
New to Bubble? Follow along on our Crash Course introductory videos to get familiar with the basics of Bubble.
We also recommend completing the introductory lessons, which will guide you step-by-step through some of the most common Bubble features. This will help you get a running start on building your no-code Youtube clone.
How do people even begin building their apps?
The short answer is that this comes down to personal preference. Some Bubblers like to start by designing their pages so that they can visualize what the user interactions are like, then moving on to hooking up their pages to the database and workflows. Other Bubblers like to start by defining their app’s database, which influences how they think about page design and workflows. There’s no one correct approach, so give the different approaches a try to see what fits best with your style of thinking.
Main pages of your app
We’ll start off by thinking about the main pages that a site like YouTube needs in order to provide the features your users will expect from a modern video-sharing platform. These pages will act as the primary interface that your users will use to upload a video and make it available to your platform’s community for watching.
Bubble lets you build stunning dashboards and pages that will make your users feel at home, regardless of your design background. If you are a beginner, no problem! You can easily kickstart your project by choosing from one of our many templates.
One of Bubble’s features is the ability to send data to a page. This means that you only need to create one generic version of a page, with one simple design; from there, Bubble will automatically populate the elements on the page using this data. This information is stored in the Bubble database, which requires no external setup, and Bubble will then automatically propagate the data into the right groups and text elements, so you won’t need thousands of different pages for each profile or post.
To build an MVP, we’ll build these pages of the app:
- A home page (you can use the default “index” page) that shows all of the latest videos uploaded to the platform.
- A profile page that shows information about a user and any videos they’ve posted.
- An upload video page to let users upload a video.
Data Types You'll Need
How is the Bubble database different from normal databases?
Bubble reduces a lot of the technical complications in interacting with databases, but many of the same core concepts are still present. In databases you have tables; in Bubble, you have a table for each “data type.” Bubble’s data types have fields, represented as columns, and you define what type of data a field has, like text, number, or yes/no (binary). One difference is with database joins, where Bubble allows you to define a field type as a data type you have in the app. If this doesn’t make sense to you right now, don’t worry - it becomes clearer after you see an example.
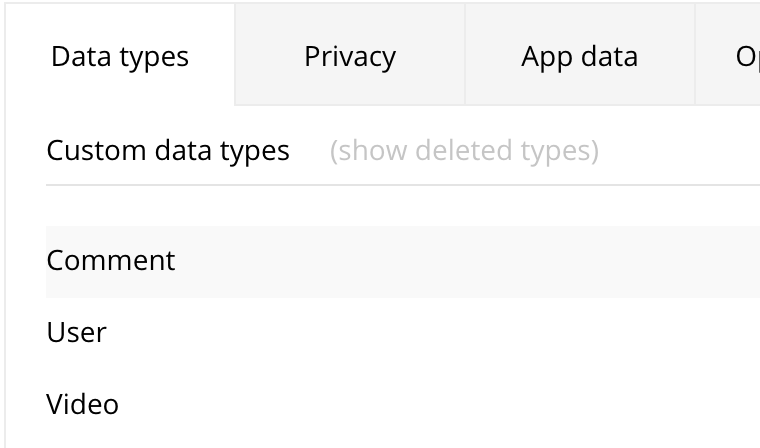
Some users find it easier to start with setting up their data types, which is essentially setting up a database. Every Bubble app comes with a built-in database that you can configure to suit your needs, meaning no setup hassle for you.
We want one data type per type of ‘thing’ we want in the app. Think of a ‘thing’ as exactly that - a thing that you will be showing, storing data on, or using in the app.
Each one of these data types should have fields within it that hold properties of that thing. As we continue building the pages, elements on the page will draw upon different fields of different data types.
Our video app will have these data types:
- Data Type: User - this is a default type for all Bubble apps
- Fields: email (included by default), first name, last name, profile picture, list of ‘videos’, and handle, the equivalent of Youtube’s “username.” Note that the ‘type’ of data is also set so you (and Bubble) know what type of data each field is. (A first name is a piece of text, so we select ‘text’ as the data type, ‘Videos_Published’ are a list of Videos, etc.)
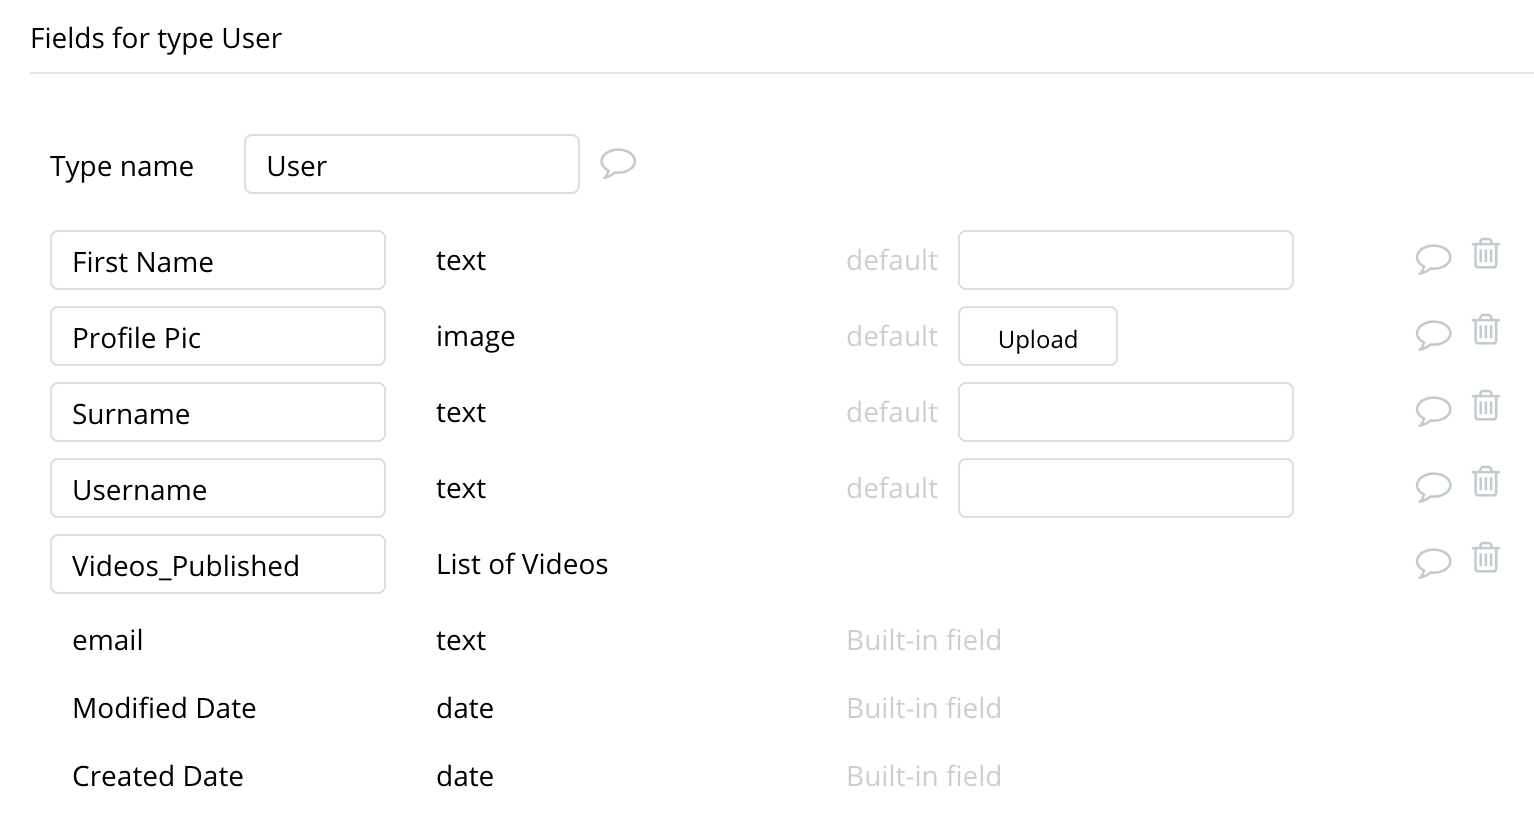
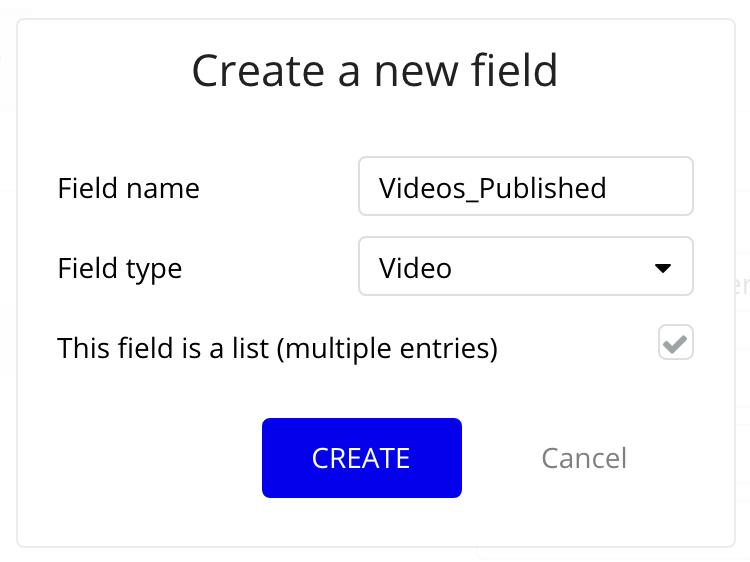
- Important: We’ll be storing not just one video, but an unknown number of videos so we use the ‘This field is a list’ option by checking the checkbox when we create the “Videos_Published” field. It should look like this:
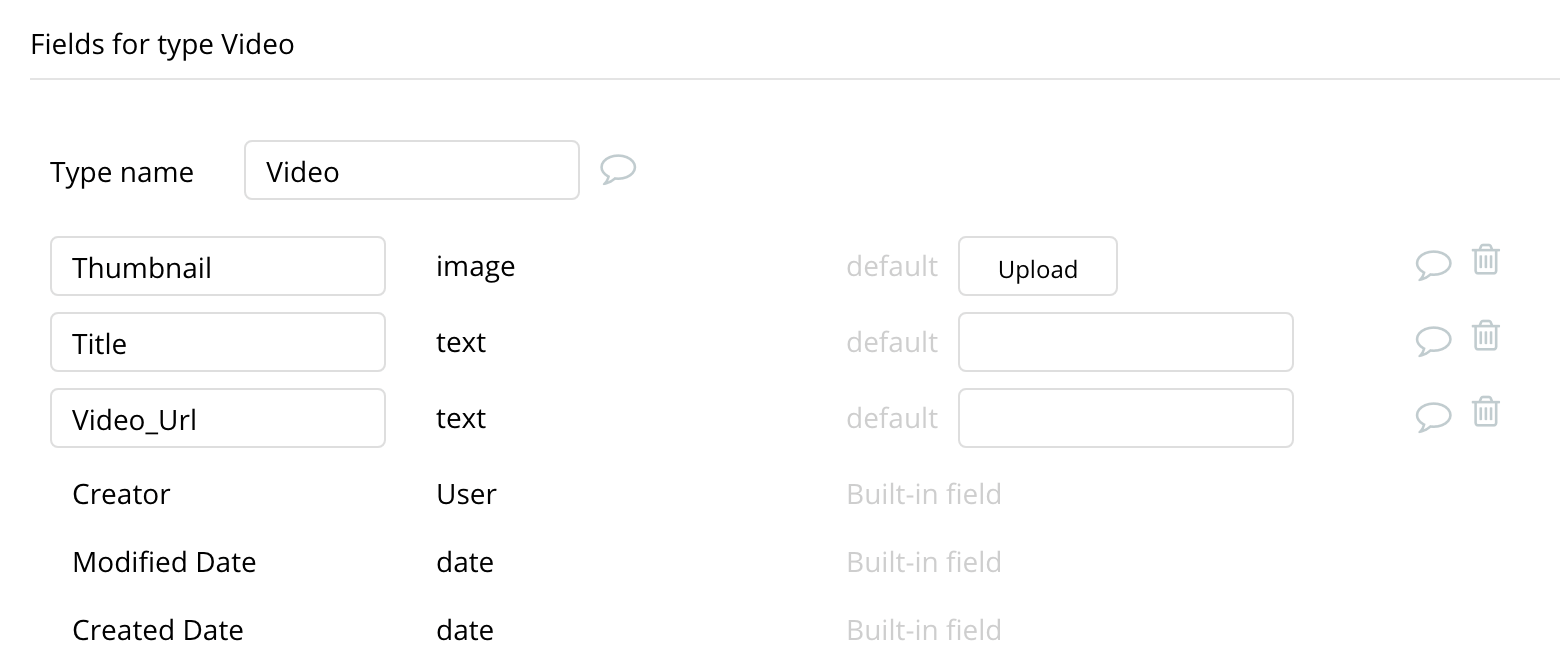
- Data Type: Video - the video that the user will upload and make available for public viewing on your platform.
- Fields: Video_url (the url of the stored video, great for sharing or embedding), Thumbnail (the small image that represents the video) and the Title (the text title of the video). Optionally, you can also create another data type called Comments and save a list of Comments to the video like we did for ‘Videos_Published’ on the user data type. In Bubble’s database, fields we create can be optional. This means there are no errors or issues if we create a Video record that doesn’t have any Comments.
These are the bare-minimum fields we’d need to get the app working. As we build more features, we would likely add more data types and fields. For example, we can add things like user commenting, video embed features, and more to make our platform as powerful as YouTube. We can even integrate with a third party video editor and let users upload then edit videos inside our app, then automatically upload the final edited video!
You can have as many data types and fields as you like. We can then hide or show different design elements or change the way the app behaves in Bubble based on those bits of data.
Core Features
How do you build features in Bubble?
Along with the page designer and the built-in database, an equally important core Bubble feature is “workflows.” Workflows allow you to define pieces of logic in the form of “When X happens, do actions A, B, C, etc.” In reality, “if X, then A, B, C” statements are the basic building blocks for most features in websites - they connect what users see on the page with the database behind the scenes.
Now that we have some blank pages and the database set up, we’re going to give the web app some actual functionalities by connecting them together and performing some basic actions. In Bubble, the main way to do this is with a list of “actions” grouped in a “workflow.”
Each workflow happens when an “event” happens (e.g. a user clicks on a button or the page is fully loaded), and then runs a series of “actions” in response (e.g. “sign the user up”, “make a change to the database” or “hide/show an element” etc.).
To get you started with the basics of the workflows, you can build the following features:
User Signup
- Account > “Sign the user up” to use the built-in Bubble signup
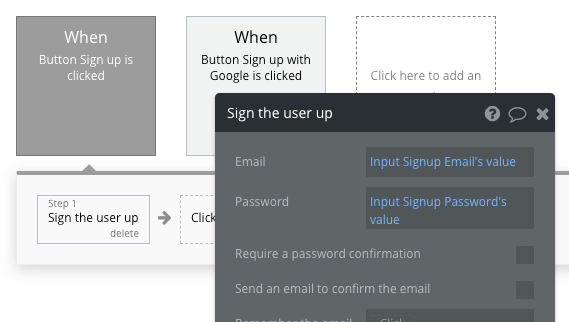
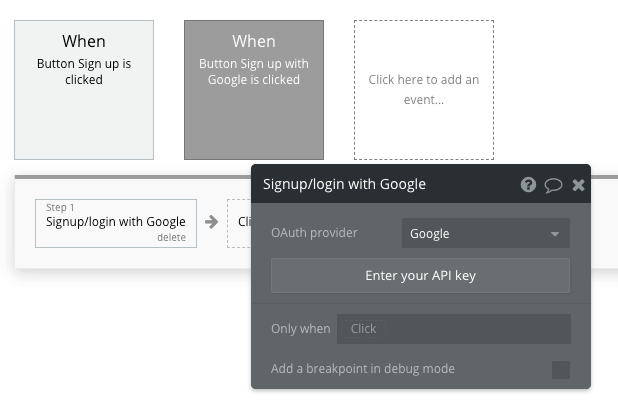
- Account > “Signup/login with a social network” for Google or Facebook login (“OAuth”) if desired (refer to our Manual on authentication service plugins for more info).
Create a YouTube profile
Here, we’ll design a form and then let the user click a button to save their profile image, handle and full name. A workflow will tie both the design side (the form) to the data types that we created earlier, which makes Bubble really powerful for building data-driven apps that store and retrieve user information.
First, here is an example of a profile page:
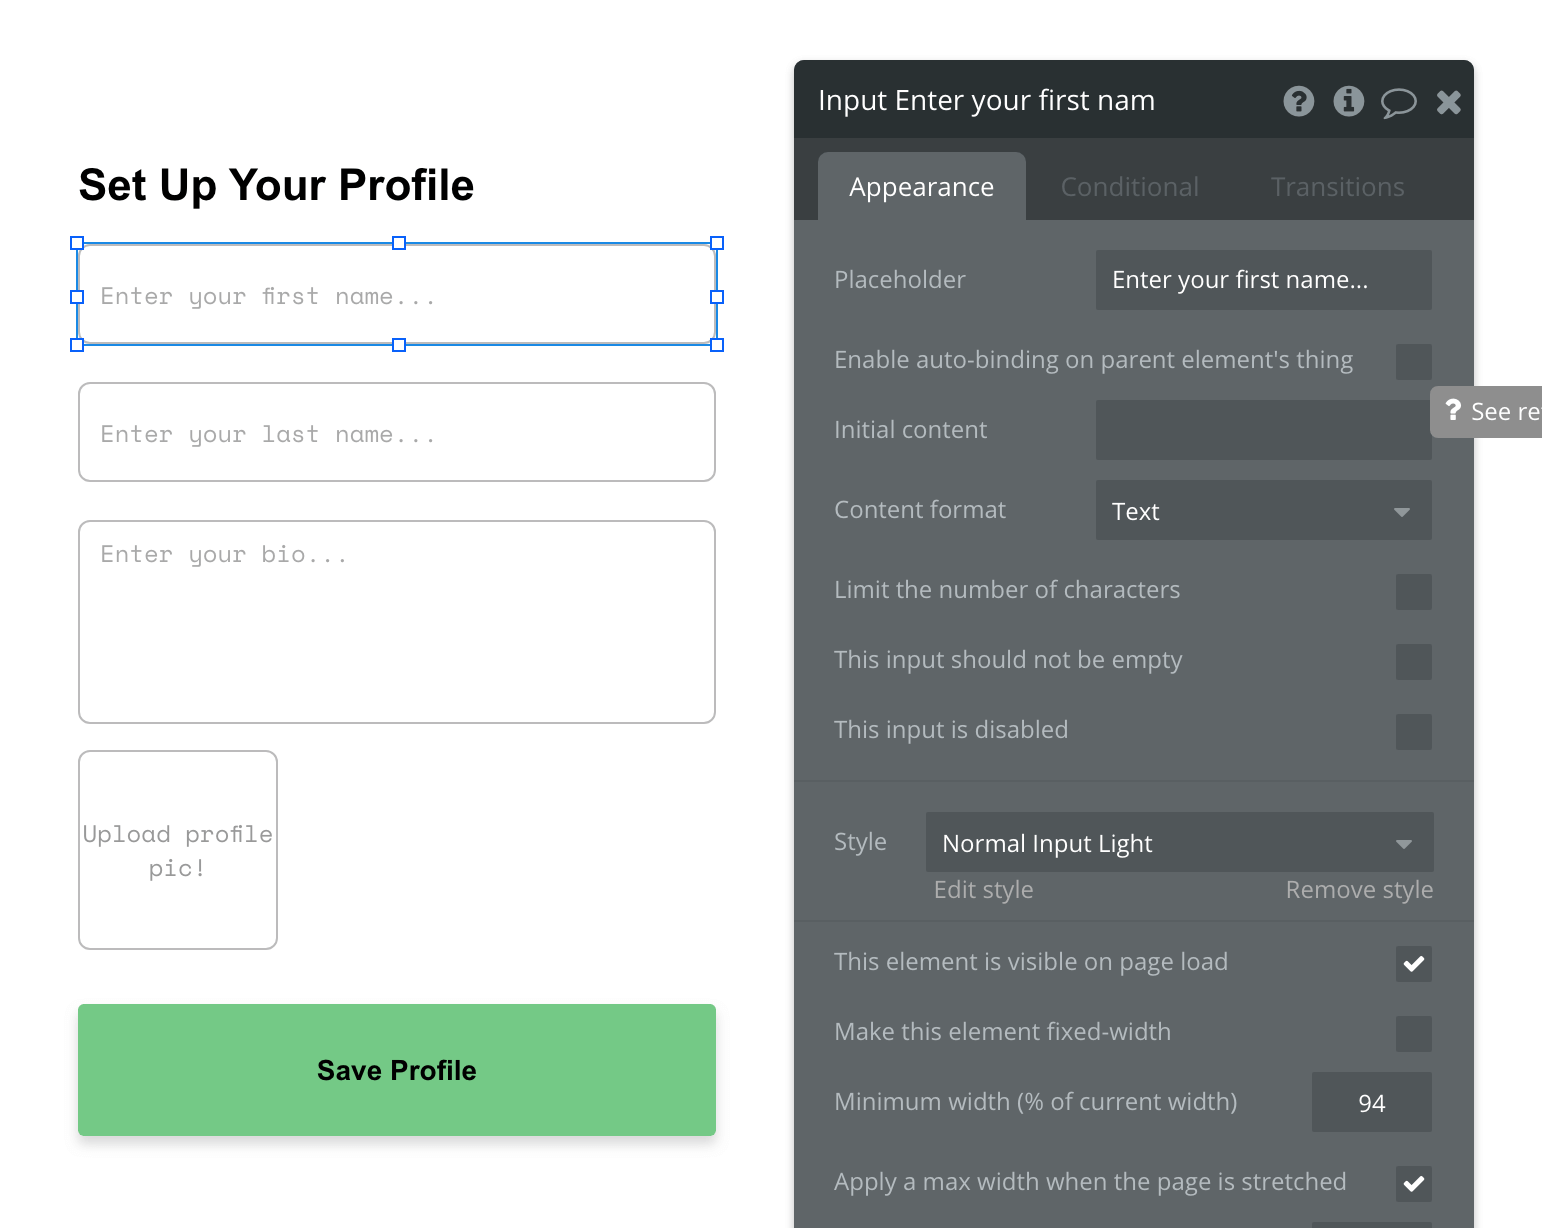
The elements added include:
- 2 ‘inputs’ for first name and last name.
- 1 ‘multiline input’ for the user bio
- An image uploader element for a profile picture
- A Save Profile ‘button’
As we want all of this information to be public, we won’t need to worry about Data Privacy rules for now. If you want to change who can see what, check out the reference here.
Note: Input fields need to have Content Formats that match the type of data that Bubble’s database is expecting. For instance, Name fields should have the Content Format of "text," and Profile Picture data field should be an "image," which means we need an image uploader element to get the right type of data.
Next, save the user’s profile information using a workflow.
Double click the ‘Save Profile’ button in your form and click ‘Start/Edit Workflow’ in the properties menu. This tells Bubble that you want to tie some logic to the button when it is clicked.
Then select the step ‘Make changes to a thing.’ In this case, we are making changes to the user that is currently logged in to our application.
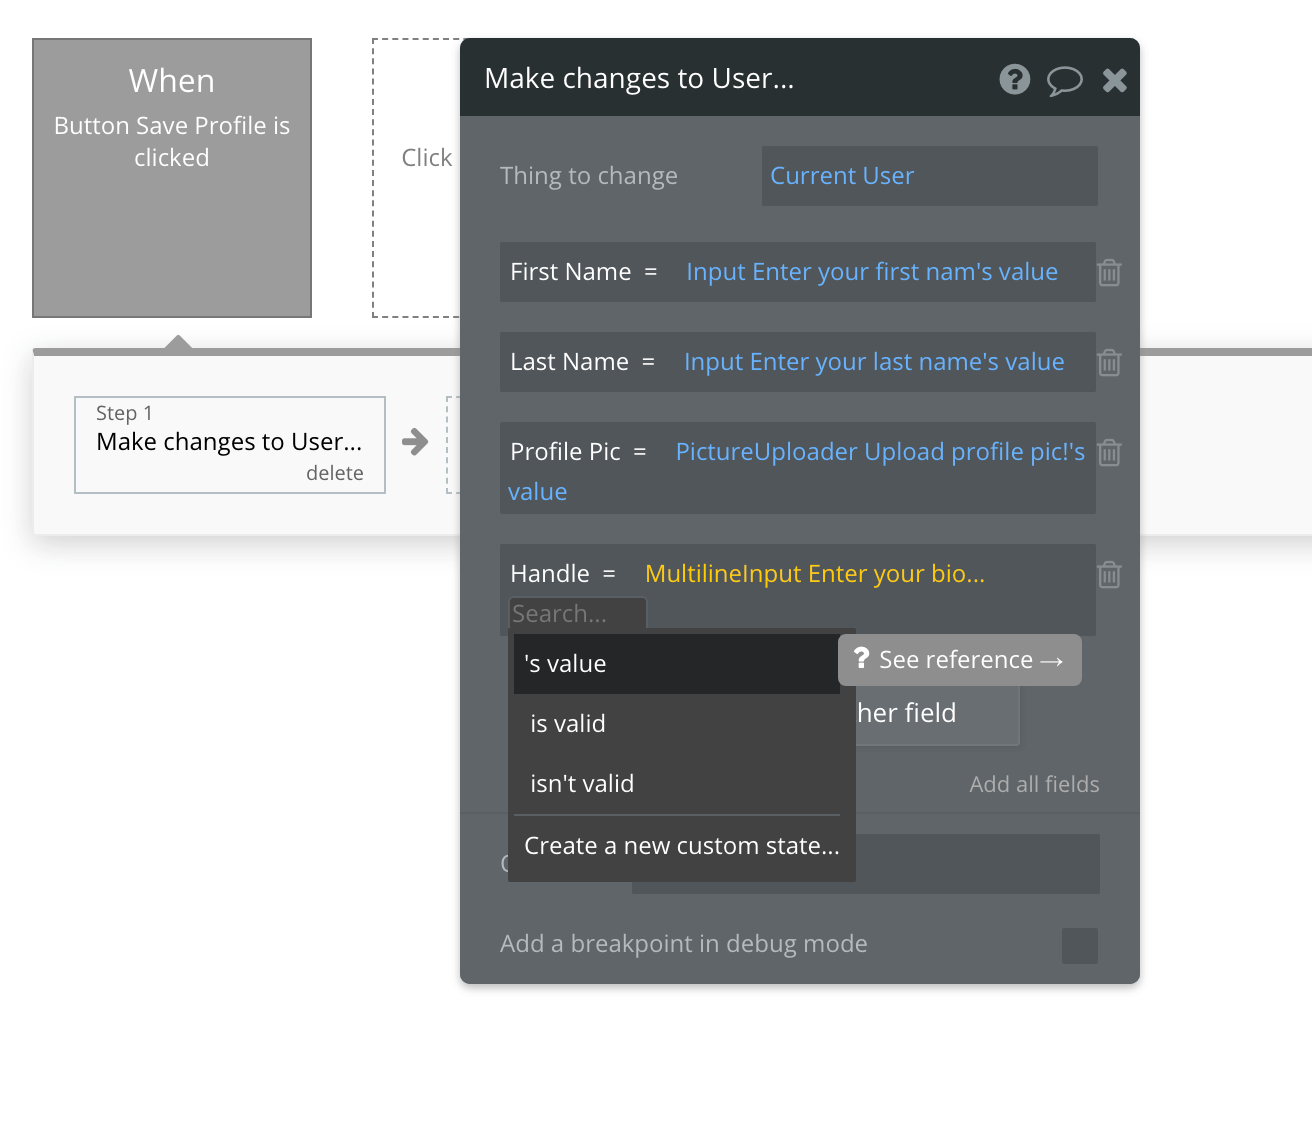
Create the action 'Make Changes to the Current User' using the input’s data as shown above:
- Thing to Change = 'Current User'
- First Name = 'Input Enter your first name’s value'
- Last Name = 'Input Enter your last name's value'
- Profile Pic = 'PictureUploader Upload profile pic!'s value'
- Handle = 'MultilineInput Enter your bio…'s value'
(Supporting materials: Lessons on “Saving data” and “Saving and modifying data”)
Uploading a ‘Video’ to the video library
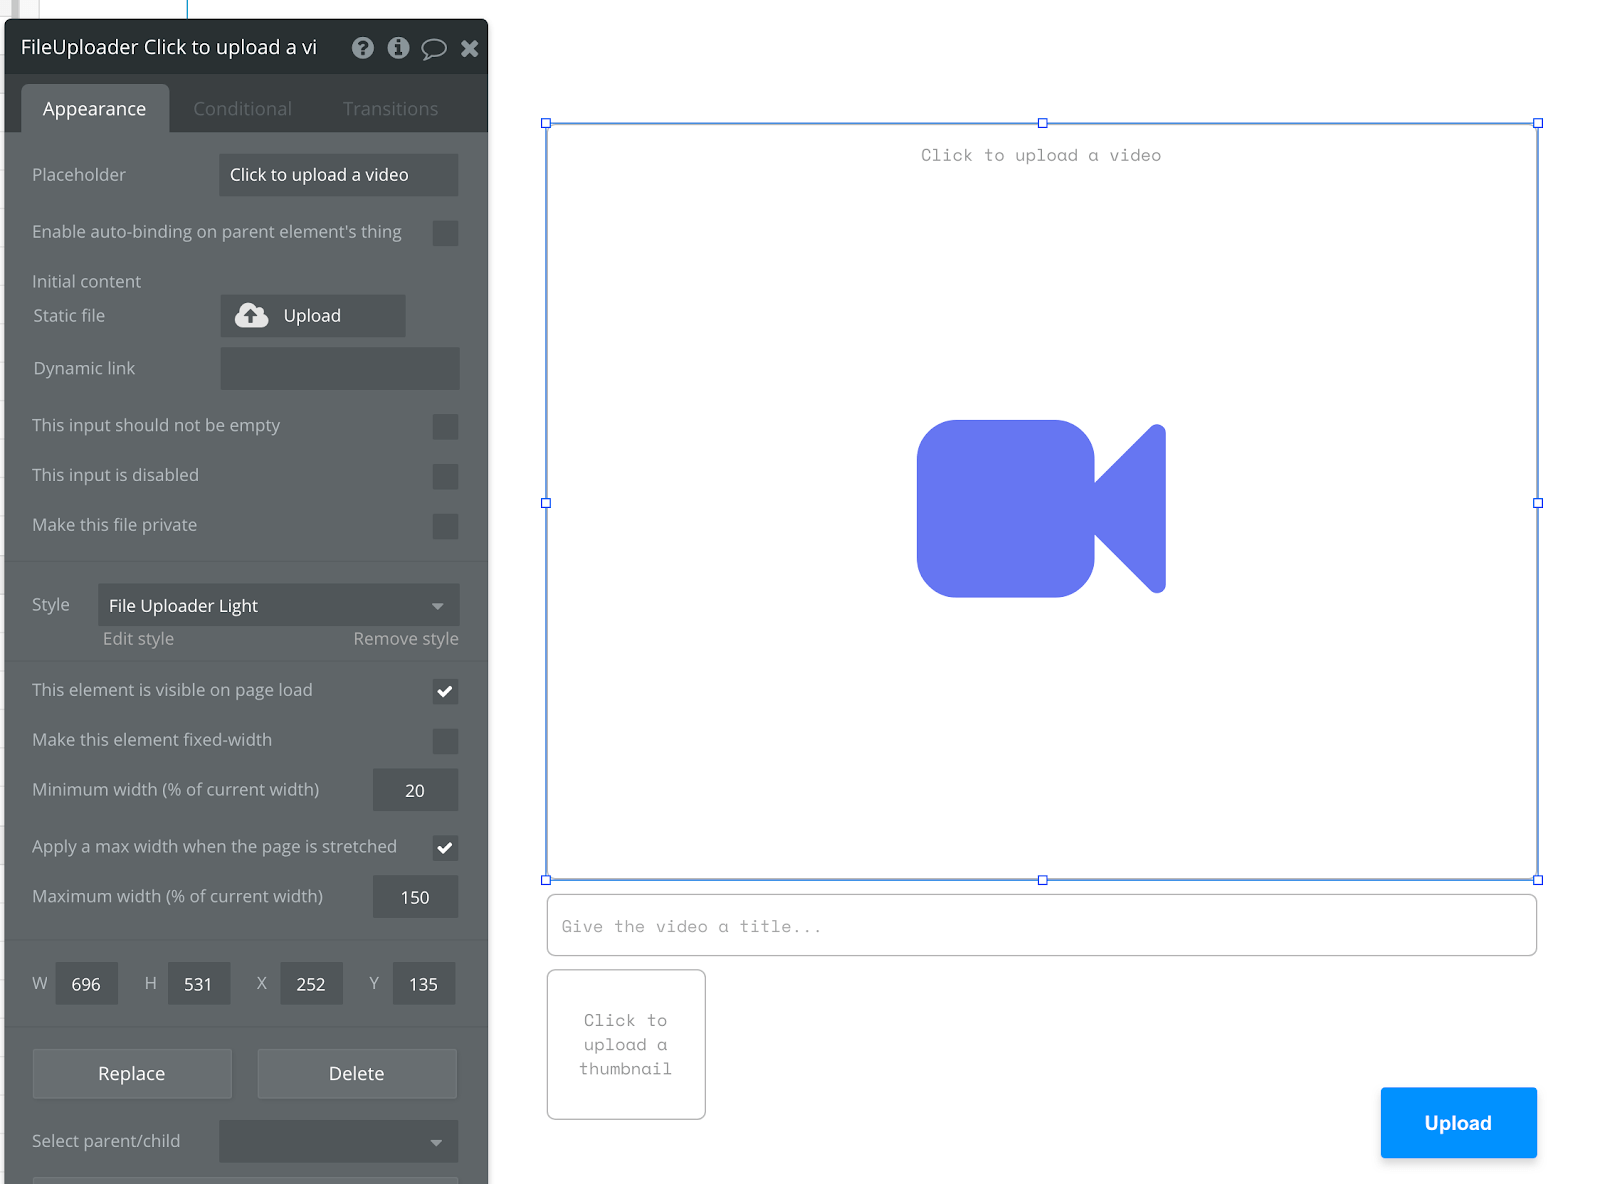
Build a page for uploading a Video to the video library, using a ‘FileUploader’ element, an icon, a Video Title input, and a Thumbnail Image Uploader icon. Add an 'Upload' button:
Click the Upload button and select " create a new workflow.
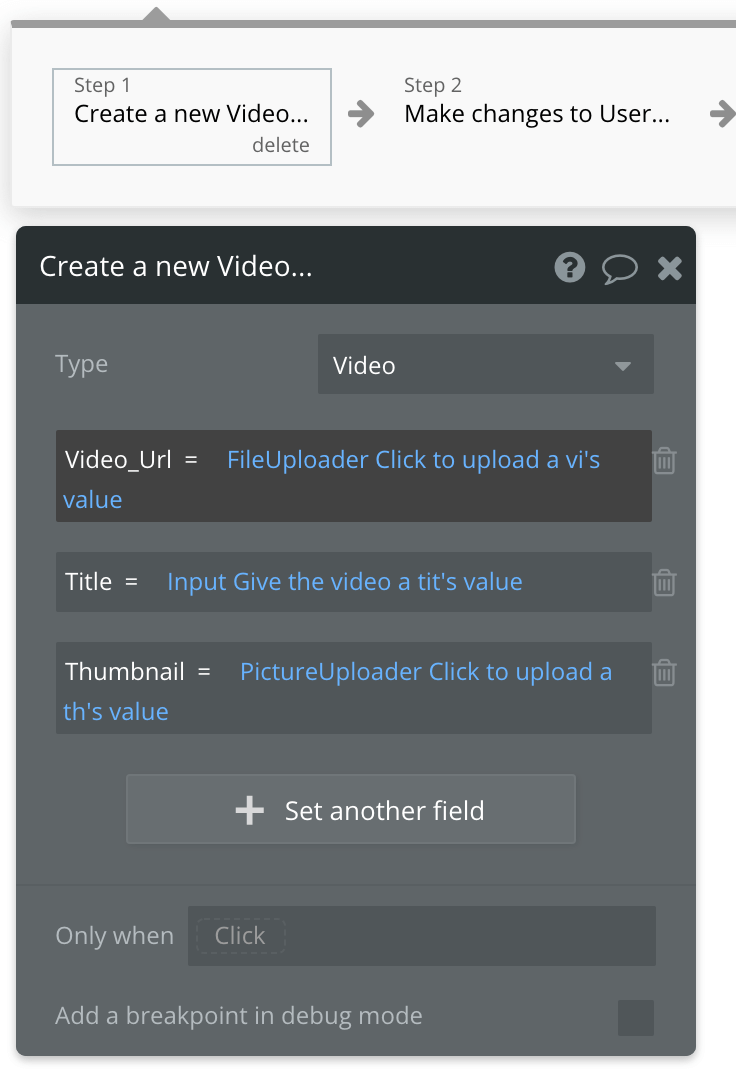
Step 1: “Create a new thing” > Type = Video with the following fields:
- Video_Url = FileUploader Click to upload a video's value
- Title = Input Give the video a title's value
- Thumbnail = PictureUploader Click to upload a thumbnail's value
In Bubble, when files are stored in the database, Bubble returns the Amazon Web Services url of the location of the file, which in this case is the video’s storage link. We’re actually uploading the video file itself to AWS via Bubble, and then saving the returned URL to access that file in the Video_Url. We can use that piece of data to then show the video in a video element later on.
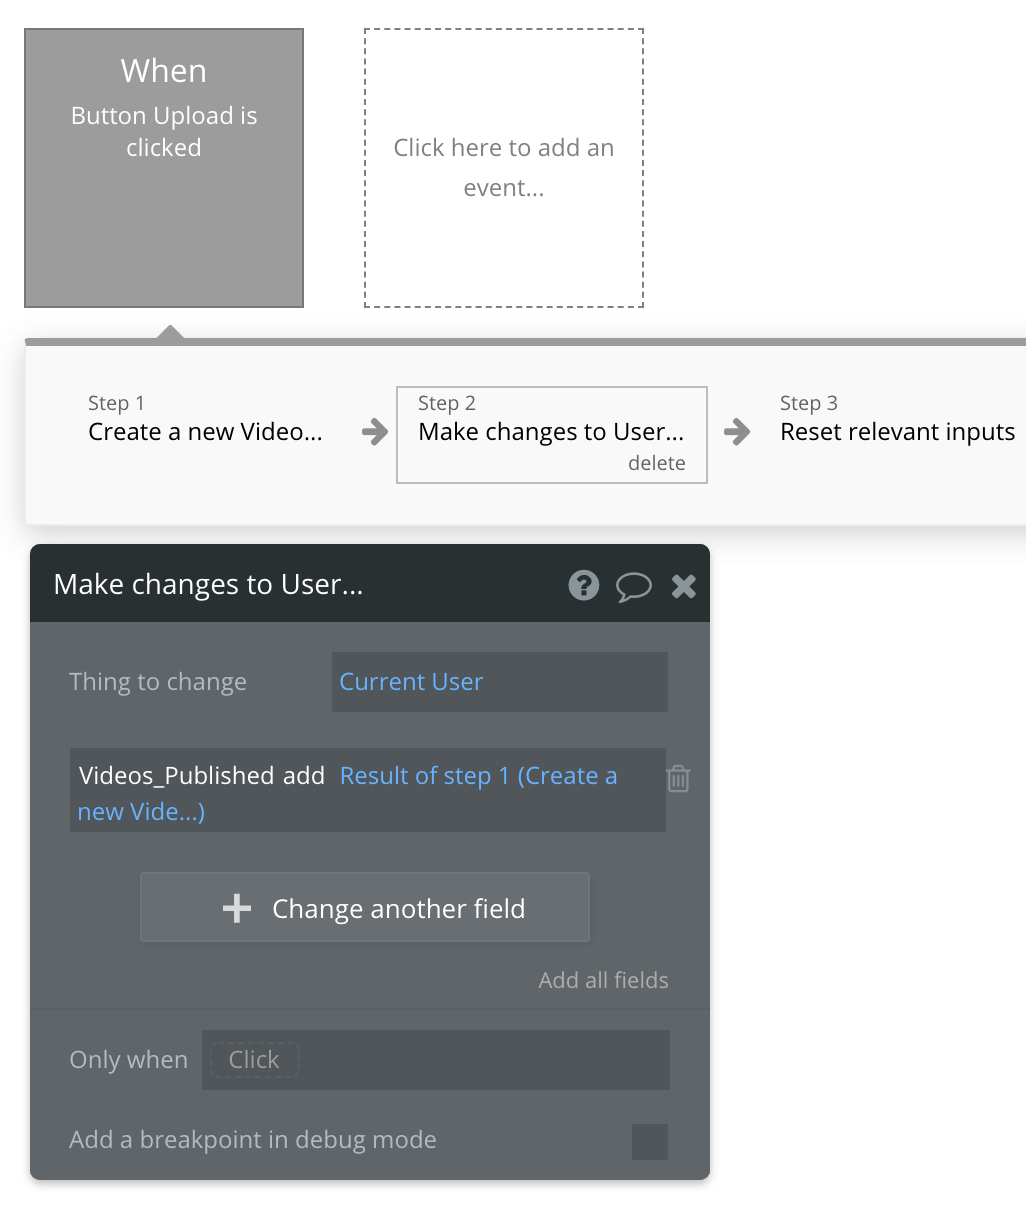
Step 2: create a new step and select "Make changes to a thing" > Set Thing to change = "Current User" > Change another field > Set the field as "Videos_Published add = Result of step 1 (Create a new Video...)" We don’t necessarily have to do this for an MVP, but depending on the app, saving data and mapping it to a user this way can save time on privacy rules in the future.
Step 3: Add ‘Reset relevant inputs’ action after this so that the user can post something else without needing to remove the old text they typed and files they added. Don’t worry, it's all been saved already before we reset these inputs.
That’s it! Videos will now be saved to the database, along with some default data Bubble automatically adds (like the user account who created the Video, the time it was created and a unique ID for the Video) which we can use for more advanced actions later down the line.
Displaying Uploaded Videos
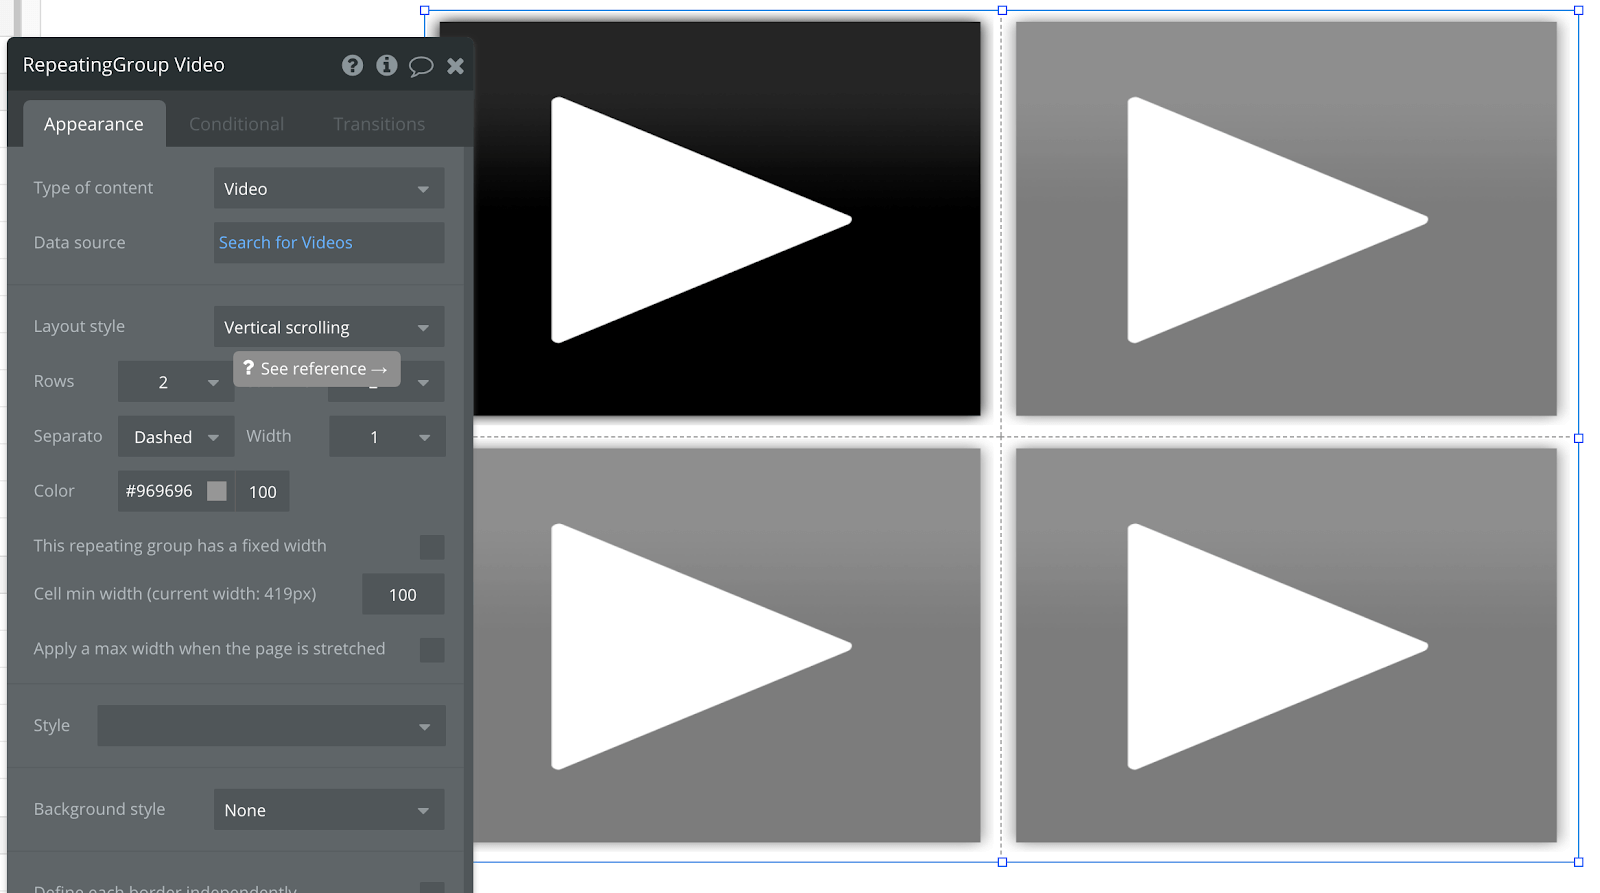
Now, we have to create the Video feed to view all of the Videos stored in the database. This is really easy to do in Bubble, but you can also add more complex filters and access rules when you get more versed in the Bubble platform. To do this, we add a ‘Repeating Group’ element from the element types on the sidebar of the Bubble editor to our ‘Latest’ page or wherever we want to display the videos.
Set the ‘Data Source’ to 'Search for Videos' - this will show all the Videos stored in the database (that have been created by users using the uploading form).
In each cell of the repeating group, you want a different Video to show.
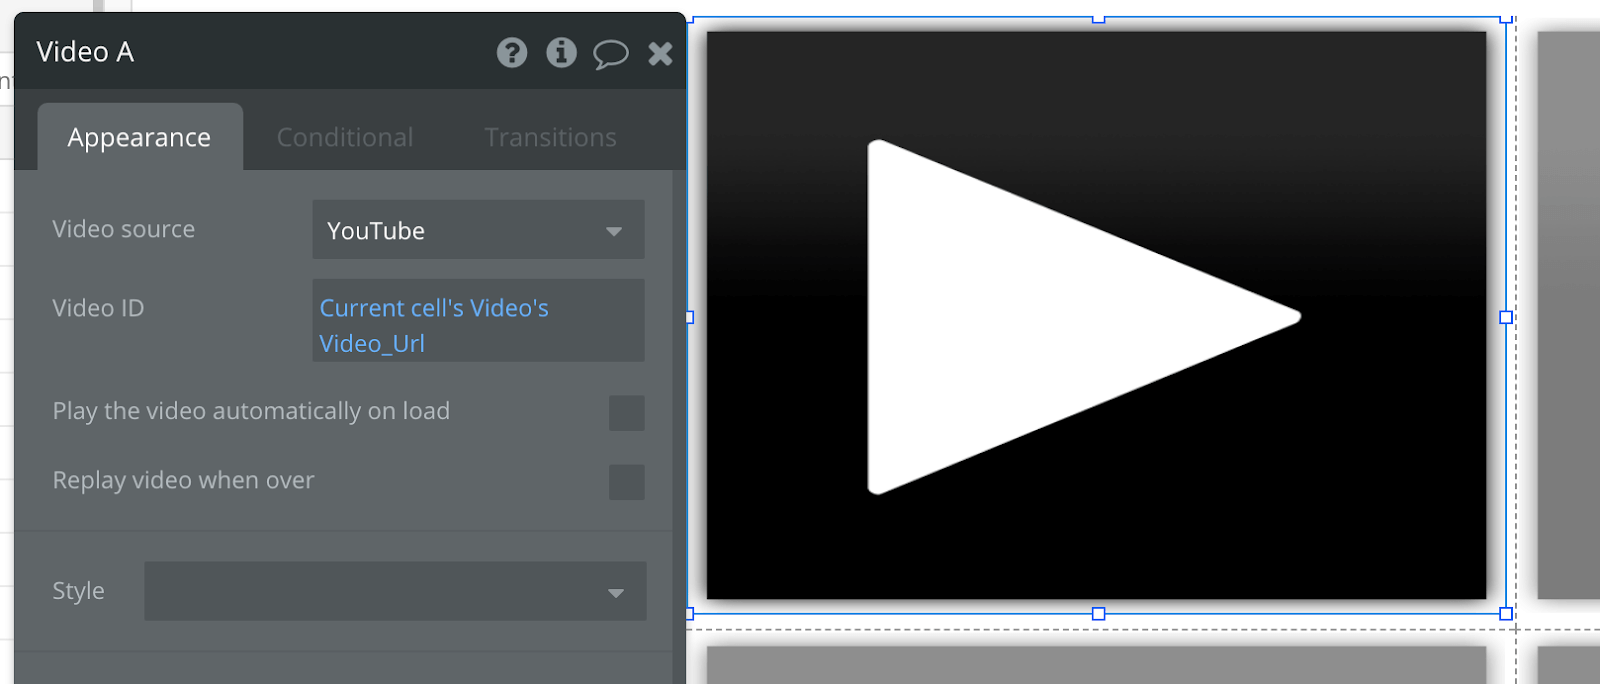
Add a ‘Video’ element and set Video source = YouTube, Video ID = Current cell's Video’s Video_Url.
Add a text element to Repeating Group cell #1 to display the ‘Current cells’ Video’s Created Date’ if you like, which will then show the date the video was uploaded to your platform! You can even sort by created date: set ‘Descending’ to ‘yes’ to sort videos chronologically so the latest video is shown first in the grid.
Your users can then scroll the repeating group as they would normally on YouTube and the cells will scroll through all of the different Videos stored in the database. Repeating Groups are very powerful, and you can add filters or constraints if you want to only show Videos created by the current user, or even build in a search with a text input to only show Videos whose title contains the search term!
That is the great thing about Bubble - once you have learned the basics of creating a piece of data, you can then do a lot more and use the same technique to create other types of data in the database. (See our supporting materials: Lesson on “Saving and modifying data”
How to Show logged-in users their Videos but a generic Video feed to logged-out users
Create a Conditional statement to show a different data source based on if the user is logged in or out.
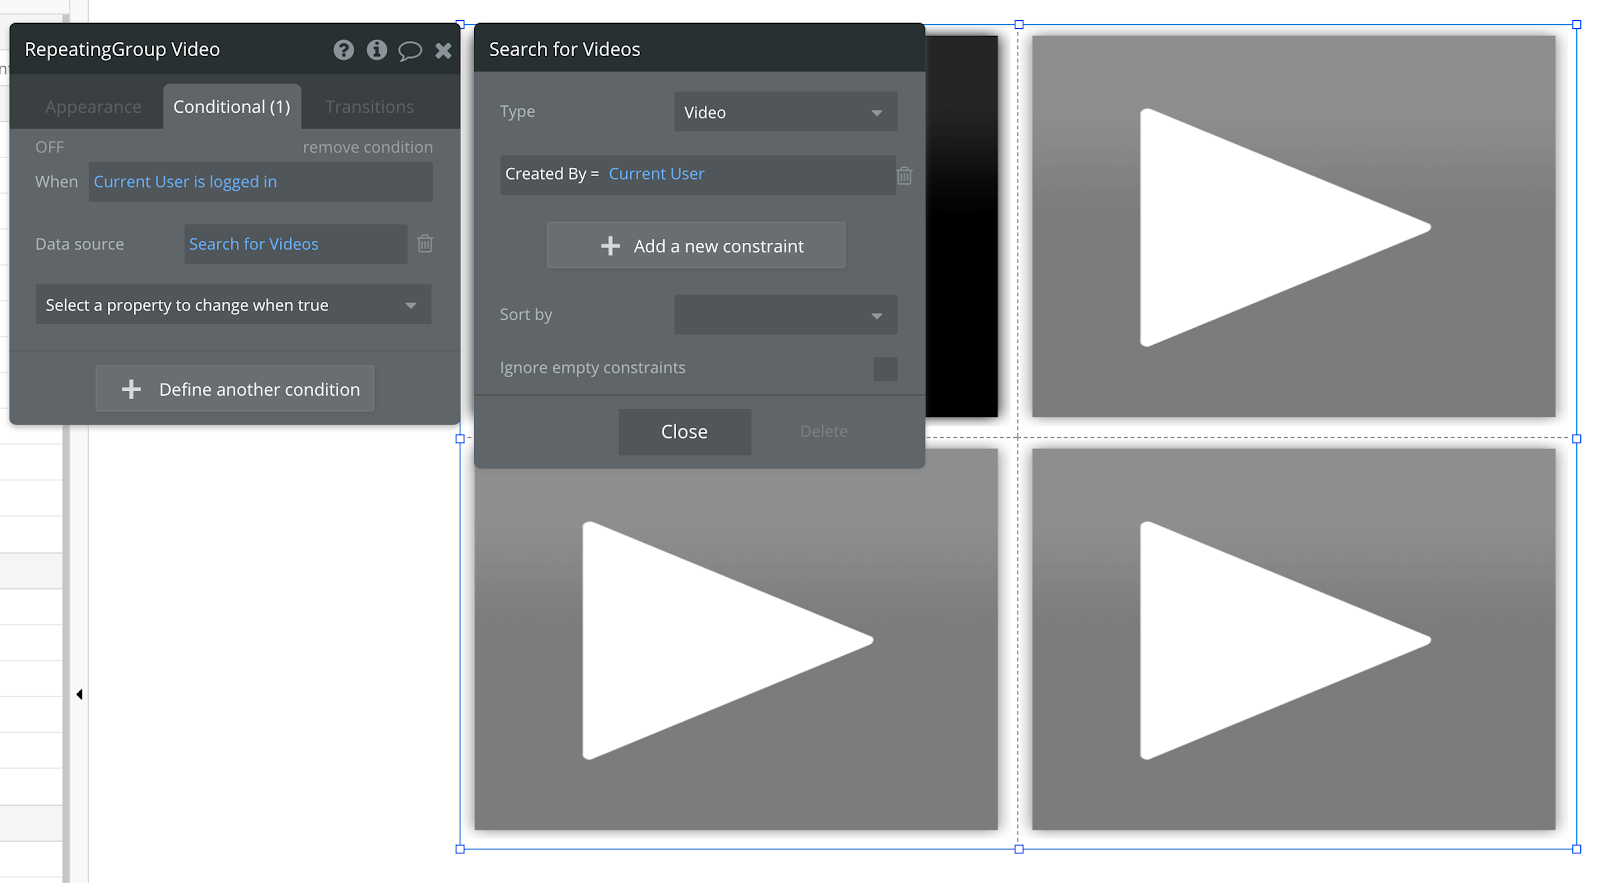
Go to the Conditional tab in Bubble for your Repeating Group element. Create the following Condition: 'When the Current User is logged in’ > Data source = Search for Videos > Type = 'Video,' Created By = 'Current User'.
The Repeating Group will now show only Videos that have been ‘Created By’ the ‘Current User’, i.e. the person logged in. This is a great way to show different data to different users. Remember, Repeating groups can only have one data type each, so we can’t change the type of data it shows to anything other than ‘Video’: if we wanted to show a list of Users in the database for example we would need a separate Repeating Group with the data type set as User. (See our supporting materials: Lesson on “Using conditionals”).
Additional features
Privacy & Security: Now that you have the basics of your app, don't forget to start setting some privacy rules and conditionals to keep your data secure - starting with roles in the 'Privacy' section of your Data tab. You can also check if you're unintentionally exposing any data with an API checker.
You can also add some fun additional feature ideas to add more functionality to your no-code YouTube clone. These are not only features your users will love, but building these will give you more practice with designing pages, structuring the database, and building workflows:
- Adding a new data type ‘Comment’ and letting users submit comments on each video.
- Adding a search input and letting users search for videos by title.
Launch
Hiring a developer or dev team to build this app would cost thousands, if not tens-of-thousands of dollars. Well, now you can treat yourself to a vacation, because you can build and launch your app in Bubble for free.
As you launch and grow in users, paid plans allow you to host the app on your own custom domain, and these start as low as $25 per month. Some templates and plugins may cost more, but you can build all the functionality of a video platform without any additional costs.
Templates
If you don’t want to build your no-code YouTube clone from scratch, you can purchase one of the templates made by our community members:
• Tubely Video Sharing by Rapid Dev
• Flixly like Netflix by Rapid Dev
Plugins
Videos can sometimes exceed the 5GB upload limit that Bubble applies, so you can use third party plugins for uploading HD videos and storing them, like File Uploads by Zeroqode.
Start Building
Bubble can help you build a user-generated video hosting platform with custom features of your choosing, all without code!
To get started for free, sign up for Bubble.
Connect with other users building a video sharing platform on Bubble's community forum.
Build for as long as you want on the Free plan. Only upgrade when you're ready to launch.
Join Bubble