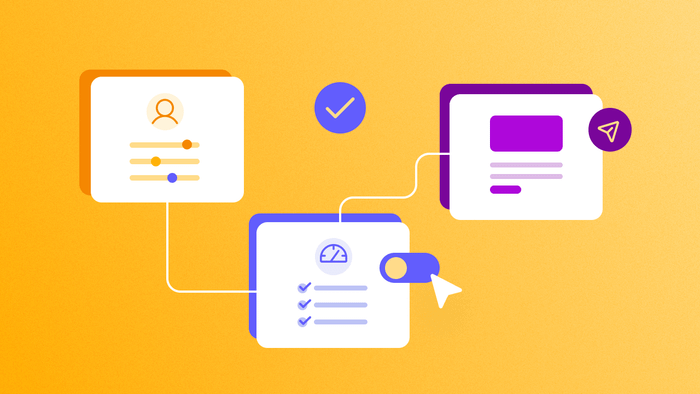
TL;DR: Building an app with AI involves three main steps: write a detailed prompt describing your app, let the AI generate a blueprint with database structure and workflows, then refine and customize. Success comes from knowing when to use AI for rapid generation and when to switch to hands-on editing for precise control.
AI app development has evolved rapidly from limited coding assistants into tools that can generate fully functional apps from a simple prompt. This has given rise to "vibe coding" — building apps through natural language. But not all AI app builders are created equal. Most vibe coding tools generate code you can't read or customize without coding skills, leaving you stuck when you need to make changes.
Bubble is different: it generates visual apps you can see, understand, and edit without code. You can chat with AI when you want speed, or edit directly when you want control. And with built-in security, hosting, and scaling, your app is production-ready from day one.
In this article, we'll walk you through the complete process of building an app with AI — from understanding how AI app development works to generating your first prototype and deploying a production-ready product with Bubble.
What is AI app development and how does it work?
AI app development is the process of using natural language to describe an app you want to build, and an AI model generates a complete, production-ready application in minutes, including the user interface, database structure, and functional workflows you can see and edit.
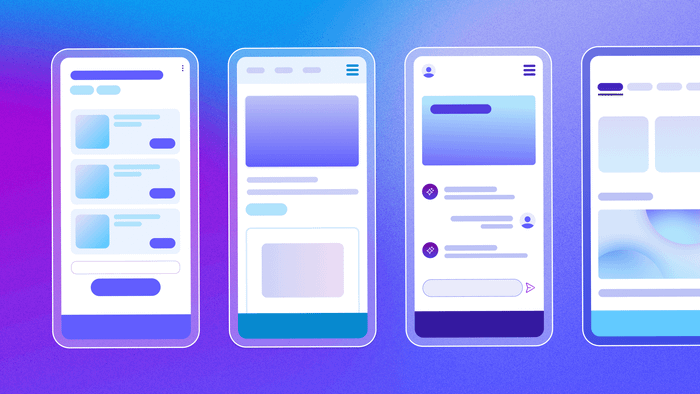
Modern AI app builders create complete foundations for applications, including:
- A user interface (UI) — the screens and visual elements your users will interact with.
- A database — the backend structure to store and manage your app's data, like user profiles and posts. (Note: Some AI coding tools may not include database functionality, requiring you to integrate with a separate backend service.)
- Workflows — the logic rules that make your app work, such as what happens when a user clicks a "Sign Up" button. With AI coding tools, this logic is written in code, but in Bubble it's presented and edited visually.
You can launch quickly or continue refining with Bubble's visual editor to perfect your app before deployment.
Understanding AI app building: capabilities and limitations
AI is incredible for getting started, but it's important to know what it does well and where you'll need to take over.
AI's Strengths:
- Speed — go from a simple idea to a functional prototype in minutes.
- Idea validation — quickly create a testable version of your app to see if your concept has potential.
- Foundation building — AI can instantly generate the core structure of your app, saving you hours of setup.
AI's Limitations:
- Code dependency — some AI builders generate code that may be difficult to modify without coding skills, limiting customization for non-developers.
- Limited customization — when AI can't build a specific feature, you may need coding skills or visual editing tools to complete the implementation.
- The "last 20%" problem — you get a great prototype but no clear path to a polished, production-ready product without additional development work or infrastructure setup. That's where visual editing really comes in especially handy.
Why choose Bubble for AI app development?
Bubble is the only fully visual AI app builder that combines rapid prototyping with production deployment, security, and scaling—giving you a foundation to build a real business on.
Whether you're building an internal tool, your startup's MVP, or a full-scale SaaS business, Bubble AI helps you get started fast by generating a functional app foundation.
You have complete flexibility to refine every part of your app using Bubble's powerful visual editor — switch to it anytime you want precise control. And with built-in security, privacy, and scalability features, your app is ready to grow from day one.
Plus, Bubble lets you build, test, and refine your full app without paying a cent until you’re ready to deploy.
How to build an app with AI in 7 steps
Building an app with AI on Bubble begins with a simple description of what you’re building. Head to the AI app generation page to get started.
Step 1: Craft your prompt
The first step in building an app with Bubble AI is crafting an effective prompt. Simply describe your idea in natural language, and the platform takes it from there. Your prompt can be as short as a single phrase or include specific features—the AI adapts to your level of detail, making informed guesses where needed while you maintain control over the final result.
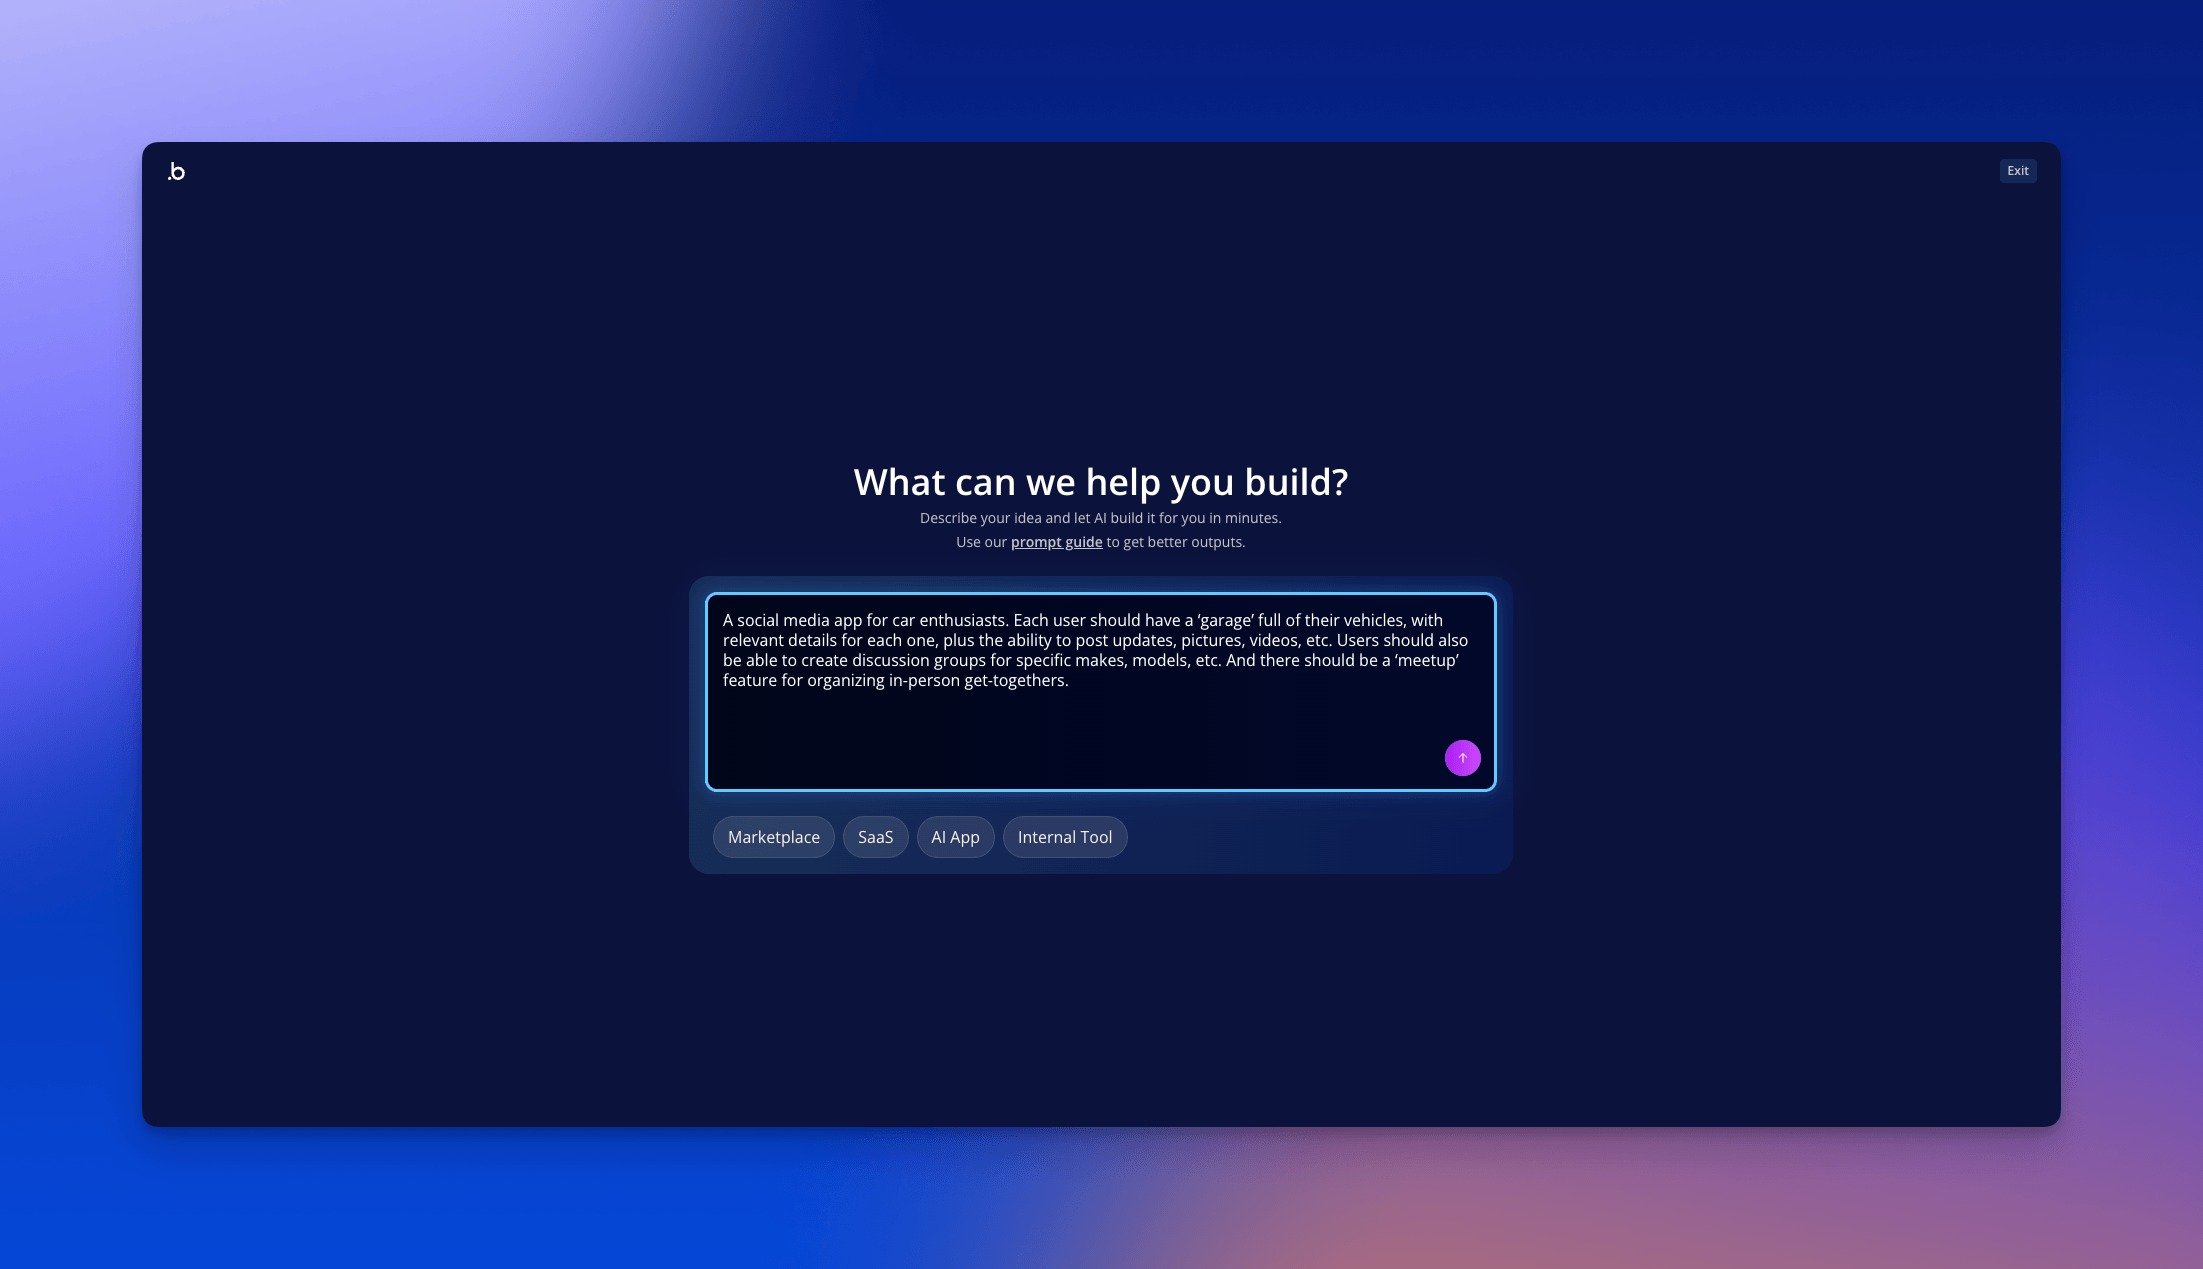
For our example, we'll use this expanded prompt for more targeted results:
“A social media app for car enthusiasts. Each user should have a ‘garage’ full of their vehicles, with relevant details for each one, plus the ability to post updates, pictures, videos, etc. Users should also be able to create discussion groups for specific makes, models, etc. And there should be a ‘meetup’ feature for organizing in-person get-togethers.”
A concise but specific prompt like this provides clear expectations, ensuring the AI’s output aligns more closely with your vision.
Step 2: Generate a blueprint
Click Generate and Bubble AI turns your prompt into detailed key features, helping you visualize your app's functionality before generating the full application.
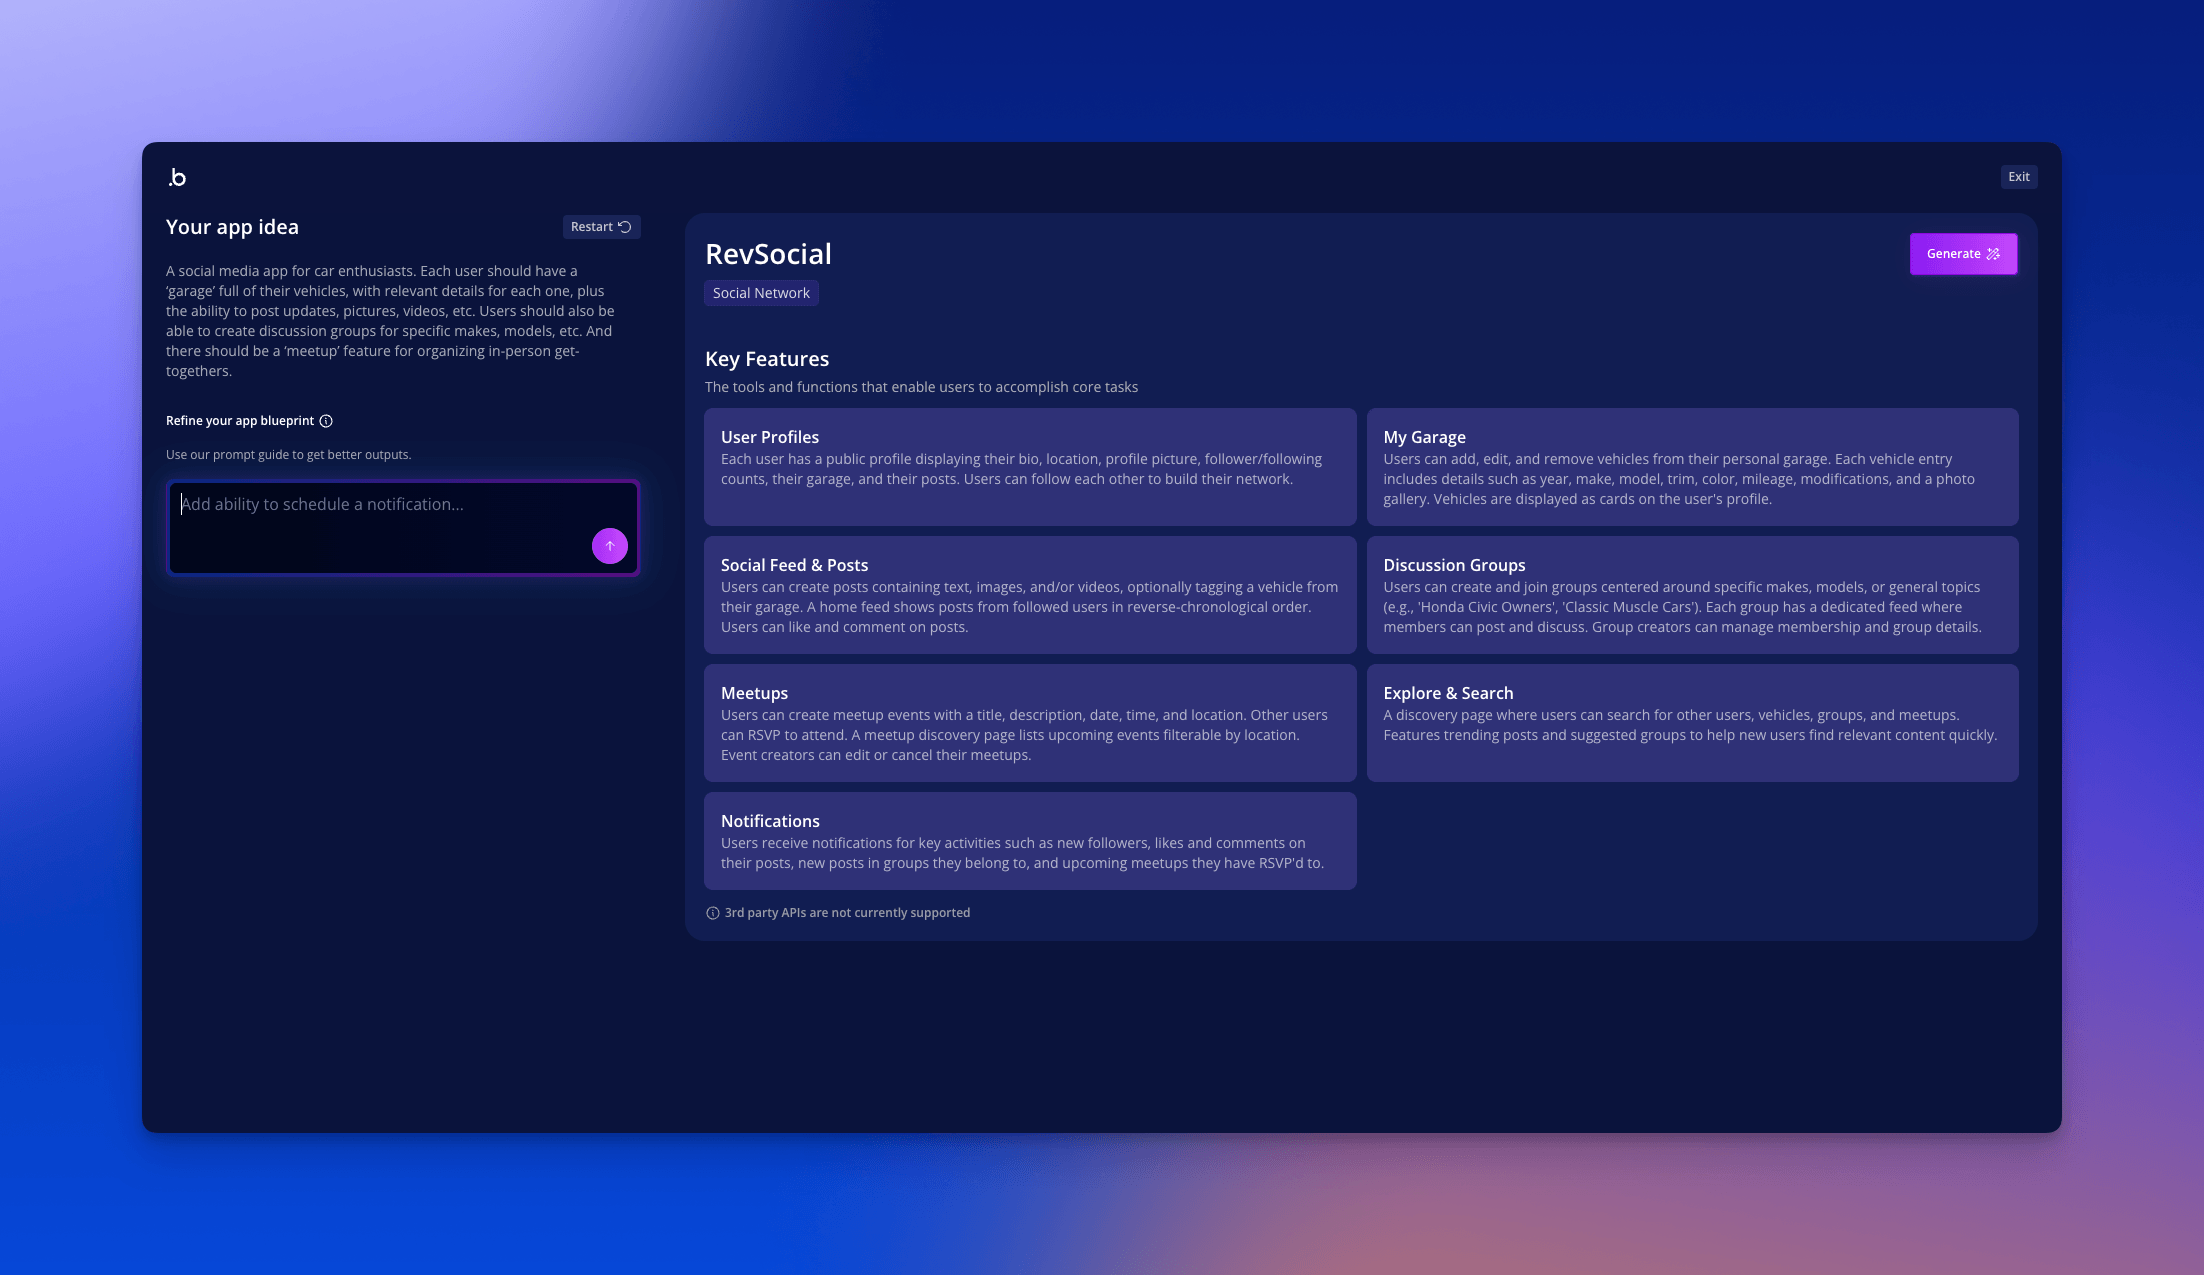
For our car enthusiast social media app, Bubble AI might generate these key features:
- Garage Management: Users can add vehicles to their personal 'garage,' inputting details like make, model, year, and photos. They can edit or remove vehicles as needed.
- Content Creation and Sharing: Users can create posts to share updates, pictures, and videos related to their cars. Posts can be viewed by followers and interacted with through likes and comments.
- Discussion Group Management: Users can create and join discussion groups focusing on specific makes or models. In groups, users can initiate conversations and participate in existing threads.
- Meetup Organizer: Users can create and organize events, allowing them to arrange meetups with details like date, time, and location. Other users can RSVP to attend these meetups.
- User Authentication: A secure signup and login system ensuring only registered users can access their personal garages, post content, and join discussions.
- User Profile Management: Users can manage their profiles, which include personal details, a listing of their vehicles, and their posts. Profiles can be customized with an avatar and a bio.
Step 3: Refine your blueprint
Review the key features to ensure everything aligns with your vision, then refine as needed. Modify the blueprint the same way you created your prompt — by describing changes in natural language.
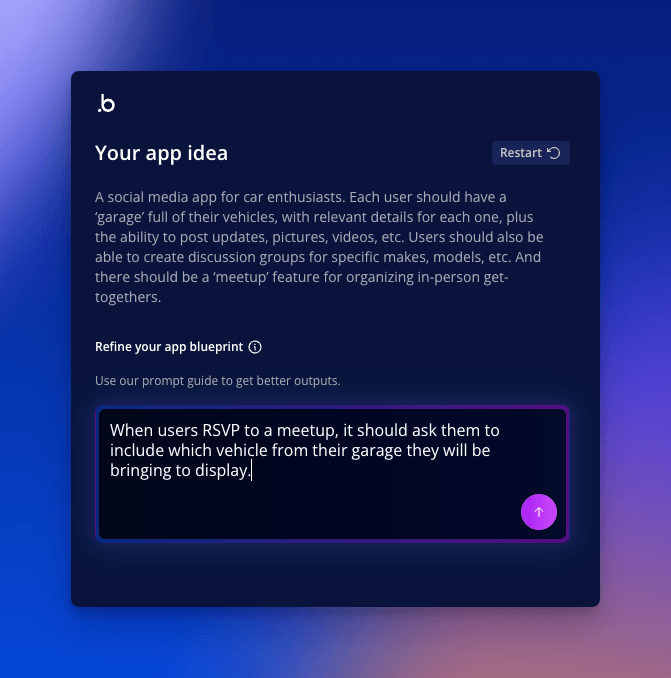
The AI often suggests useful features you hadn't considered. If it includes anything you don't want, simply ask it to remove those features.
You might also notice that some features are correctly included, but lack some of the specificity you have in mind. For example, if you wanted to add more detail to the meetup feature, you might request:
“When users RSVP to a meetup, it should ask them to include which vehicle from their garage they will be bringing to display.”
Bubble AI would then update the blueprint accordingly. It may add a new user story:
- As a user, I want to RSVP to meetups and indicate which of my vehicles I will be bringing.
And it may refine or add details to an existing feature:
- Meetup Organization: Users can plan and manage meetups, including setting a location, date, and time, providing other users the option to RSVP and attend. While RSVPing, users can specify which of their vehicles from their garage they’ll bring to the meetup.
Step 4: Generate your app
Once you’re happy with your blueprint, just click Generate, and Bubble AI will create an interactive prototype of your app. While your app is generating, you can take a tour of the Bubble editor to start getting familiar with the interface.
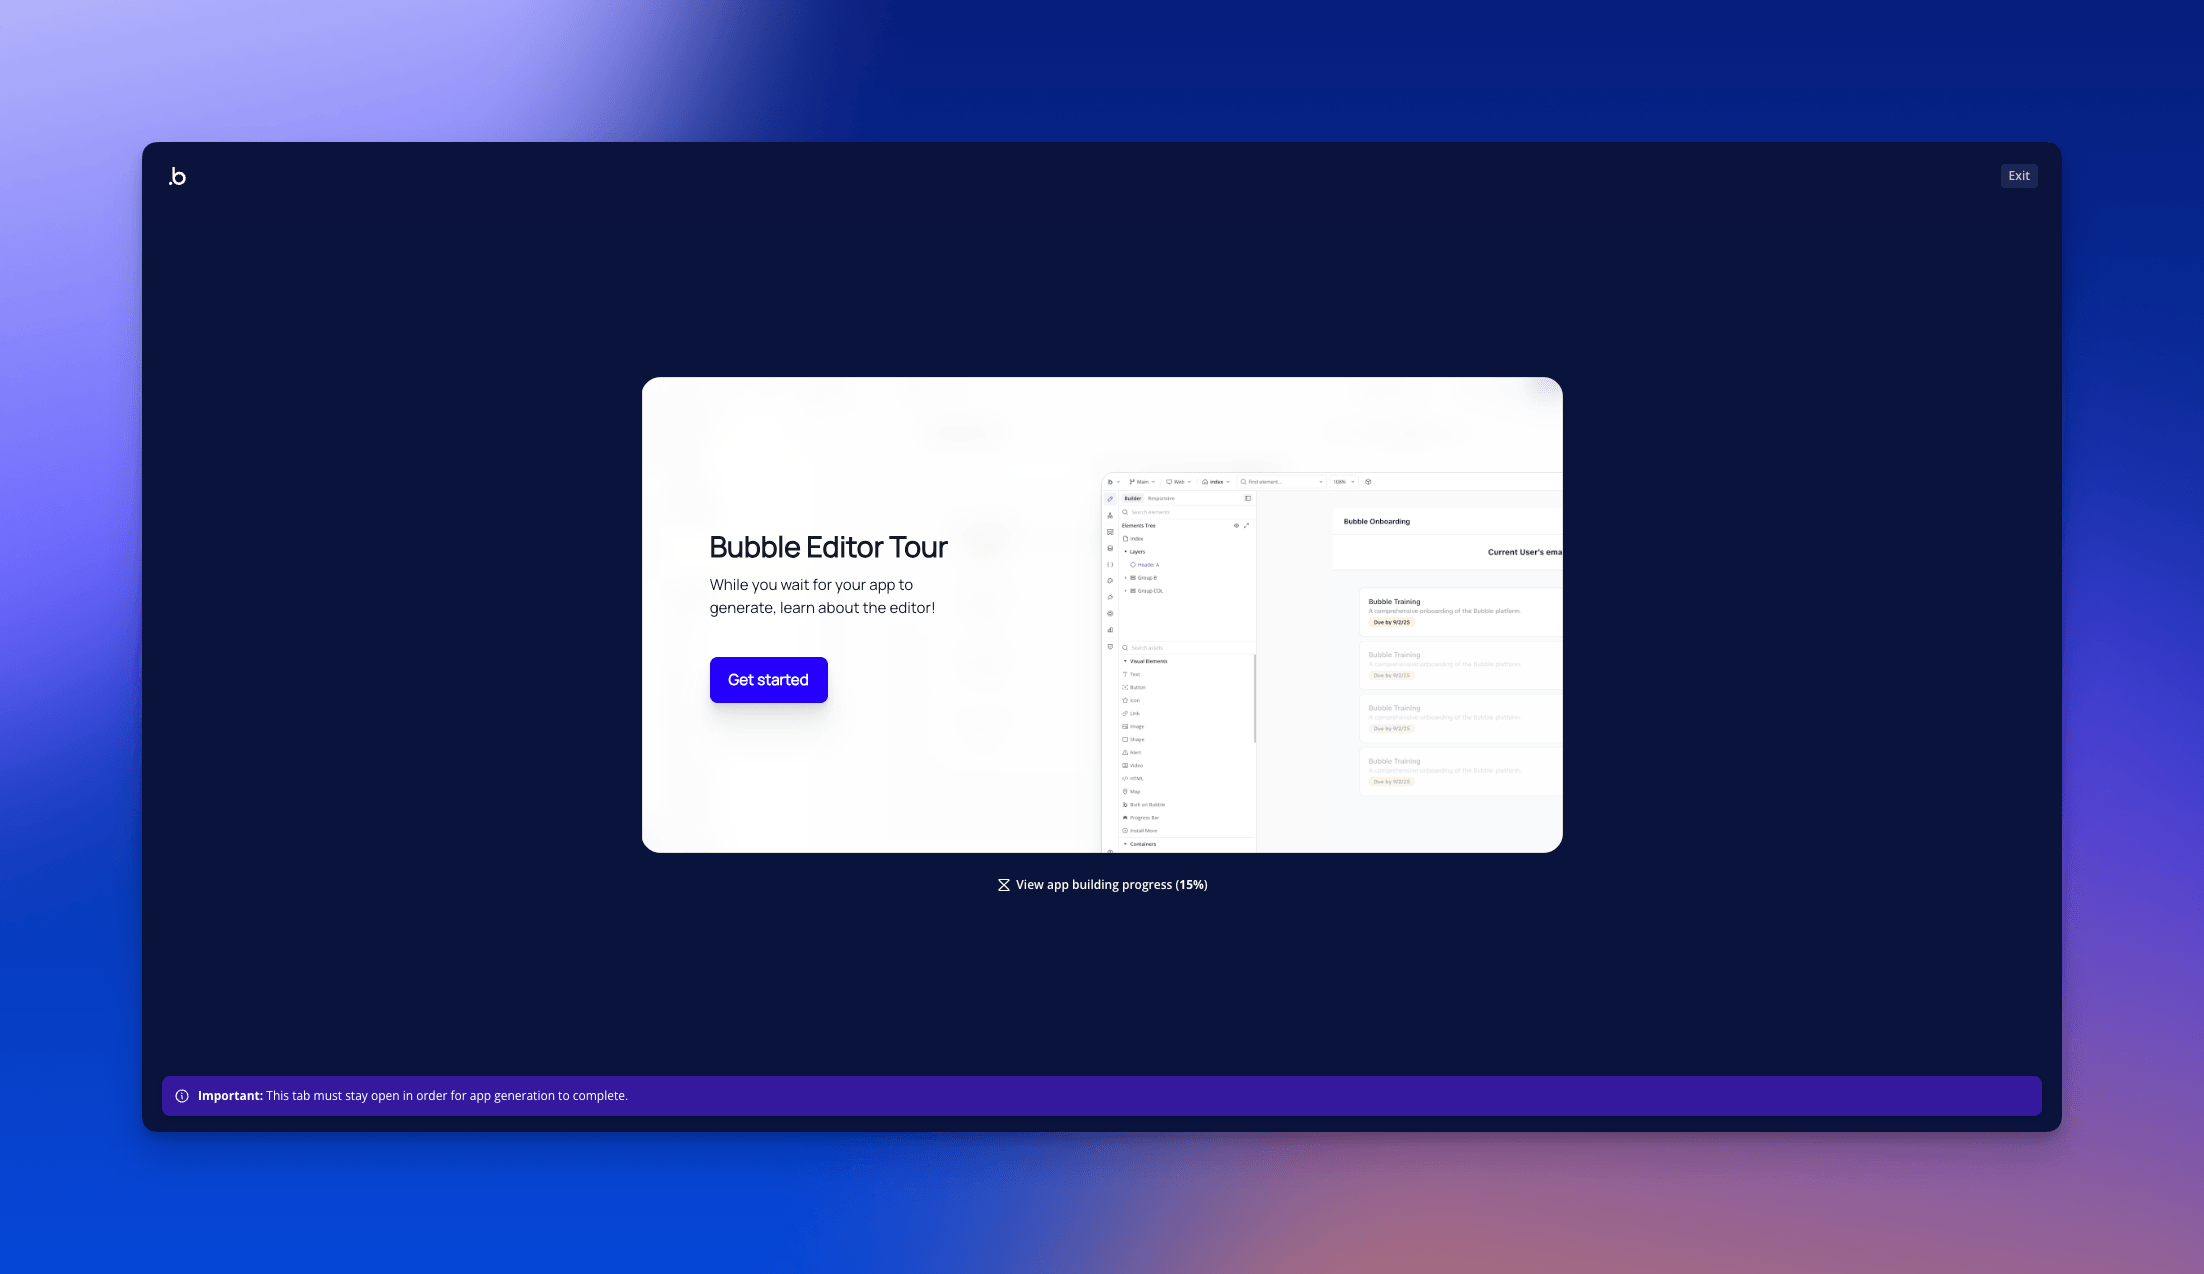
In just a few minutes, you'll receive a wireframed interface, functional workflows, and a structured database with sample data.
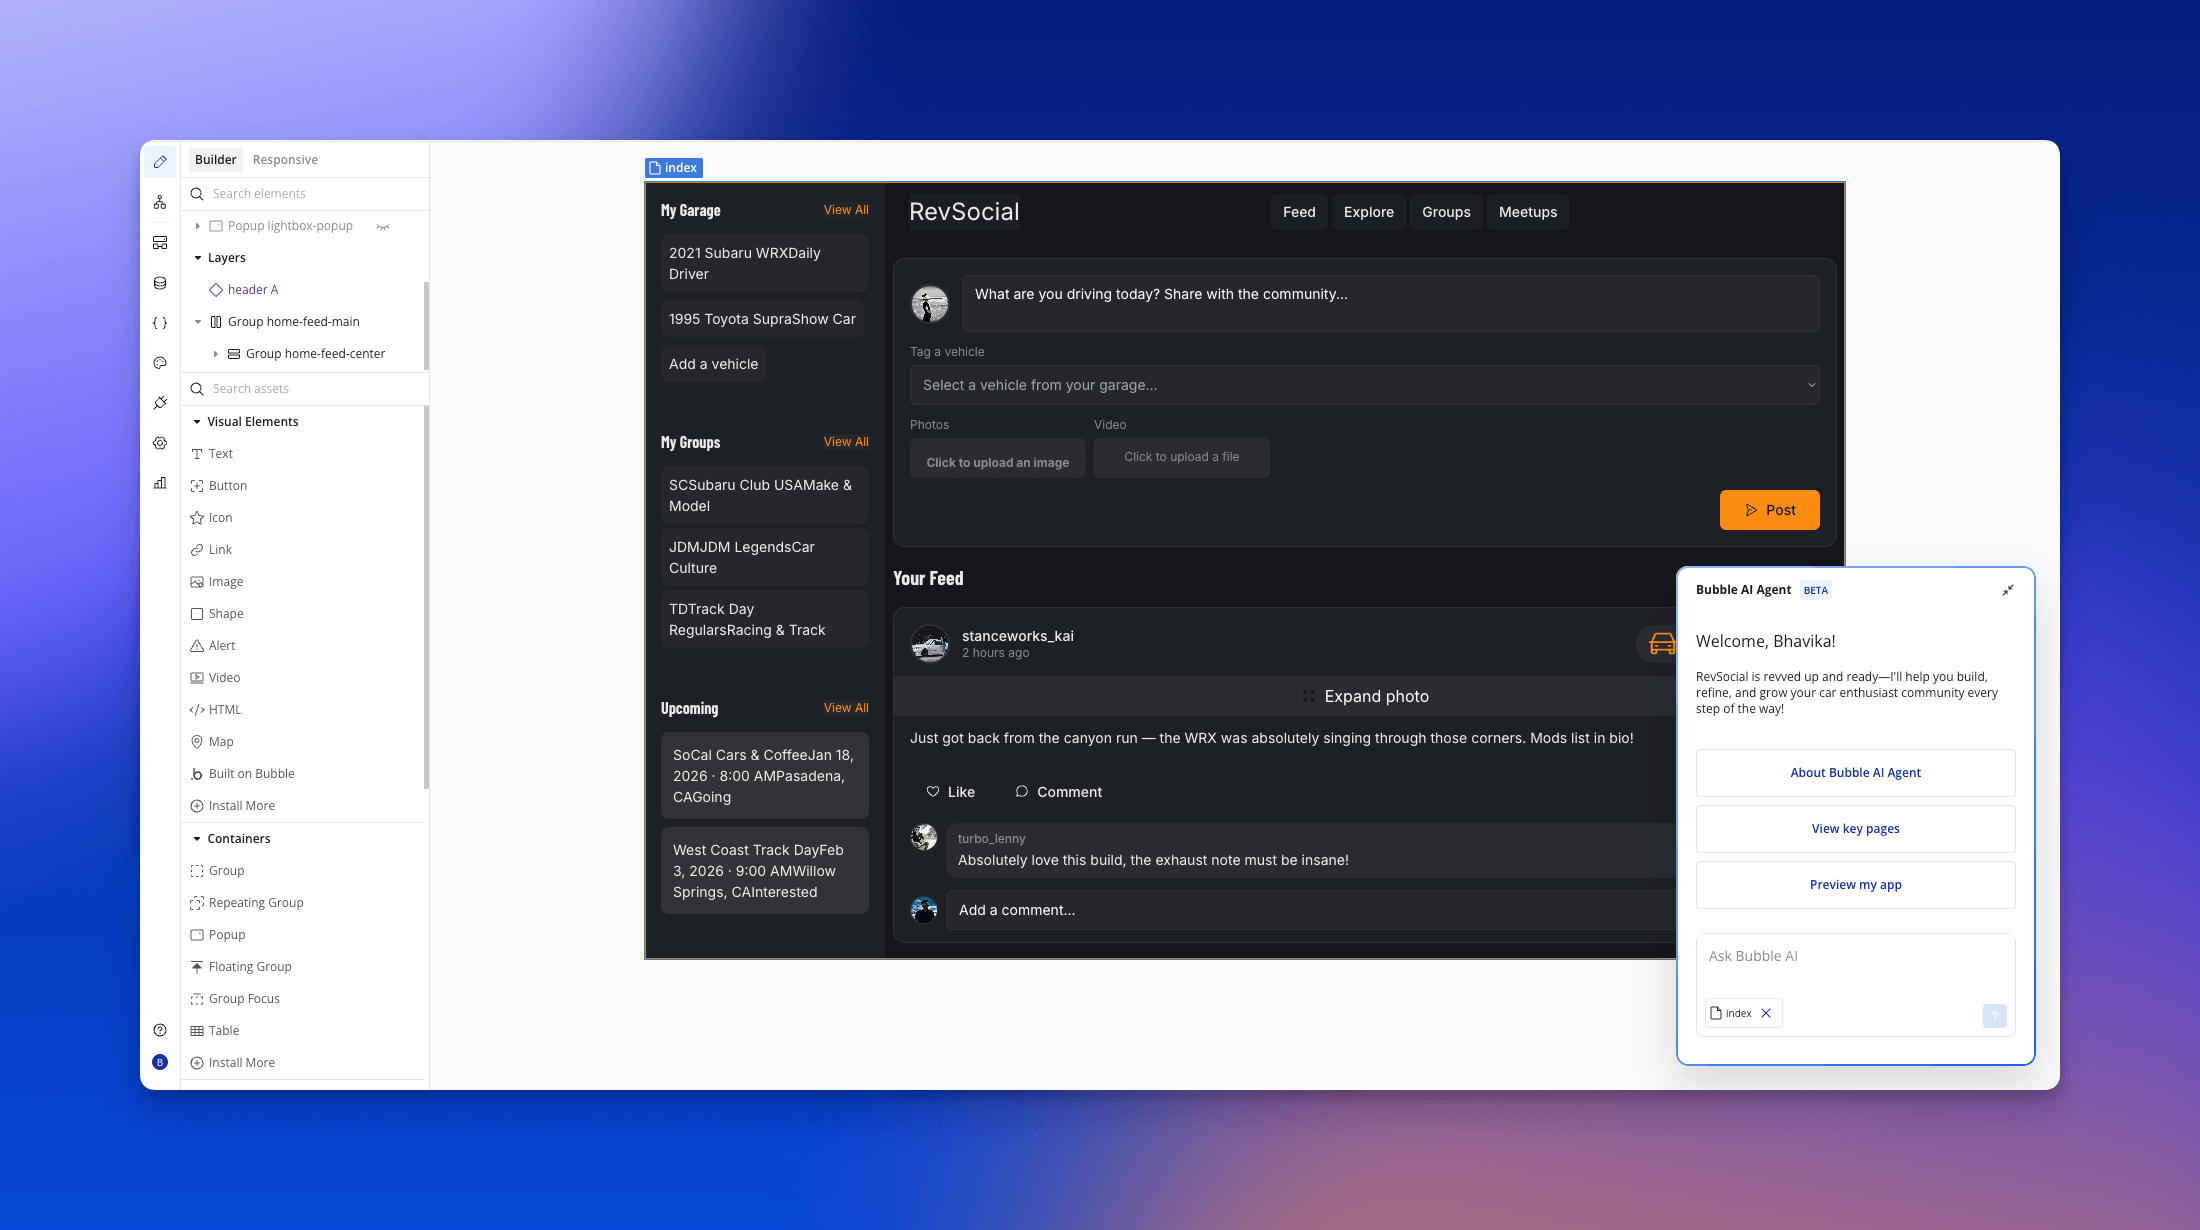
For our example app, the AI-generated output might include:
- A navigation bar including links to Home, My Garage, Discussion Groups, Meetups, and Profile, along with a Log Out button
- Prebuilt pages filled with sample data representing vehicles, posts, and discussions
- Functional user interactions, like the ability to post updates, add or remove vehicles, join groups, and create meetups
Step 5: Preview your app
After generation, you can preview your app to explore its structure, functionality, and design. This allows you to assess what’s working well and identify areas that need improvement. Click on the Preview button in the top-right corner to get started.
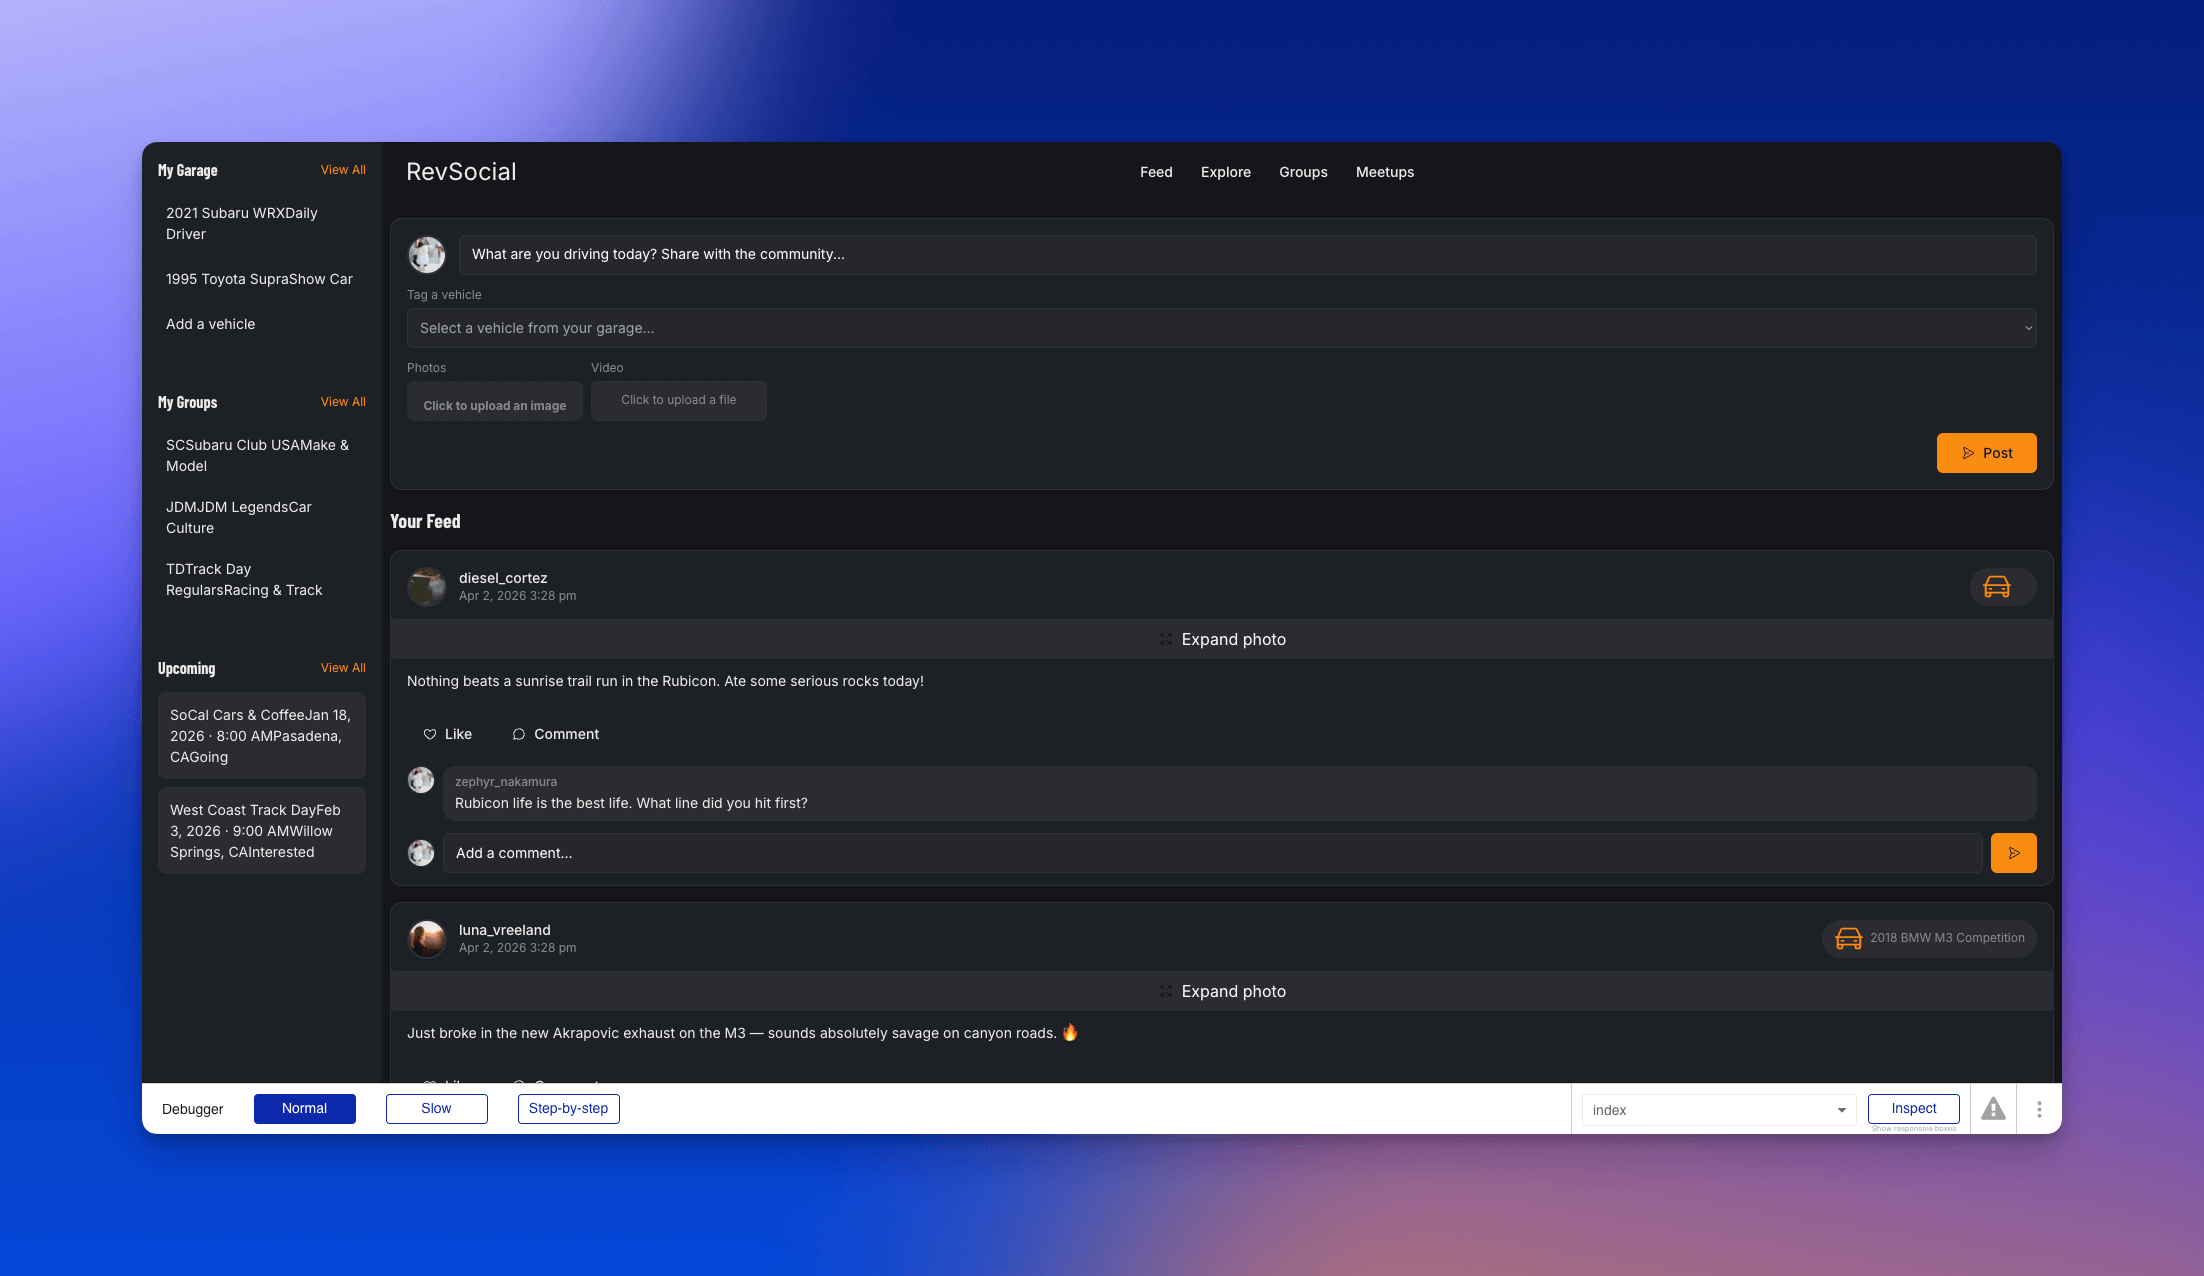
While reviewing your app, look for things like:
- Navigation — verify all key pages are present and linked correctly
- Workflows — test whether each feature works as expected
- Data accuracy — check that sample records display and connect properly
You'll likely find that most features work out of the box, while some may need refinement or additional logic. For example, posting might work perfectly, but you might want to add image compression. Or you might want to add email notifications when someone RSVPs to a meetup.
Step 6: Debug and refine app functionality
Once you've previewed your app, you have two powerful ways to refine it: use the Bubble AI Agent for quick changes through natural language, or switch to the visual editor for precise, hands-on control.
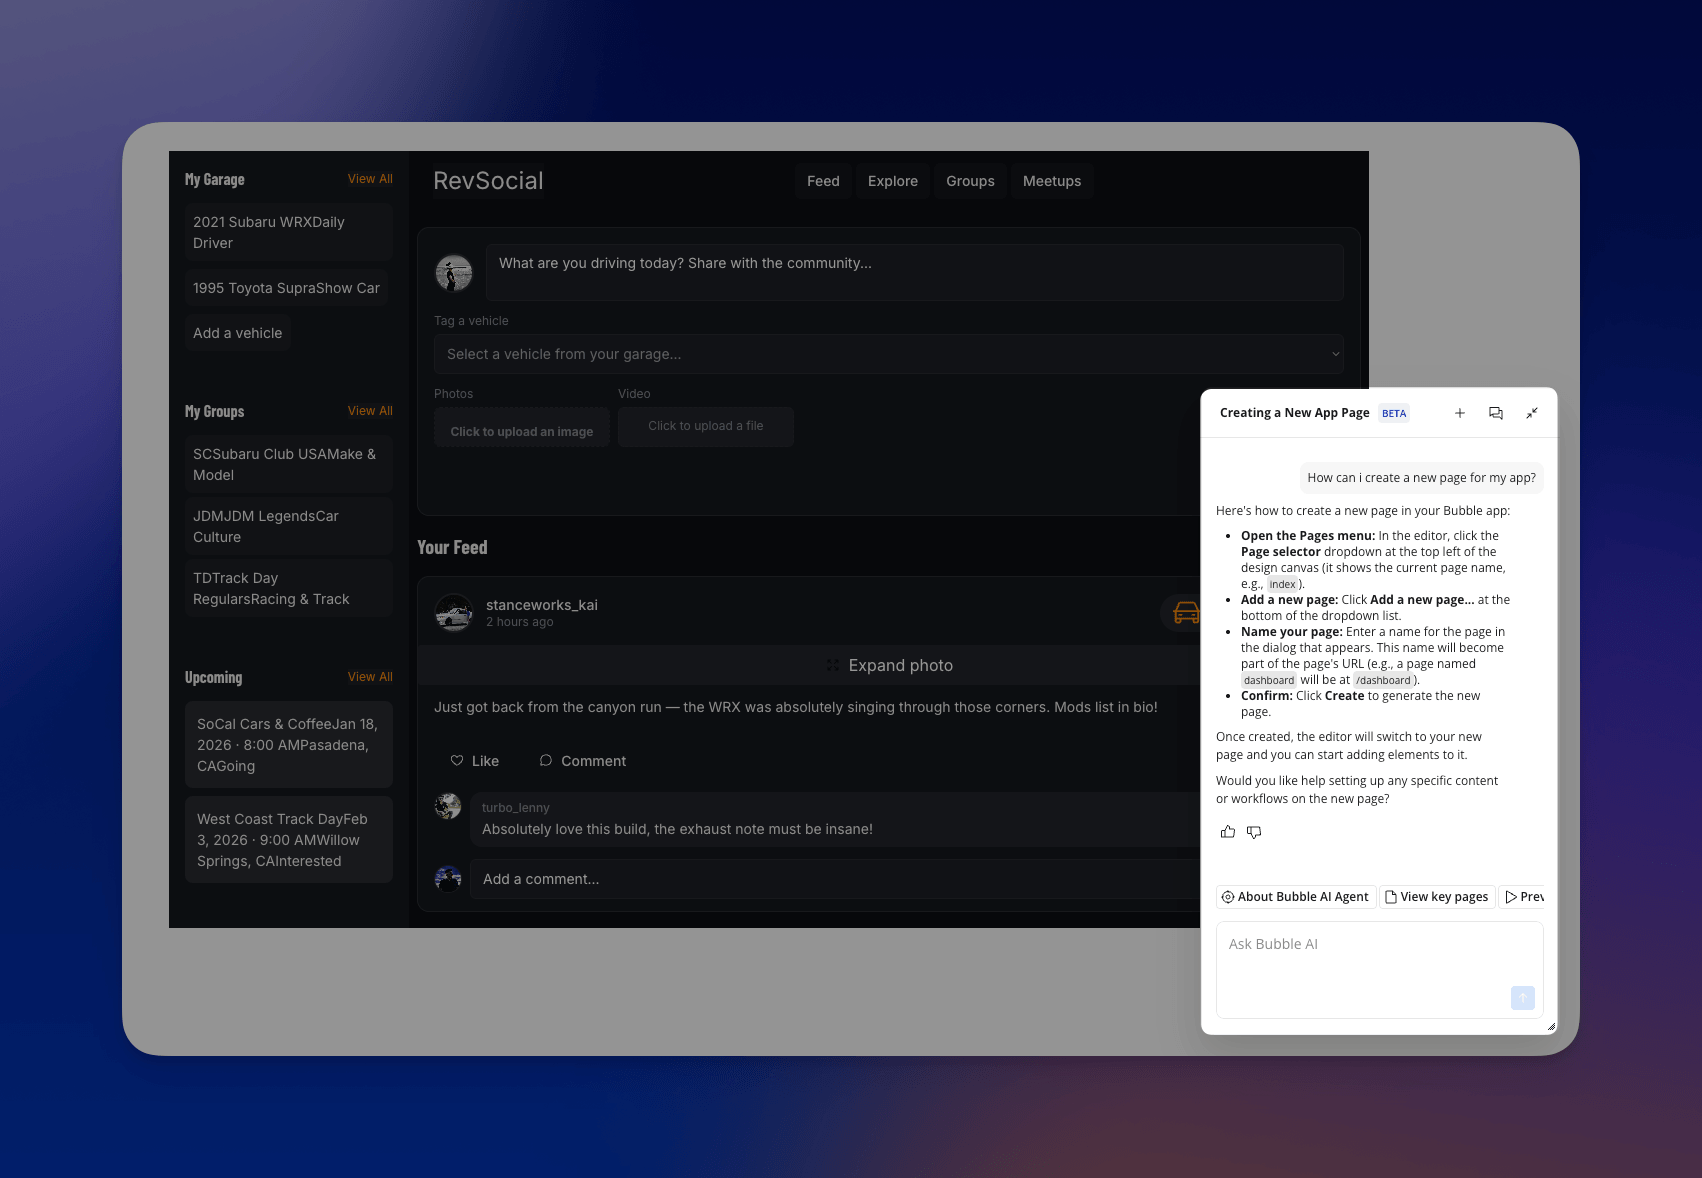
The AI Agent (located in the bottom right of the editor) is perfect for troubleshooting and rapid iteration. Ask "Why aren't images uploading correctly in posts?" and it analyzes your setup and provides step-by-step directions. Want to add new features? Ask "How do I add a location-tagging feature to posts?" and the Agent can build it for you or walk you through the implementation.
For more precise control, switch to Bubble's visual editor to directly adjust elements, workflows, and data structures. Click on any element to modify its properties, drag and drop to rearrange your layout, or open the workflow tab to fine-tune your app's logic. You get complete transparency — you can see exactly how everything works and make changes with pixel-perfect precision.
The real power comes from seamlessly switching between both approaches: Let the AI Agent handle routine changes, then jump into the visual editor when you want granular control.
Here are some more ways to make it uniquely yours:
- Customize the design — adjust colors, fonts, and layouts to match your brand perfectly. Don't settle for a generic AI design.
- Refine workflows — fine-tune the logic to create custom user experiences that AI alone can't build.
- Integrate with other services — use the API Connector to connect your app to hundreds of other tools, like Stripe for payments, Google Maps for location services, or other AI services for advanced features.
This combination of AI speed and visual precision gives you the best of both worlds for building production-ready apps.
Step 7: Deploy and iterate
Once everything is working as desired, you're ready to deploy v1 of your app. In the Bubble editor, click Deploy, and your app will go live for users.
As users interact with your app, you'll want to iterate based on feedback, fix bugs, and expand functionality over time.
Bubble helps you do this with built-in bug tracking and reporting features. And version control lets you maintain multiple app versions, roll back changes, and test new features in a development environment before deployment. The Bubble AI Agent is also available to guide you through the whole process.
You'll not only get to v1 in record time — you'll have a secure, sustainable, and scalable app ready for growth.
Start building your app with AI on Bubble
Bubble’s AI-powered app generator not only lets you go from idea to production-ready app in minutes, but also gives you the tools to refine, expand, and scale — without ever needing to read, write, or manage code. Whether you’re launching a new startup, building an internal tool, or experimenting with an app idea, Bubble gives you the flexibility and control to bring your vision to life.
The best way to see what’s possible is to try it yourself. Bubble’s AI app builder is free to get started, so you can begin building your app today.
Frequently asked questions about building apps with AI
Can I build my own app using AI?
Yes. AI app builders can generate functional apps in minutes, but most leave you stuck with code you can't edit. Choose Bubble — the only fully visual AI app builder that generates production-ready apps you can customize, refine, and scale using visual tools you fully control.
Is it legal to use AI to build an app?
Yes, it is legal. U.S. Copyright Office guidance suggests that as long as a human has creative control over the final work, it can be copyrighted. When you use AI as a tool to generate a foundation and then refine it yourself, you are maintaining that essential human authorship.
What happens when AI can't build what I want?
With some AI tools that only generate code, you may get stuck in a "prompt loop," hoping the AI eventually understands you, or you have to hire a developer. On Bubble, you simply switch to the visual editor and build it yourself. You can see exactly how your app works and make precise changes without ever touching code.
How much does it cost to build an app with AI compared to hiring developers?
Building with AI-powered platforms is significantly more affordable than traditional development. Instead of developer salaries that can exceed $150,000 per year, you pay a predictable monthly subscription, with many platforms offering plans ranging from free to under $100/month.
How long does it take to build and deploy an app with AI?
You can generate an initial prototype with AI in minutes. Refining that prototype into a polished version 1 that's ready for users can take anywhere from a few days to a few weeks, depending on complexity. This is a dramatic speed increase compared to traditional development, which often takes 4-6 months for a first version. This rapid development capability is a key benefit of AI-powered app builders.
Build for as long as you want on the Free plan. Only upgrade when you're ready to launch.
Join Bubble