Another Bubbles lesson today: let’s build a Lost & Found service. This will be an app where people can report things they found on the street, and people who lost stuff can search what has been submitted and send a message to the relevant person.
Here is what the app looks like: bubble.is/site/lostandfound/
And here is the code you can explore (and modify!): bubble.is/page?id=lostandfound
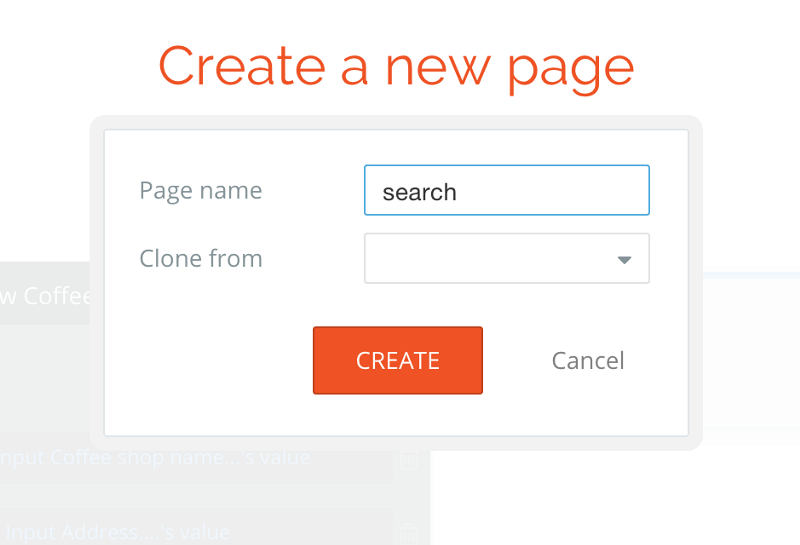
Let’s think about the pages our app will have. We need a homepage where users land and choose whether they want to report a found object or search the database. Reporting and searching should be done on two different pages. This leads to three pages: ‘index’ (aka our home), ‘report’ and ‘search’.
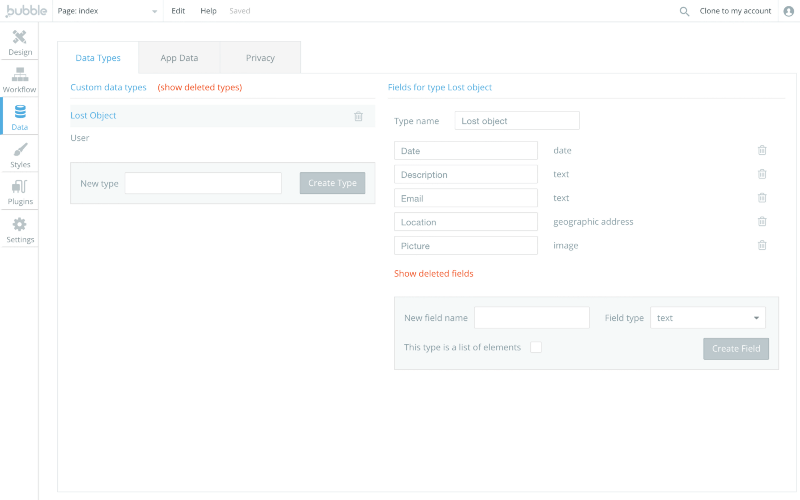
The second thing we want to think about is our data structure. We only have one type of thing to save — our ‘lost objects’. A lost object should have a description, a picture, a location (where it was found), a date (when it was found) and the email of the person who found it. At this stage, we won’t have people sign up, so we should ask for an email at each submission so that we know who to send an email to.
Let’s define this in the data tab of our app, making sure we pick the right type for each field.
Index Page
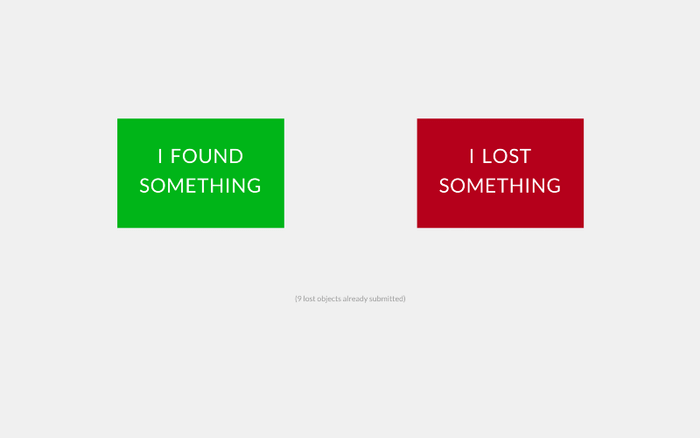
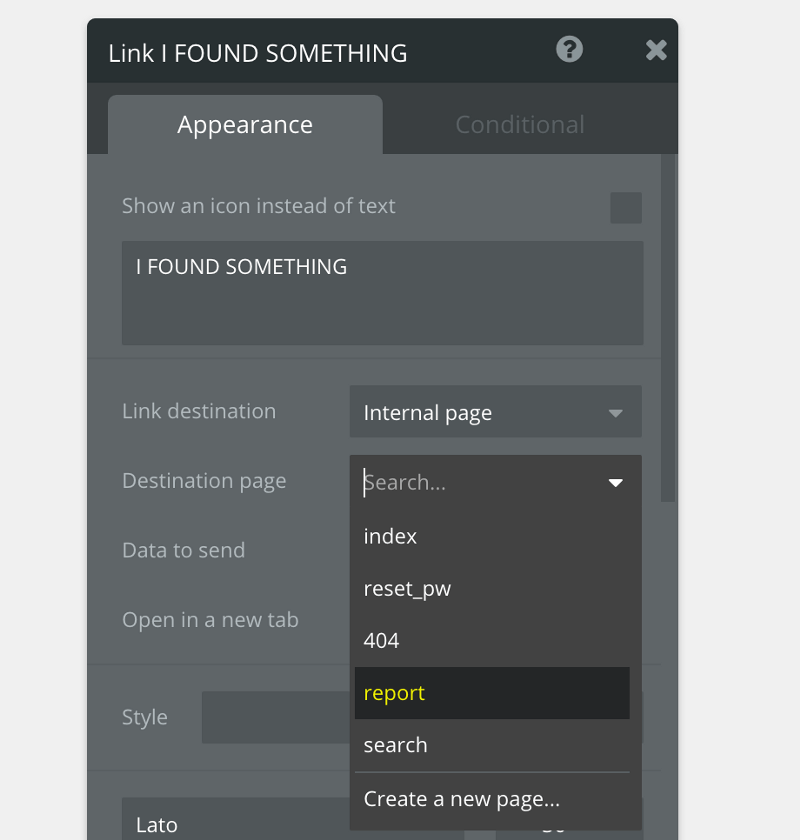
Okay, let’s start with our index page. We’re just going to add two links that redirect the user to search or report, based on what they want to do. We just pick the relevant page as the link destination in the property editor.
Let’s improve the look of the link when the user hovers it with her mouse. We do this in the conditional tab, where you can change how each element looks based on some conditions.
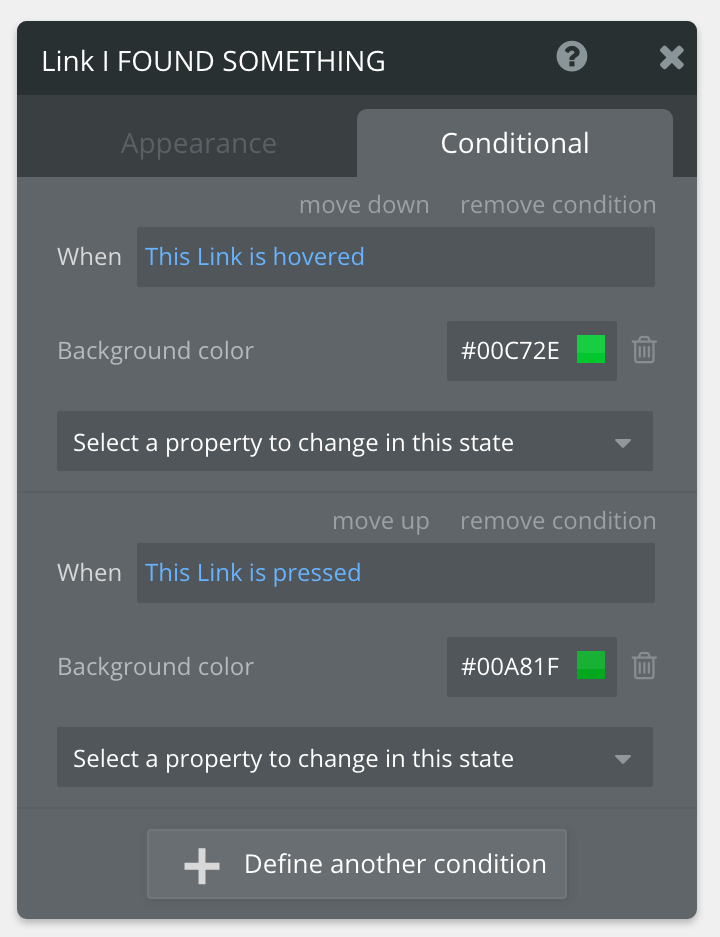
I copy paste this link to use the same format for the search page. We just change the destination page to ‘search’ and modify the caption and colors.

Alright, we now have our ‘homepage’ :)
Report Page
Let’s move to the report page to build the form where our users will report what they found. We’re going to have an input form and a submit button. We’ll also add a map element so that users can make sure the location they entered is right. Here is what the page looks like.
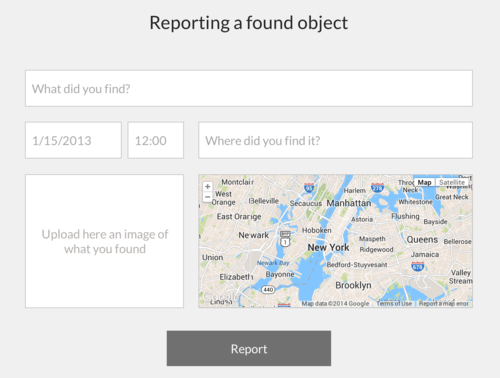
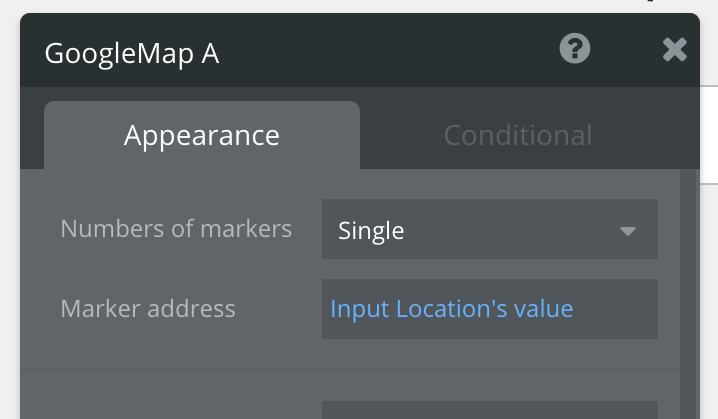
I changed the content type of the input ‘Where did you find it?’ to ‘Address’ as we want to make sure the user types a valid address. Then I had the map show the location typed in this input.
Okay, we can now make this form actually do something. Let’s click on ‘Start workflow’ for the button. The action we want to use here is the ‘Create a new thing’ action. As we already defined our fields, it’s going to be pretty fast. We just want to define for each field which input contains the relevant information.

We add a reset relevant inputs action to wipe the content of the form once it’s done and we’re all set on this page.
Search Page
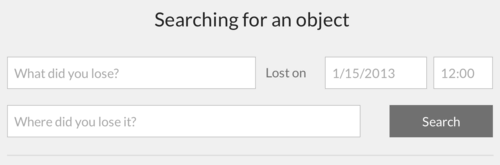
Now let’s move to the search page. Here we want to display search results based on some criteria. Let’s start by building the page elements. We’re going to have some search criteria and a list of results. For the criteria, we want the user to be able to specify a location, a date, and a description.
Here’s what it looks like.
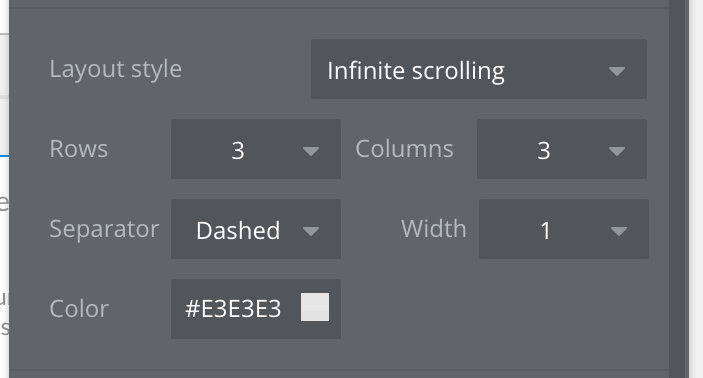
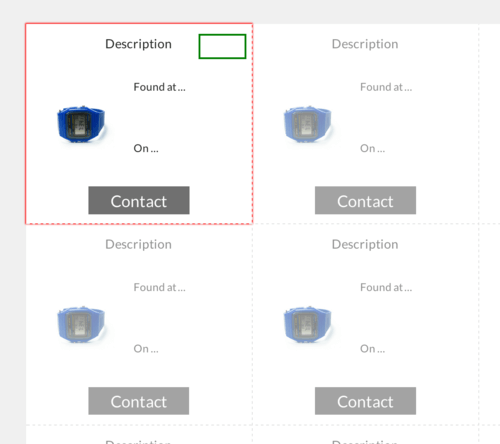
Now, let’s build the list of results. To do this, we use a repeating group. Let’s add this element below the search criteria. The first thing we do it to define the layout of the repeating group. Let’s change the line-style layout to a cell-style (3 lines and 3 columns).
The way this element works is that you design the first cell, and the others will follow a similar design. Here we want to show the picture, the description, the location and the time. Let’s add these elements in the first cell (the borders will turn red to show that the new element is attached to the repeating group). We also add a button so that the user who recognizes something can send a message to the person who found the object.
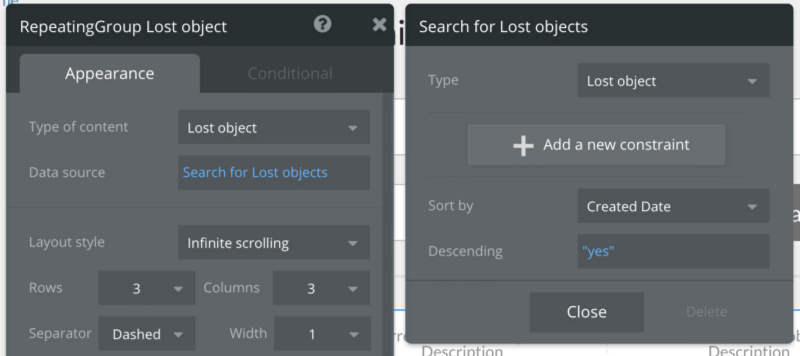
Let’s make the element content dynamic. The first thing we do is to define the type of content of the repeating group. That way, Bubble knows what to expect. Double clicking on the repeating group opens the property editor, and I pick ‘Lost object’. We’re also defining the list on page load as the whole list of submitted objects (a search without constraints).
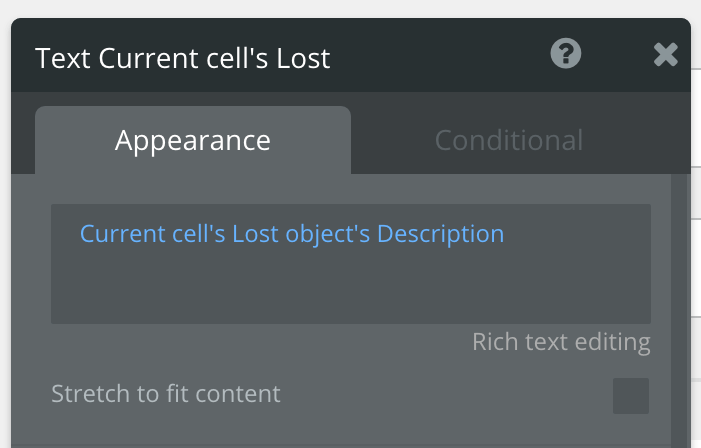
Let’s get back to each element inside the repeating group. Using the ‘Insert dynamic data’, I can make the content of the text element and the image dynamic.
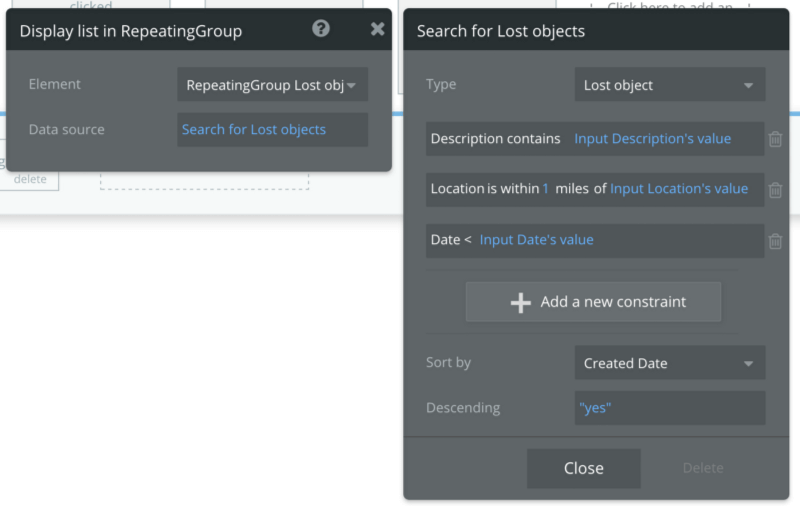
Let’s move to our ‘Search’ button. When the user clicks it, we want to replace the initial list by a new list based on our search criteria. The action we want to use is ‘Display a list in a repeating group’ in the ‘Element Actions’ section. We just need to define the list to display as a search for ‘Lost objects’.
Here is what it looks like after setting up the constraints (we only keep the objects that have been found after the object was lost, within 1 mile around the location).
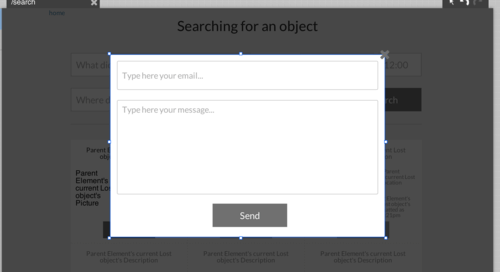
One last thing and we’re good to launch. We want people to be able to send a message to whoever has found the object, but without exposing the email (for privacy reasons). To do this, we’re going to build a popup where the user will be able to type a message. We first add a popup element to the page, and then have some inputs for the email and the message.
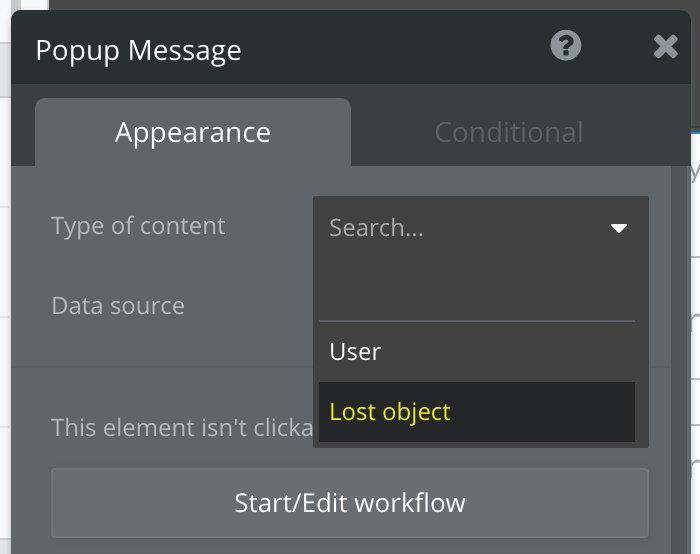
One tricky thing to do here: we need the popup to be ‘aware’ of the lost object the user clicked on (otherwise we won’t know who to send an email to). To do this, we’re going to define a type of content for the popup and send the lost object that was clicked to this popup when we open it. First, let’s pick the right type for the popup.
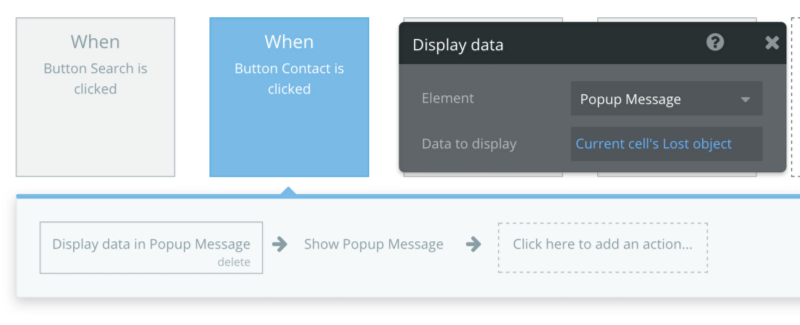
When the user clicks on contact, we want to show the popup, and send the current lost object to the popup. This is what we do here:
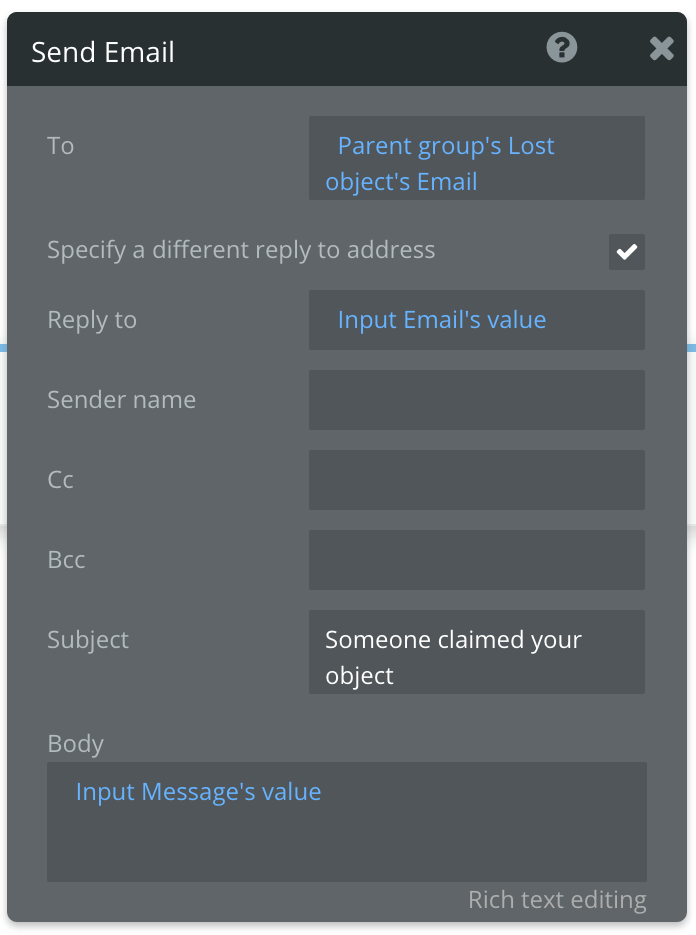
The very last step is to actually send an email. Let’s add a Send an Email action to the button ‘Send’. The way this action works is pretty similar to a regular email. The only thing is to define who should get the email – in this case, the email that was saved with the lost object, and the message as the content of the input.
At this stage, it’d be a good idea to have the people that found items ask questions to know whether the person that reached out is the actual owner — but that’s definitely something that would come later. We could also add a reward system so that people that bring things are recognized (and maybe get money at the end of the year, etc.) Everything is possible!
Build for as long as you want on the Free plan. Only upgrade when you're ready to launch.
Join Bubble