TL;DR: This guide walks you through building a complete employee expense management system: generating your app foundation with AI, defining spending policies and approval workflows, structuring your database with proper security controls, creating mobile receipt capture with OCR, automating policy checks and routing, integrating corporate cards and accounting software, and implementing fraud detection.
Most companies already know they need better expense management — the question is whether to buy an off-the-shelf solution or build one tailored to your specific policies and workflows. Pre-built systems work for standard use cases, but they often force you to adapt your processes to their limitations. Generic approval chains that don't match your hierarchy. Rigid spending categories that don't fit your business. Integration gaps that leave you manually syncing data between systems.
Building your own expense management system gives you complete control over policies, workflows, and integrations without the constraints of vendor-imposed structures. You define exactly how approvals route based on amount and department. You create spending categories that match how your business actually operates. You integrate directly with your existing corporate cards and accounting software rather than working around API limitations.
With Bubble AI's fully visual app builder, you can generate a working foundation in minutes, from mobile receipt capture to automated policy checks to instant approvals. Chat with the AI Agent to add features, or edit directly for pixel-perfect control. You're not choosing between speed and customization — you get both.
What is employee expense management?
Employee expense management is the process companies use to track, approve, and reimburse business expenses that employees pay out of pocket or charge to company cards. This means any spending where an employee uses personal or corporate funds for business purposes — meals with clients, travel bookings, office supplies, software subscriptions, and mileage reimbursement.
The basic workflow follows a predictable pattern. An employee spends money on something work-related, then submits a claim with a receipt and business purpose. A manager reviews and approves the expense, checking that it follows company policy. Finance processes the approved expense, either cutting a reimbursement check or recording the corporate card charge. The transaction gets logged in the accounting system for tax reporting and budget tracking.
This differs from other types of business spending in an important way. When you buy equipment or pay vendors, that's procurement — planned purchases through established relationships. When you track materials used to make products, that's cost of goods sold. Employee expense management specifically handles the ad-hoc, employee-initiated spending that happens as people do their jobs.
The scope includes several common categories:
- Travel expenses cover flights, hotels, rental cars, and ground transportation
- Meals and entertainment include client dinners, team lunches, and business event catering
- Office supplies might be printer ink, notebooks, or small equipment under your capitalization threshold
- Software subscriptions cover tools individuals need for their work
- Mileage reimbursement pays employees who drive personal vehicles for business
Each category typically has different spending limits, approval requirements, and documentation rules that you'll need to define and enforce.
Step 1: Define policies and approval rules
Before generating anything with AI, map out the business rules about what employees can spend, how much they can spend, and who needs to approve it. These policies become the logic that powers your entire system — the automated checks that flag overspending, the routing rules that send high-value expenses to the right approvers, and the documentation requirements that keep you compliant with tax regulations.
Start by documenting your current practices, then translate those rules into categories, limits, and workflows your system will enforce. This planning work helps you create a better prompt for the AI Agent in the next step.
Set expense categories and spending limits
Create a standard list of expense categories that cover your most common types of spending. Start with broad categories like meals, lodging, transportation, office supplies, and software subscriptions. Under each category, you can add subcategories if you need more granular tracking — for example, transportation might split into flights, rental cars, parking, and public transit.
For each category, set spending limits that align with your budget and company culture. You might allow $75 per person for business meals, $150 per night for hotel rooms, or $50 per month for productivity software. These limits can vary by employee level — executives might have higher meal allowances, or managers might have broader software purchasing authority.
Different departments might need different rules. Your sales team probably needs generous meal and travel budgets to meet with clients, while your engineering team might need more spending authority for software tools. Set up separate category structures for different teams, or use role-based limits that automatically apply based on the employee's department and level.
Plan out approval workflows by amount and type
Map out who needs to approve expenses based on the amount and category. Simple, low-value expenses — say, under $50 — might only need a manager's sign-off. Mid-range expenses between $50 and $500 go to the direct manager, while anything over $500 requires an additional finance review.
Some expense types always require special handling regardless of amount. Client entertainment usually needs advance approval to make sure it's appropriate. Conference registrations might need department head sign-off. Equipment purchases over your capitalization threshold need to route through finance so they're properly recorded as assets instead of expenses.
Build in exception workflows for when employees need to spend outside normal policy. Maybe someone needs to exceed the hotel limit because they're attending a conference where venue hotels are expensive, or they need emergency same-day flights that cost more than the usual advance-purchase rate. Create a clear path for employees to request exceptions, with required business justification and a defined approval chain.
Decide on compliance rules for receipts and documentation
Set clear rules for what documentation employees must provide with each expense claim. The IRS requires receipts for business expenses over $75, so make that your baseline — itemized receipts are mandatory for anything above that threshold, while smaller amounts might only need a brief description.
For meals, you'll need to capture not just the receipt but also the business purpose and who attended. Establish submission deadlines to maintain tax compliance and accounting accuracy. A common standard is requiring employees to submit expenses within 30 days of when they were incurred, though some companies use 60 or 90 days.
For international expenses or remote teams, document how you'll handle multiple currencies. Will you use the exchange rate from the day of purchase, or the rate when the employee submits the claim? Make sure your policy addresses travel advances, per diem allowances, and how employees should handle receipts in foreign languages.
Step 2: Generate your app foundation with AI
With your policies documented, use Bubble AI to generate your app foundation in minutes. Describe what you need — including a summary of the policies you defined in Step 1 — and the AI will create your initial database structure, workflows, and UI tailored to your requirements. A detailed prompt like "I want to build an employee expense management system with receipt capture, approval workflows, and reimbursement tracking. Expenses under $50 need manager approval, $50-$500 need manager approval, over $500 need manager and finance approval. Include mileage reimbursement with IRS rate calculation" gives you a more accurate foundation.
The AI generates everything visually in front of you, so you see exactly what it creates. You're not locked into what the AI builds — refine the generated structure by chatting with the AI Agent or editing directly. Add specific features or adjust the policies, and the Agent updates your app in real time.
This foundation becomes your starting point. You'll add integrations and refine workflows in the following steps, but you begin with a functional expense management system built around your specific policies on day one, not a blank canvas.
Step 3: Build your database and security (with AI or visual editing)
With your app foundation generated, refine the database structure to match your specific requirements. You can describe what you need to the Bubble AI Agent and it will update data types, fields, and privacy rules — or design the structure visually yourself.
Structure expense data and relationships
The AI Agent can generate or refine the core data types you need from a prompt — or you can create them visually. For example, describe "I need to track employees with name, email, department, manager, and bank details" and the Agent creates a User data type with those fields. Similarly for Expense (amount, date, category, merchant, business purpose) and Receipt (images/PDFs linked to expenses). The Agent automatically adds privacy rules to secure sensitive data.
Connect these data types through relationships that mirror how your business works:
- User to Expense: Each expense belongs to the user who submitted it
- Expense to Receipt: Each expense links to one or more receipt images as documentation
- Expense to Policy: Each expense references the policy rules that govern whether it's compliant
- Expense to Approval: Approval records track who approved, when they approved, and any comments they added
Think through the data fields you'll need for common workflows. For mileage reimbursement, you'll want starting address, ending address, and calculated distance. For meals, you'll need the attendees' names and business purpose. For travel, you might track confirmation numbers, trip destinations, and project codes to allocate costs properly.
Apply role-based privacy and access controls
Configure privacy rules so employees only see their own expense data, managers can view their team's submissions, and finance has access to everything they need. When the AI Agent generates data types, it automatically creates privacy rules — or you can configure them visually yourself. Bubble complies with the SOC 2 Type II standard for security and offers a GDPR-compliant data processing agreement (DPA), with data encryption in transit with TLS and at rest with AES-256 encryption.
Protect sensitive information with additional privacy layers. Bank account details for reimbursement should only be visible to the employee who owns them and to finance administrators processing payments. Social Security numbers or tax IDs, if stored, need strict access controls.
Build conditional access for different workflow stages. An expense in draft status is only visible to the person creating it. Once submitted, it becomes visible to assigned approvers. After approval, finance can see it for processing, and it eventually becomes part of queryable historical data for reporting and auditing.
Track changes with audit logs and version history
Record every action taken on an expense — when it was created, submitted, approved, modified, or rejected. Store who made each change and timestamp when it happened. This creates an audit trail that proves compliance with tax regulations, helps investigate disputes about what was approved, and lets you identify bottlenecks in your approval process.
Keep policy versions with effective dates so you can accurately apply the right rules to historical expenses. If you change your meal allowance from $50 to $75 in March, expenses from February should still be evaluated against the old $50 limit.
Build in the ability to add notes and documentation throughout the expense lifecycle. Approvers might need to explain why they rejected something or conditionally approved it. Finance might add notes about issues processing a reimbursement. Make these notes part of your permanent record, with timestamps and attribution showing who said what when.
Step 4: Build submission and approval workflows
Now you'll build the user-facing parts of your system — submission forms, approval screens, and routing automation. The AI Agent can generate these through prompts like "create an expense submission form with receipt upload" — or you can build them visually. Focus on making submission effortless for employees and review efficient for approvers, because any friction here directly impacts how quickly expenses get processed.
Enable mobile receipt capture and OCR
Build a native mobile interface (or generate one with AI) where employees photograph receipts instantly using device camera access — Bubble's React Native foundation gives you full access to native capabilities like camera and photo library. Note: Bubble's native mobile app builder is currently in beta. Implement optical character recognition (OCR) through Bubble's plugin marketplace or by connecting to an OCR API using the API Connector. The Agent can guide you through API setup. Extract merchant name, date, and total amount to pre-populate form fields, then let employees verify and correct any misreads before saving.
Support multiple methods of receipt capture to handle different scenarios:
- Direct camera capture works for paper receipts
- Email forwarding handles online purchase confirmations
- Text or email to a dedicated address automatically creates a draft expense
Store receipt images permanently and link them to expense records so they're always available for audit. Even after an expense is processed and reimbursed, you need that receipt for tax compliance.
Add automated policy checks and routing
Check expenses against policy rules before employees can submit them, not after. If someone enters a $100 meal expense but the policy limit is $75, show them an error immediately and let them either correct the amount or add a business justification for an exception.
Route approved expenses using visual workflows — or ask the AI Agent to build them for you. When an employee submits an expense, workflows check the amount and category, then assign it to the right approvers automatically. The Agent builds workflows step-by-step in front of you, so you see exactly what it created and can edit anything directly. Approvers get notified immediately via email or native mobile push notifications (Bubble's native mobile apps support push notifications out of the box), with a link to review and approve without logging into a separate system.
Handle edge cases gracefully. If an employee's manager is on vacation, expenses should route to the backup approver or skip that level and go directly to the next approver in the chain. If an expense sits in someone's queue for more than a few days, send reminder notifications or escalate to their manager.
Handle mileage, per diem, and special cases
Create a specialized mileage entry form that calculates reimbursement automatically. Employees enter starting and ending addresses, and the system uses a mapping API to calculate distance and multiply by the current 72.5 cents per mile IRS standard mileage rate. Store the rate used for each expense so historical claims remain accurate even when rates change.
Build per diem workflows that calculate daily allowances based on location and trip duration. If your policy provides $65 per day for domestic travel meals, have employees enter their trip dates and destination, then auto-generate the appropriate per diem amount. Adjust for partial days — someone leaving on Tuesday afternoon might only get half the Tuesday allowance.
Create multi-day trip expenses that group related charges together. An employee traveling to a conference might have one expense covering their entire trip — flights, hotel, meals, and ground transportation — rather than submitting separate claims for each charge.
Step 5: Automate cards, reimbursements, and accounting
With submission and approval working, connect the money flow using Bubble's API Connector. Set up integrations to import corporate card transactions, process reimbursements, and sync with accounting software — all through visual configuration. The AI Agent can provide step-by-step guidance for complex API setups.
Connect corporate cards and transaction feeds
Use Bubble's API Connector to integrate with your corporate card provider and automatically import transactions. Set up the connection visually, or ask the AI Agent for step-by-step guidance on configuring the API. The Agent can even help you work through authentication and response parsing. Match these imported transactions to submitted receipts by comparing amounts, dates, and merchants.
Set up policy enforcement at the point of purchase where possible. Some modern corporate card systems let you set spending controls on individual cards — blocking certain merchant categories, setting daily spending limits, or requiring pre-authorization for purchases over a threshold.
Handle shared company cards and subscription charges that don't map to individual employees. Some expenses — like the company's software subscriptions or shared office supplies — won't have a single owner. Create workflows to assign these charges to the appropriate department or cost center, with approval from a department manager or finance.
Process reimbursements through ACH or payroll
Set up automated reimbursement processing once expenses are fully approved. Collect bank account information from employees securely, then generate ACH transfers or direct deposits to repay approved expenses. Some companies batch reimbursements weekly or monthly, while others process them immediately after approval.
Consider integrating with your payroll system to include reimbursements in regular paychecks. This eliminates the need for separate payment processing and banking fees, and employees get reimbursed on their normal pay schedule. Just make sure to properly categorize these as expense reimbursements, not taxable wages, in your payroll system.
Handle international employees and multiple currencies gracefully. If you have remote workers in different countries, you'll need to process payments through local banking systems or use international transfer services. Store the original currency and amount, the exchange rate used, and the final USD amount for proper accounting.
Sync with accounting systems and tax reporting
Push approved expenses to your accounting software automatically rather than manually entering them at month end. Connect to QuickBooks, NetSuite, or Xero using Bubble's API Connector (now in its own dedicated tab for easier access). Set up integrations through visual configuration, or ask the AI Agent for step-by-step guidance. You can even paste a cURL command to quickly configure API calls.
Map expense categories to your chart of accounts so each transaction posts to the correct expense account automatically. Include all the detail your accounting system needs — not just the amount and category, but also the employee who incurred it, the date it was charged, the vendor, and any project or client codes for cost allocation.
Generate tax-compliant documentation for expense deductions. When tax season arrives, you need to prove that reimbursed expenses were legitimate business expenses, not personal spending. Your system should be able to produce reports showing all expenses by category, with attached receipts and business purpose documentation, formatted in a way that satisfies IRS audit requirements.
Step 6: Monitor, prevent fraud, and optimize
Your expense system needs ongoing monitoring — organizations lose 5% of revenue to fraud annually, and Bubble includes the tools you need. The security dashboard scans for vulnerabilities, server logs (toggle between web and mobile) help debug issues, and version control lets you track and roll back changes. These are built-in, not add-ons.
Create dashboards for compliance and performance tracking
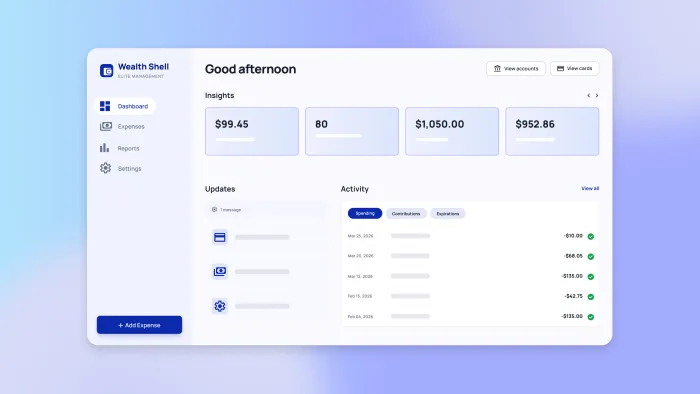
Build a finance dashboard with AI generation or visual design — showing key metrics like total pending approvals, average reimbursement time, expenses awaiting receipts, and policy violation rates.
Create manager dashboards showing their team's spending trends and policy compliance. Managers should see total team spend by month, breakdown by category, how their team's spending compares to budget, and any recurring policy violations that might need coaching.
Give executives high-level spending analysis across the entire company. Roll up spending by department, category, vendor, and time period. Show trends over time — is travel spending increasing or decreasing? Are software subscription costs growing faster than headcount?
Implement fraud detection and exception handling
Build automated fraud detection using Bubble's visual workflows — or prompt the AI Agent to generate the detection logic for you. With 24% of employees admitting to expense fraud, set up flags for patterns like:
- Duplicate receipts: Flag any receipt image that exactly matches a previously submitted one, or any two expenses with the same merchant, date, and amount
- Round-number expenses: Might indicate fabricated amounts rather than actual receipts
- Spending outside normal patterns: If an employee usually submits $200–300 per month in expenses and suddenly claims $2,000, flag it for extra review
- Weekend or holiday submissions: Expenses submitted on weekends or holidays deserve scrutiny
- Limit gaming: Multiple expenses right at the policy limit — ten separate $74 meals when the limit is $75 — might indicate someone structuring transactions to avoid review thresholds
Create a review queue for flagged items rather than automatically rejecting them. Many legitimate expenses might trigger fraud alerts — the duplicate receipt might be a mistake, the high amount might be a legitimate conference expense, and the round number might be an even hotel rate.
Plan rollout, training, and continuous improvement
Run user acceptance testing with a pilot group of 10-20 employees before company-wide launch. Choose users who represent different roles — some remote workers, some managers, some heavy travelers, and some occasional expense submitters. Have them use the system exclusively for a month while you gather feedback.
Create training materials that work for different learning styles. Record video tutorials showing how to submit expenses on mobile and web. Write step-by-step documentation with screenshots. Hold live training sessions where employees can ask questions.
Build feedback loops into the system to continuously improve. Add a "report a problem" button that lets users quickly send feedback about issues or confusing workflows. Track metrics like submission completion rate — what percentage of users who start an expense actually finish and submit it?
Launch timeline and next steps
Building a complete employee expense management system is dramatically faster with Bubble's AI capabilities.
Week 1: Generate foundation with AI and refine policies Use Bubble AI to generate your app foundation in minutes — the AI creates database structure, basic workflows, and UI. Then document your specific expense policies, approval hierarchies, and requirements. Use the AI Agent to generate data types and workflows based on your policies, or refine the generated structure visually.
Weeks 2-3: Generate workflows and mobile app, then test Use the AI Agent to generate expense submission forms, approval workflows, and policy checks — or build them visually. Generate a native mobile app with AI for receipt capture, or build mobile views yourself. Either way, Bubble's OCR capabilities and native camera access are built-in. Test the complete flow across web and mobile, using the AI Agent to troubleshoot any issues.
Weeks 4-5: Integrations and testing with pilot group Use Bubble's API Connector to integrate with your corporate card provider, payment processor, and accounting system. The AI Agent can provide step-by-step guidance for complex API setups. Import cURL commands to quickly configure endpoints. Test integrations with a pilot group while you monitor via server logs and the security dashboard.
Weeks 6-8: Company-wide rollout and optimization Use Bubble's security dashboard to scan for vulnerabilities before launch. Fix bugs using server logs and the AI Agent's troubleshooting capabilities. Create training materials and documentation. Monitor closely during rollout using built-in analytics, and refine workflows either by prompting the AI Agent or editing visually. Version control lets you roll back any changes if needed.
The exact timeline depends on your company's complexity. A 50-person startup with simple policies might launch in 2-3 weeks, while a 500-person company needs more time for integration testing and policy customization — but everyone starts with a working foundation on day one.
Start building your expense management system
You've seen how to build a complete employee expense management system — from AI-generated foundations to mobile receipt capture to automated approvals and accounting integration. The timeline is weeks, not months, and you start with a working app on day one.
With Bubble's fully visual AI app builder, you control how you build. Chat with the AI Agent when you want speed, or edit directly when you want pixel-perfect control. Generate workflows instantly, then see exactly how they function in visual flowcharts (not code). Bubble's native mobile capabilities (built on React Native, currently in beta) also let you create iOS and Android companion apps with AI or build them visually — with a shared backend and one-click publishing to app stores. Push updates instantly with over-the-air updates, no resubmission required.
Start building your employee expense management system for free today.
FAQ
How do I handle expense approvals when managers are out of office?
Build backup approver assignments using Bubble's visual workflows — or ask the AI Agent to generate them for you. Set up time-based escalation rules that move expenses to the next level if they sit in a queue for more than three days. The visual workflow engine makes these approval chains easy to see and edit.
What documentation do I need to keep for IRS compliance?
According to IRS regulations, maintain itemized receipts for all expenses over $75, business purpose statements for all expenses, and approval records showing who authorized each expense. Keep these records for at least three years from the date you filed your tax return, or seven years if you're claiming bad debt deductions. (Consult IRS Publication 463 or a tax professional for current requirements.)
How do I prevent employees from submitting duplicate expenses?
Implement automatic duplicate detection that compares receipt images, amounts, dates, and merchants across all submitted expenses. Flag potential duplicates for manual review before processing reimbursements, and create a review queue where finance can approve legitimate duplicates or reject fraudulent ones.
Should I reimburse expenses through payroll or separate ACH transfers?
Payroll integration is simpler and eliminates separate banking fees, but employees wait until the next pay cycle for reimbursement. Separate ACH transfers let you reimburse immediately after approval, which improves employee satisfaction but adds processing complexity. Choose based on your company's cash flow and employee expectations.
How do I handle per diem rates for different cities and countries?
Build a location database with standard per diem rates based on GSA guidelines for US cities and State Department rates for international locations. When employees enter trip details, automatically calculate the appropriate daily allowance based on destination and trip duration, adjusting for partial days and meals provided by the event or client.
Build for as long as you want on the Free plan. Only upgrade when you're ready to launch.
Join Bubble