In this post, we’ll walk you through the step-by-step process of building a Kayak clone with Bubble. Whether you’re looking to build a full travel booking site, a metasearch engine, an aggregator, or an app that utilizes some of Kayak’s core features, this guide will show you how to start building the underlying workflows for your product.
About the author of this tutorial: Alex has built several revenue-generating apps with Bubble and specializes in UI/UX and API integrations. He’s always interested to hear from aspiring entrepreneurs who want to build using Bubble. If you'd like to hire him to work on your bubble app you can contact him here.
Get Started
Before you start, you’ll need to first register your free Bubble account. Click the button below to get started, then you can follow along as we build our product together.
New to Bubble? Follow along on our introductory videos to get familiar with the basics of Bubble. This will help you get a running start when building a Kayak clone.
When starting your project, you can choose to begin by wireframing your product design, or building the necessary fields within your database. In this case, we’ll start by using Bubble’s visual design tool to shape the user interface of our platform.
If you’re creating a version of Kayak, you’ll need to build the following pages:
- Admin Portal – Used as a backend to upload details of flights, hotels, and car rentals
- Homepage – Allow users to search for flights, hotels, and car rentals
- Search Results Page – Displays information based on the user's search query
A major feature within Bubble is the ability to send data between pages. This allows you to create one generic version of a page, then dynamically display the relevant content from your database when it’s required.
In the case of your Kayak clone, you’ll only need to create one page for displaying flight, hotel, or car rental information. We can then add unique conditions to display only the relevant content of each data type when it’s needed (we’ll cover this in more detail soon).
Configuring your database
Once you’ve wireframed these pages, you can focus on creating the necessary data fields to power your application. We’ll rely on these fields to connect the workflows behind your product.
Bubble’s pre-built database makes it easy to create different data types with unique fields. When building your Kayak clone as an MVP, we’ll need to create the following data types & fields.
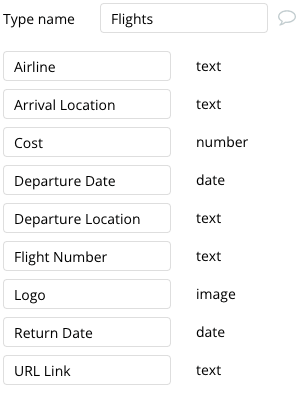
Data type: Flights
Fields:
- Airline (type: text)
- Arrival location (type: text)
- Cost (type: number)
- Departure date (type: date)
- Departure location (type: text)
- Flight number (type: text)
- Logo (type: image)
- Return date (type: date)
- URL Link (type: text)
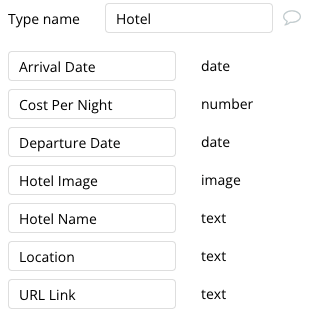
Data type: Hotel
Fields:
- Arrival date (type: date)
- Cost per night (type: number)
- Departure date (type: date)
- Hotel Image (type: image)
- Hotel Name (type: text)
- Location (type: text)
- URL Link (type: text)
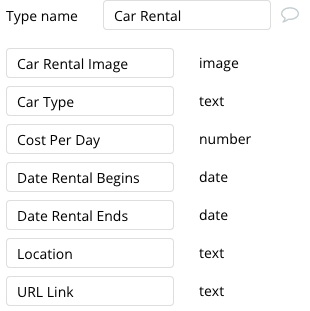
Data type: Car Rental
Fields:
- Car Rental Image (type: image)
- Car Type (type: text)
- Cost per day (type: number)
- Date rental begins (type: date)
- Date rental ends (type: date)
- Location (type: text)
- URL Link (type: text)
Building workflows
Now that you’ve structured both the design and database of your application, it’s time to start stitching everything together, making your app functional.
In Bubble, the main way to create functionality in your app is with workflows. Each workflow happens when an event occurs (e.g. a user clicks on a button), and then runs a series of “actions” in response (e.g. “sign the user up,” “make a change to the database”).
Creating an Admin Portal to Add Flights/Hotels/Car Rental Data
The first feature we’ll build is a back-end portal to add new flights to our Kayak clone. Although these items can be manually added into our database, creating a front-end interface will allow any admin to easily add new flights.
Once you’ve created a new Admin Portal page, you can use Input elements to allow users to create flight data. There are nine fields linked to our Flights data type, so we’re going to create eight Input elements and one Image Uploader element on our page.
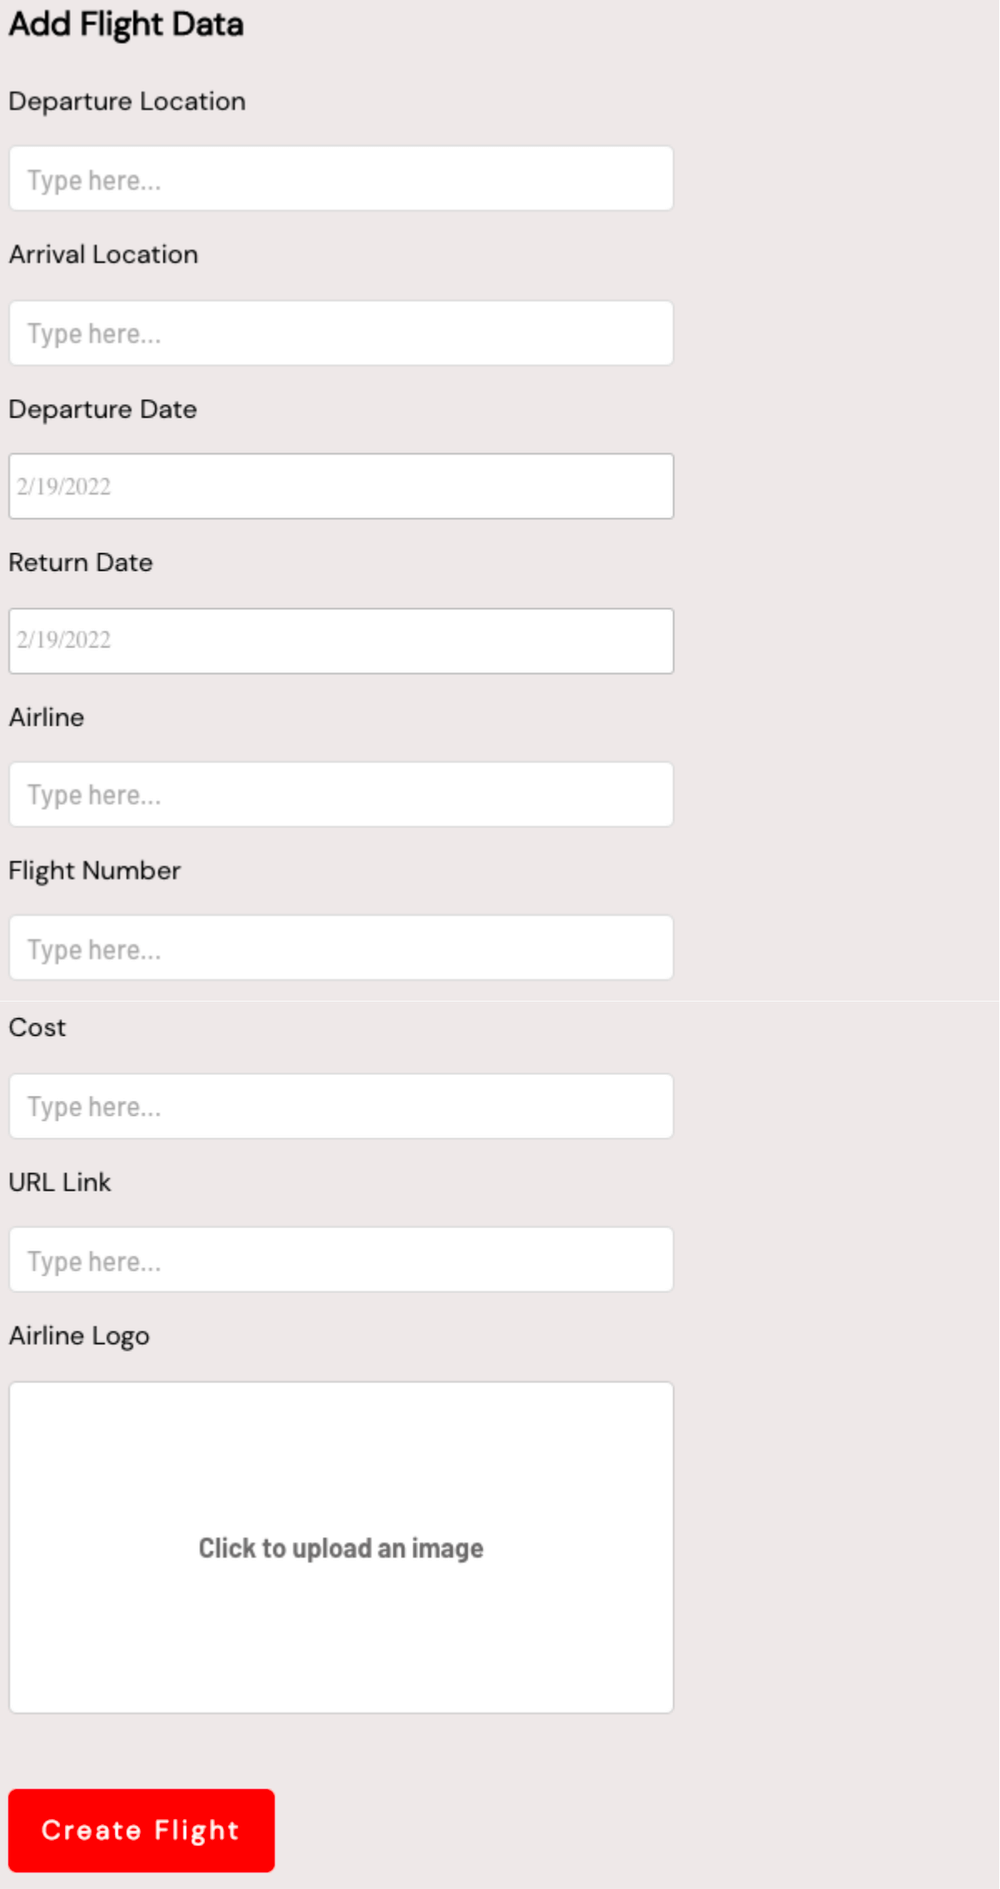
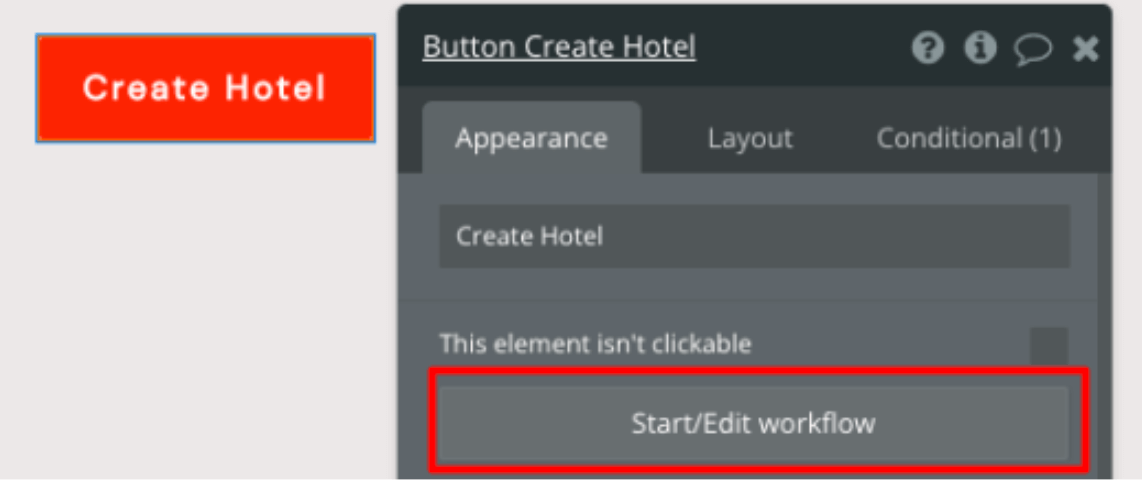
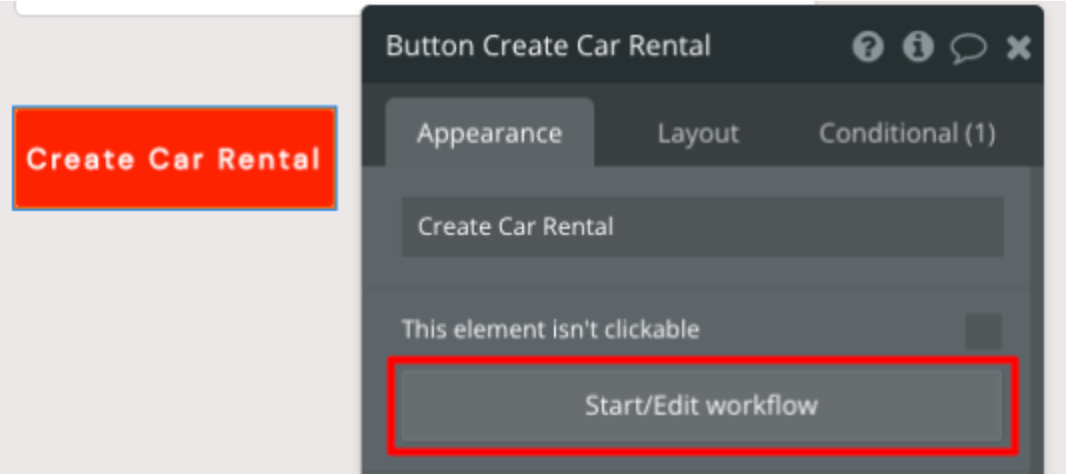
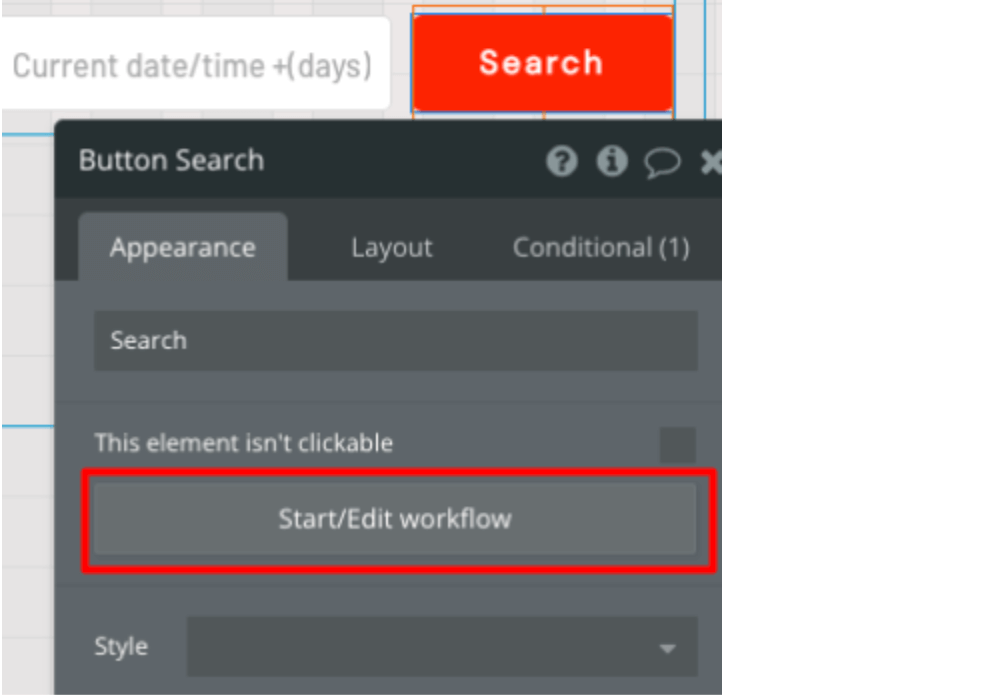
Once an admin clicks the Create Flight button, we’ll want to trigger our first workflow.
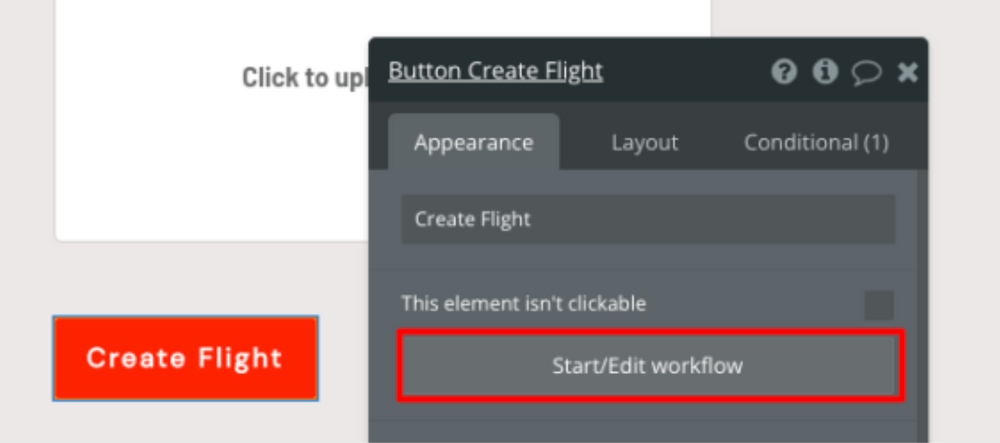
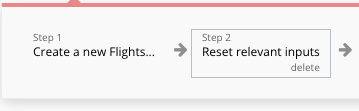
Within this workflow, we’ll be creating a flight – a new event.
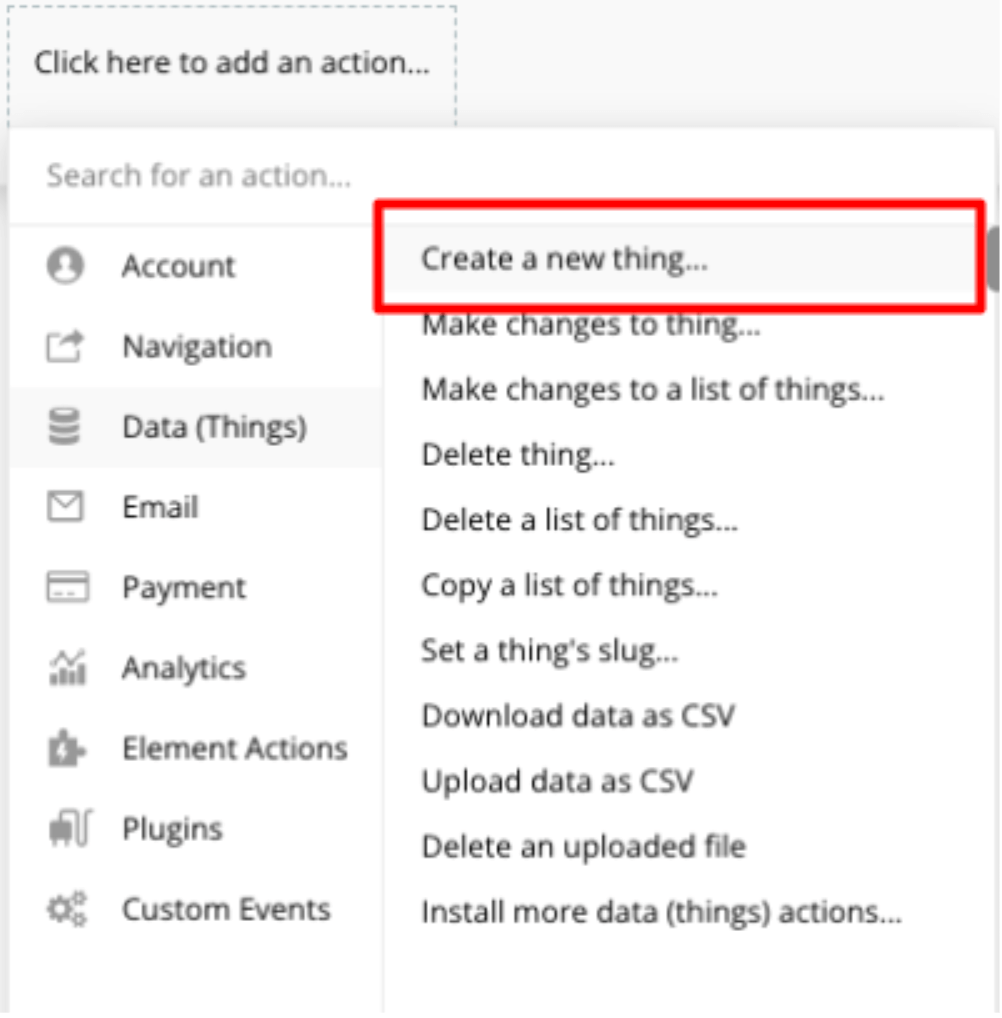
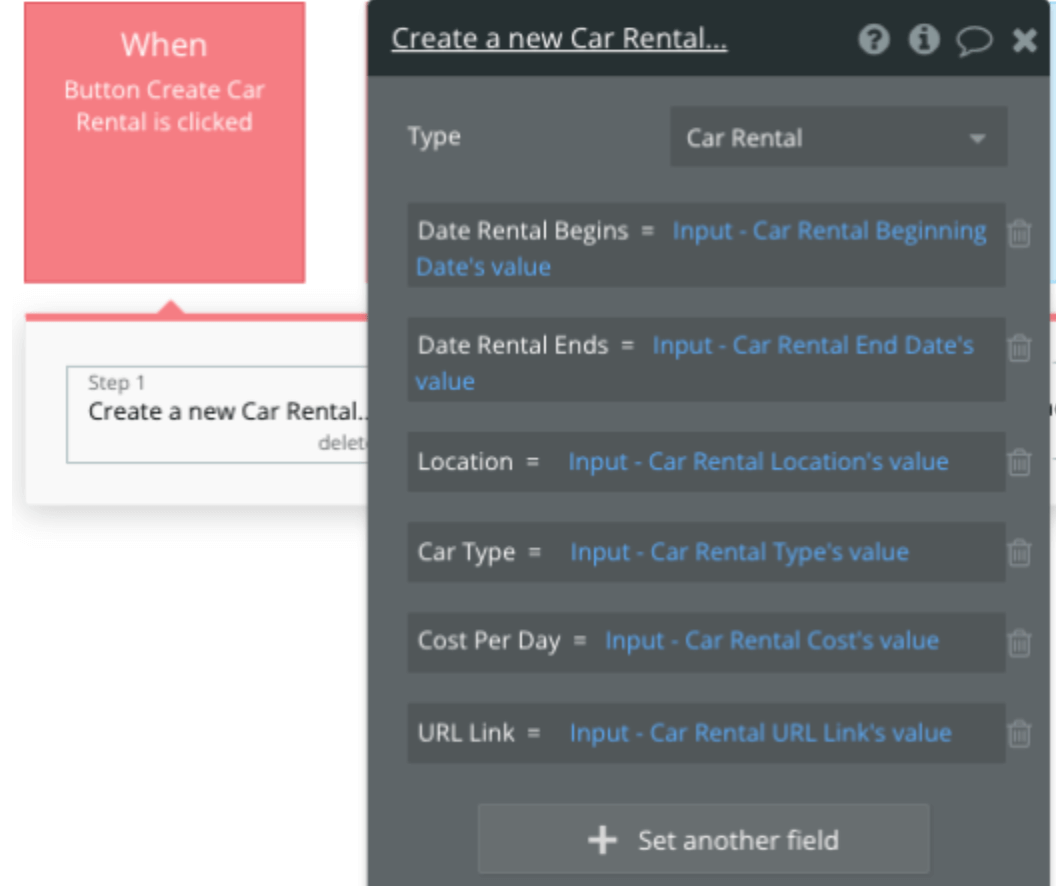
We’ll then need to start adding the relevant fields within our database. Map each of the on-page input elements with its corresponding database field.

The URL Link value should be the address of a third-party website where full details of the flight can be seen.
We’ll also need to "Reset relevant inputs" in order to clear the values the admin has put into the various input and image uploader elements.
Now that we’ve successfully implemented the functionality to add Flights data, we are going to do the same for Hotels and Car Rentals data.
To start off, we’re going to create six more Input Elements and one Image Uploader on our page that will be used to create Hotels data.
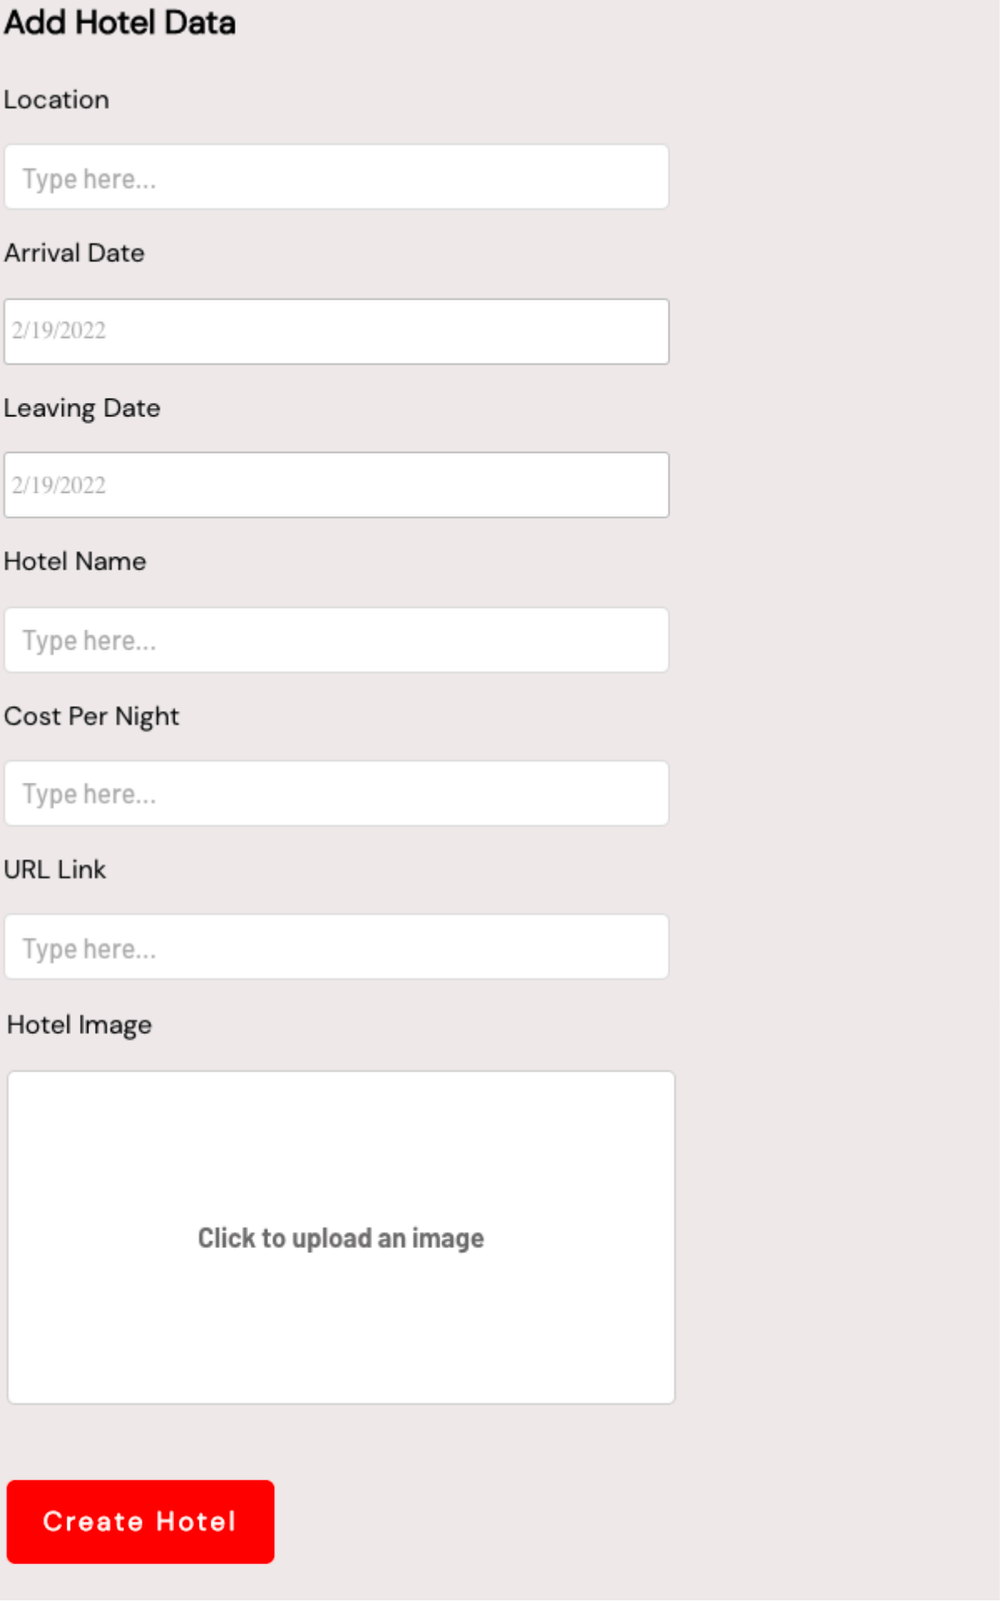
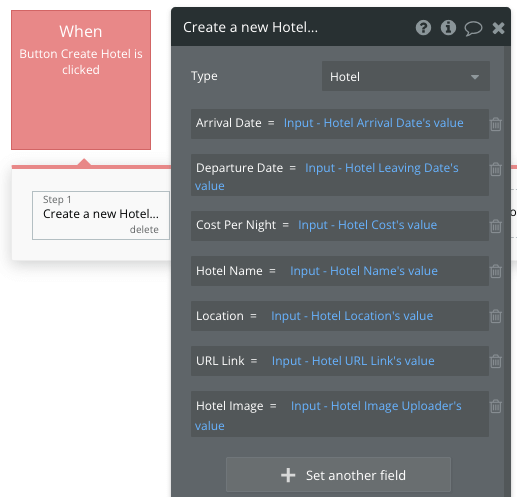
Similar to what we did with the Flights data, we’re going to use a workflow action to map the on-page input elements to our database.
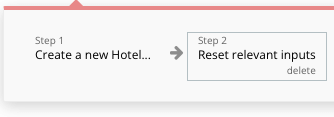
We’ll again reset the relevant outputs in order to clear the values the admin has put into the various input/image uploader elements.
Now let's repeat this process one more time so that we have the functionality to add Car Rentals data. This time we’ll again create six Input Elements and one Image Uploader on our Admin Portal page.
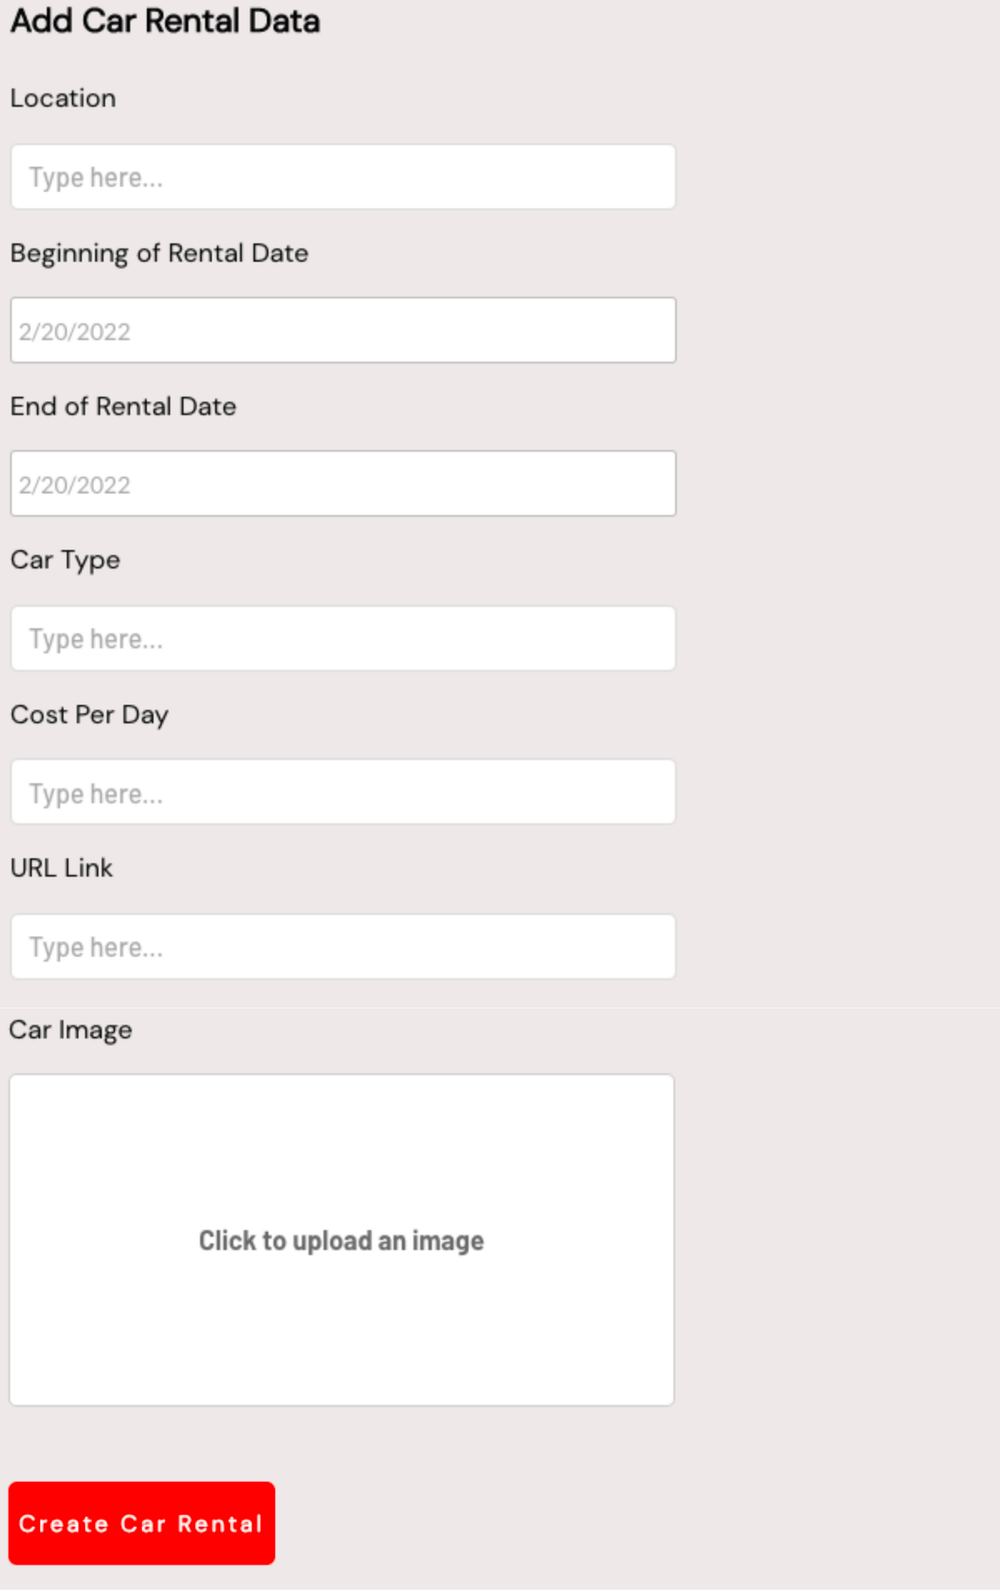
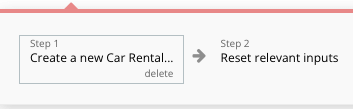
We’re going to once again use a workflow action, this time to create Car Rentals data and then map the on-page input elements to our database.
We’ll reset the relevant inputs one last time.
We now have the ability to create data for Flights, Hotels, and Car Rentals.
Optional: Using Custom States to Show/Hide Relevant Input Elements
Our Admin Portal is now going to look a bit crowded due to the three separate sets of Input elements.
To make the portal more tidy and provide a better user experience, we can use Bubble’s custom states feature to hide and show input elements depending on what data type we’re creating.
Learn more about custom states in our video tutorial:
To implement, we first need to select any element on the page (or even the page itself) and assign it a custom state. I’ve chosen the parent container group for all the input fields in this example.
You can assign a custom state to an element by clicking on the “i” icon in the top-right hand corner of the element editor.
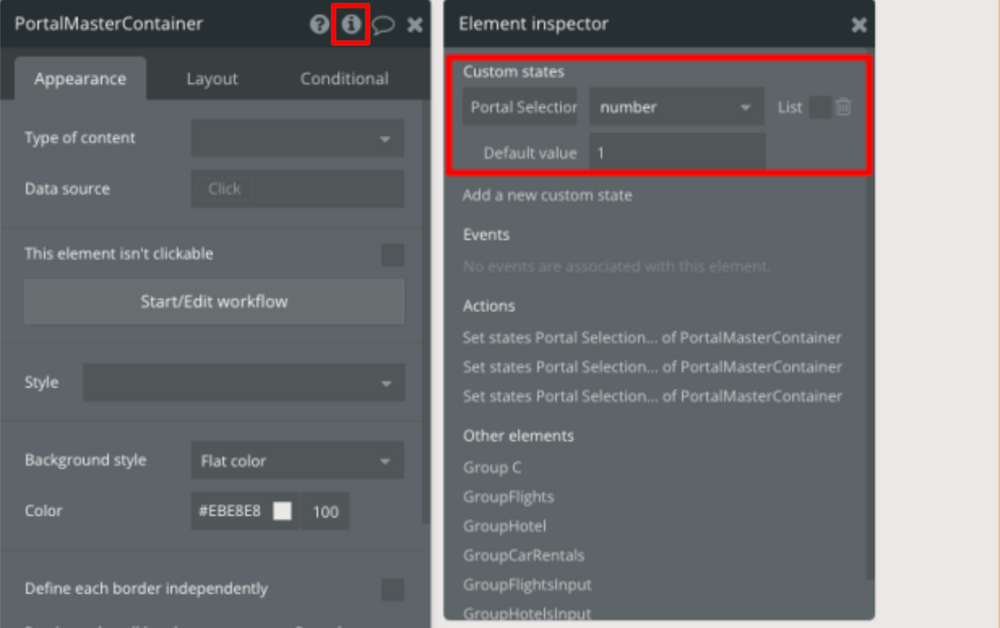
We can then name our custom state. We’re going to call ours “Portal Selection” and give it a type. Our custom state is going to have a “number” value and the default value will be 1.
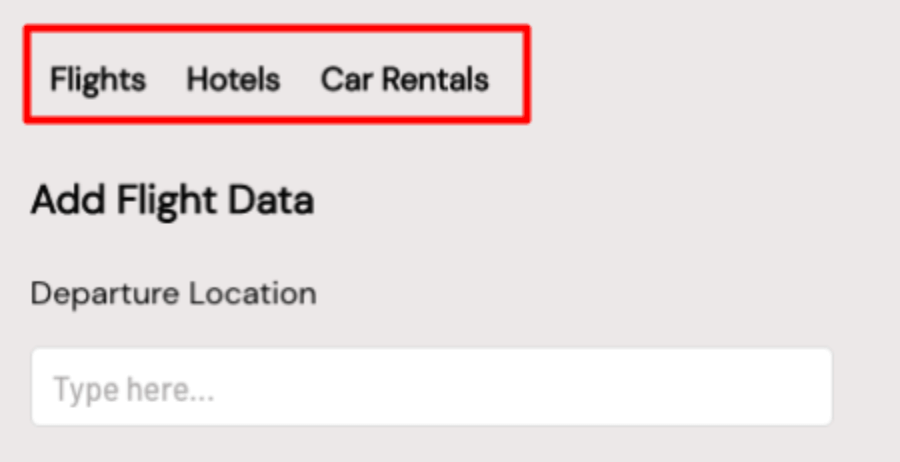
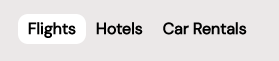
Next we’ll create three groups at the top of our page. Each group will have a text element: one for Flights, Hotels, and Car Rentals.
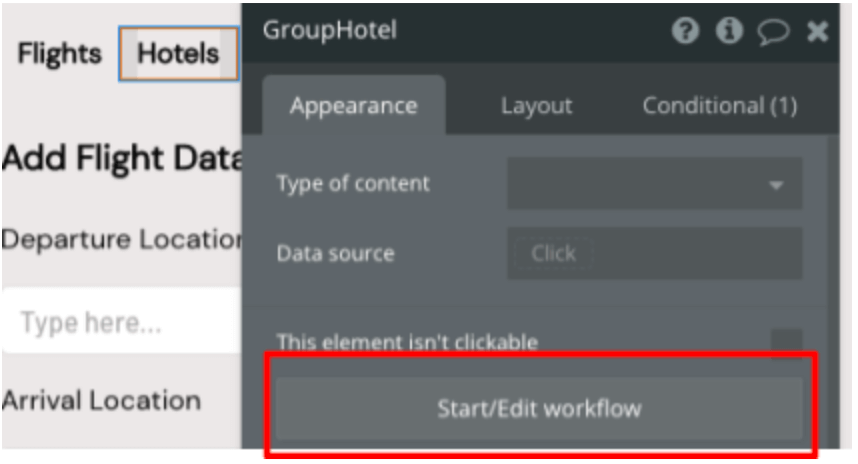
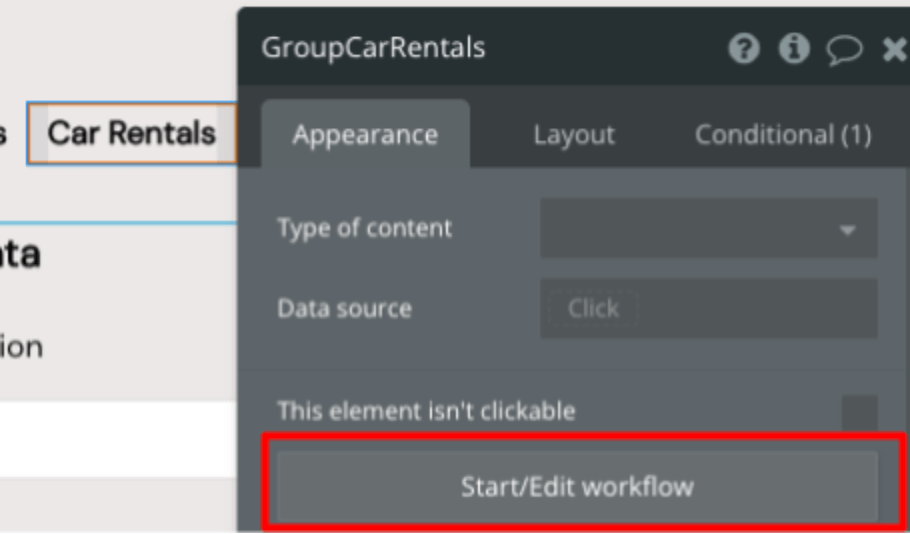
Now we’ll use workflow actions to change the custom state of our “PortalMasterContainer” element based on which of these three groups is clicked on.
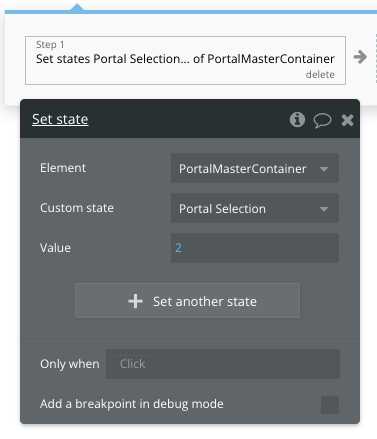
Let's start with the Hotels group.
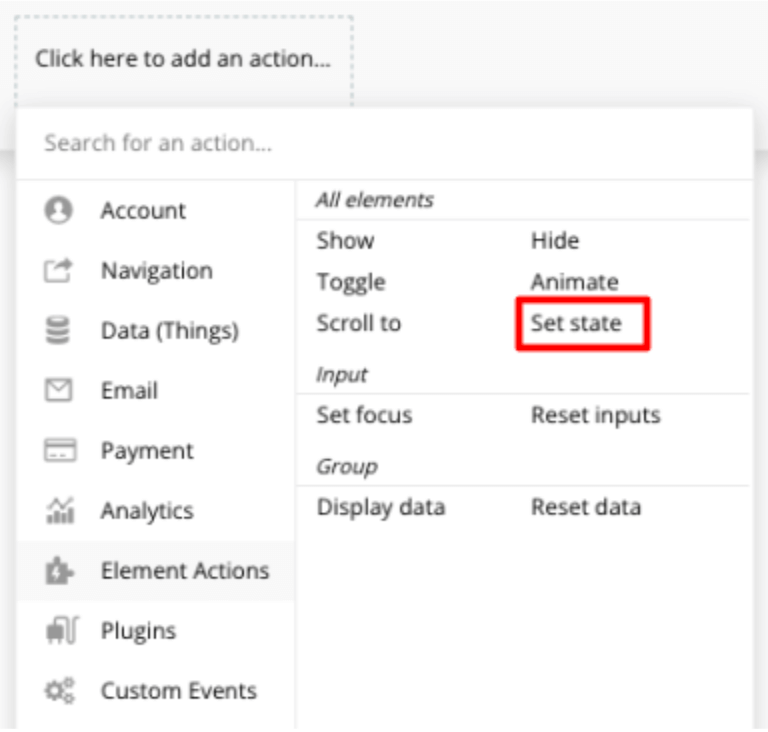
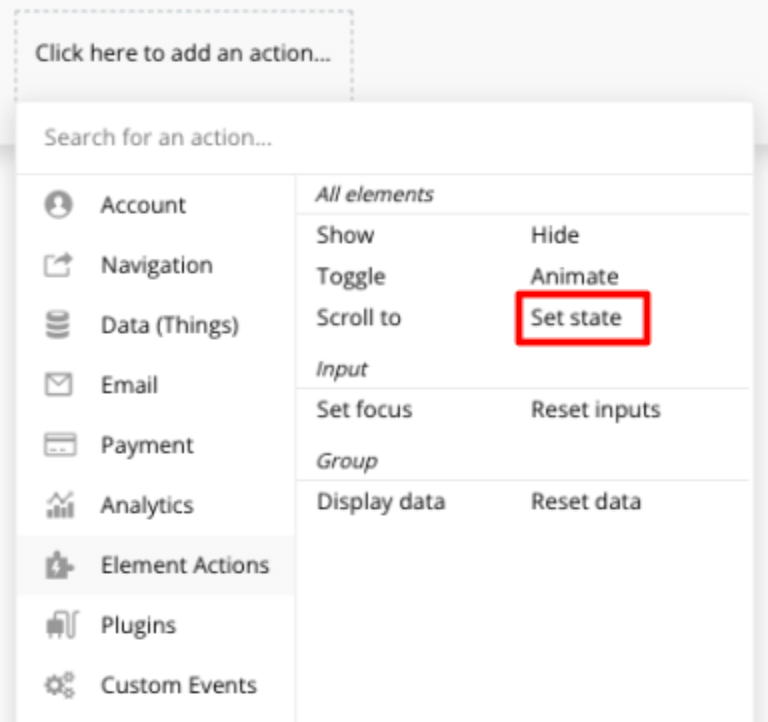
Select “Set State” under “Element Actions.”
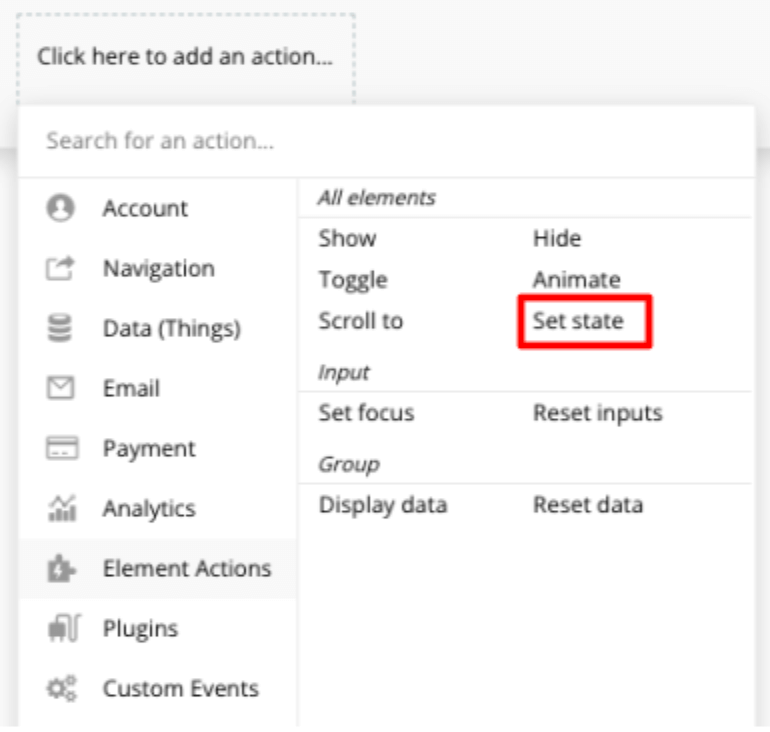
We’ll set the “Portal Selection” state of our “PortalMasterContainer” to 2.
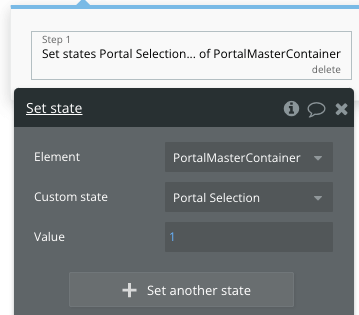
We’ll repeat these steps for our “GroupFlights” and “GroupCarRentals” elements. A value of 1 will be set for the “Portal Selection” when “GroupFlights” is clicked on.
We’ll again select “Set State” under “Element Actions”...
But this time we’ll set the state of the “PortalMasterContainer” to 1.
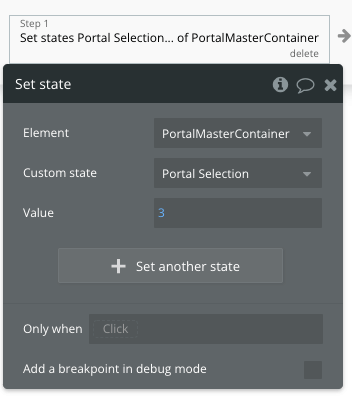
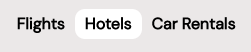
Finally, we'll set a value of 3 for the “Portal Selection” when “GroupCarRentals” is clicked on.
Once more, we’ll select “Set State” under “Element Actions.”
When we click on the “GroupCarRentals” element, we’ll set the state of the “PortalMasterContainer” to 3.
Now that we can set the custom state of our “PortalMasterContainer” by clicking our three groups, we can easily show and hide the relevant input elements. The key to achieving this is using Conditional rules.
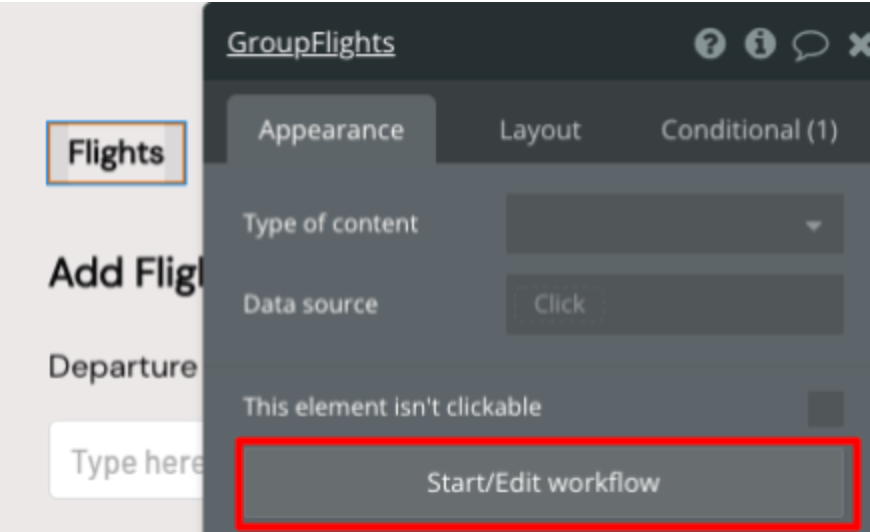
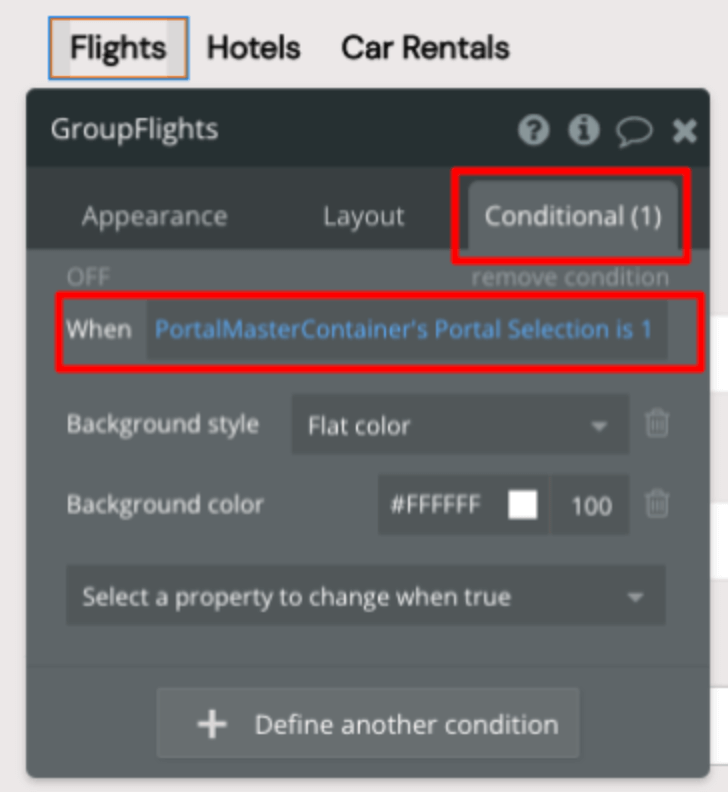
Let's click on our “GroupFlights” element, select the “Conditional” tab, and add the following condition:
“When PortalMasterContainer’s Portal Selection is 1”
Background style: Flat Color
Background color: #FFFFFF (or whatever color you want)
This is going to change the background color of the “GroupFlights” element, which will help the user understand which element is selected.
Now when the custom state is set to 1, we should see the “GroupFlights” element stand out vs. the other group elements at the top of the page.
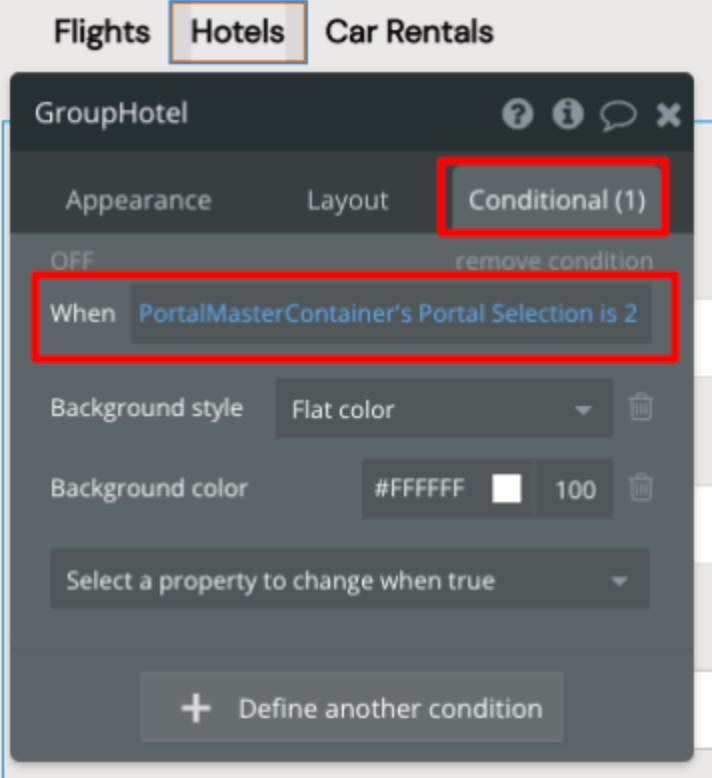
We’re going to repeat the same step for the “GroupHotel” and “GroupCarRentals” elements.
Finally, we’re again going to use Conditional rules to show and hide the various input groups we’ve put on our page.
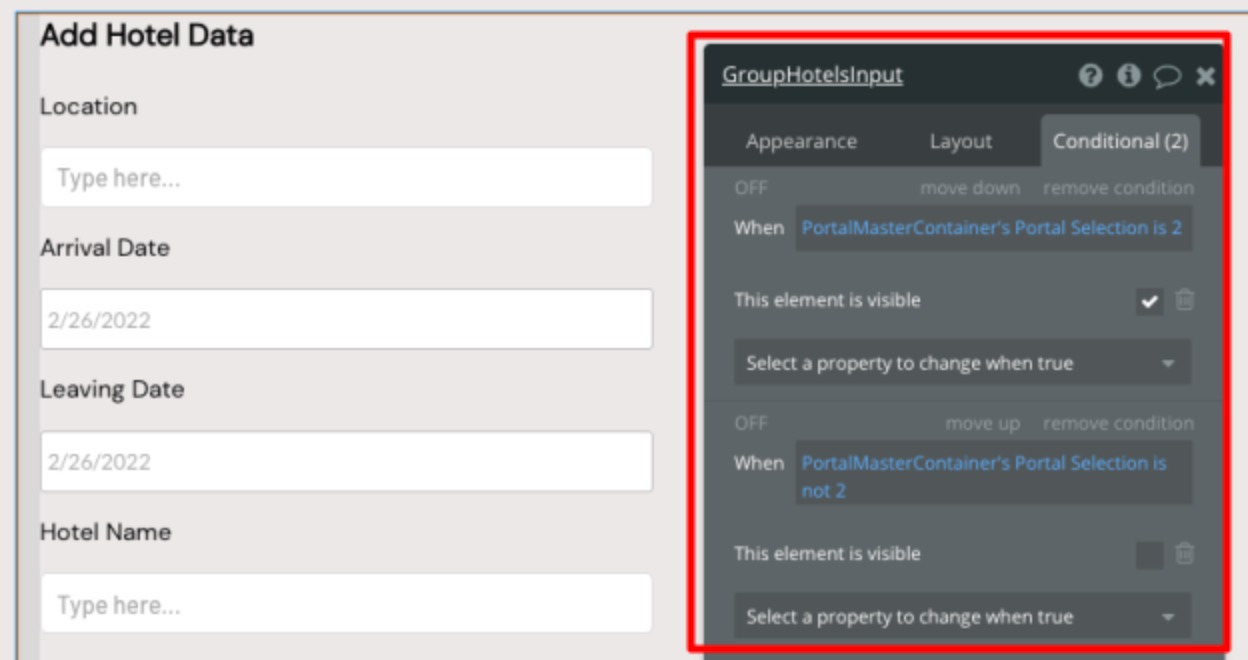
First, let's click on the Group that contains all our Flights input elements and add two conditionals to it.

When the PortalMasterContainer’s Portal Selection is 1, the element is going to be visible, but when we set the custom state to 2 or 3, the element will not be visible.
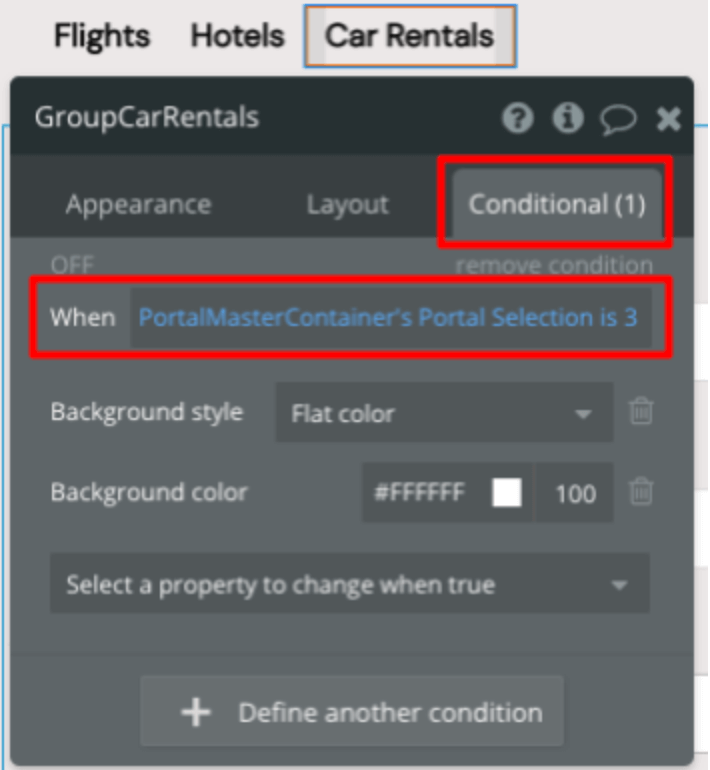
Let's then apply similar logic to the groups that contain our Hotel and Car Rentals input elements.

Now we can dynamically show and hide the various groups of input elements depending on what group we click on at the top of the page!
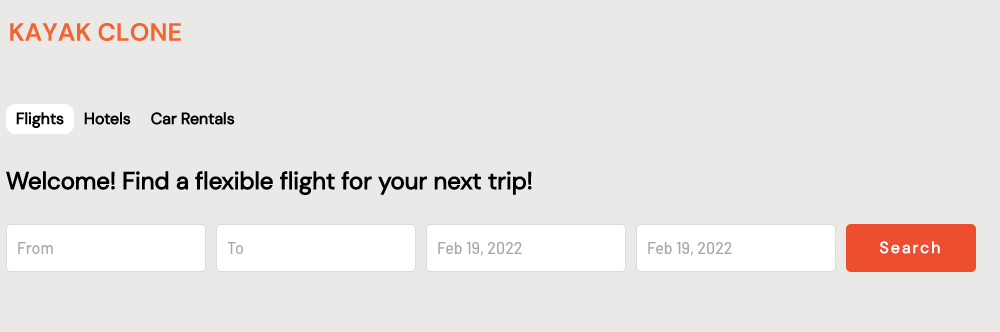
Building a Homepage
Now that we have the ability to add flights/hotel/car rental data, we’re going to build a homepage for our Kayak clone from which users can search for the information they want.
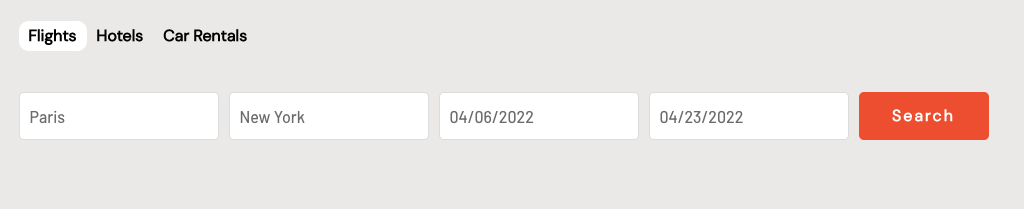
Let's start off by creating a new page and dropping four input elements and a button onto it.

We’ll set the content format of the first two input elements as Text and set the content format of the last two input elements to Date.
Sometimes, users will want to search for information on flights. Other times, they’ll want to search for hotels or car rentals. Depending on their search query, we’ll want to show different input elements, as not all elements for flight search queries will be relevant for hotel searches. We’ll use Bubble’s custom states feature to achieve this.
Let's create a group called GroupSearchChoice, put it at the top of the page, and put in three sub-groups: one each for Flights, Hotels, and Car Rentals.
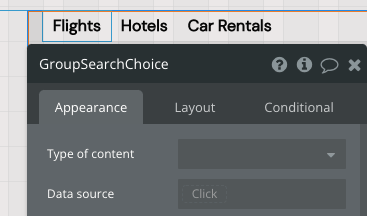
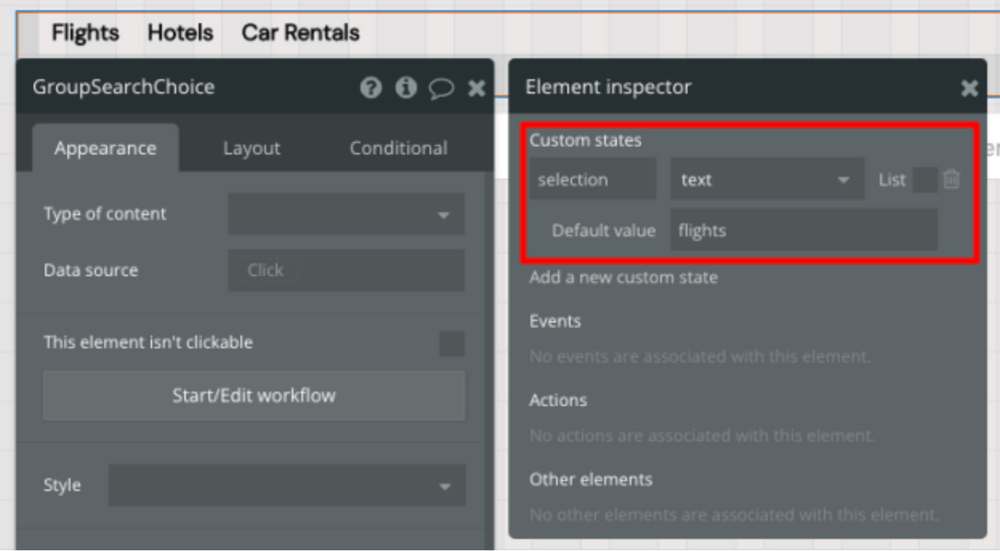
Now let's assign a custom state to the GroupSearchChoice. We’re going to call the custom state “selection,” make it a text value, and assign it a default value of “flights.”
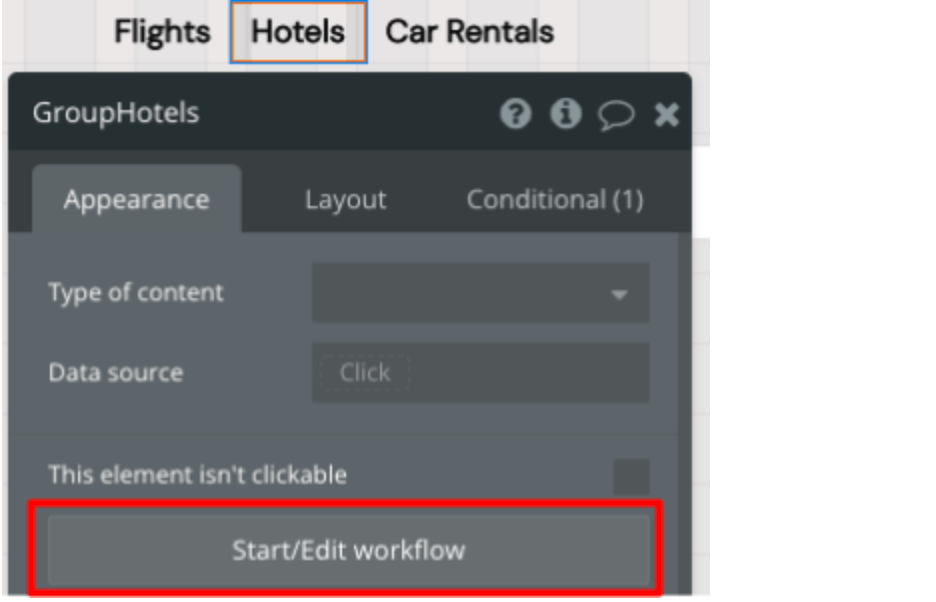
Next we’ll build out three workflows that change this custom state depending on which of our sub-groups is clicked.
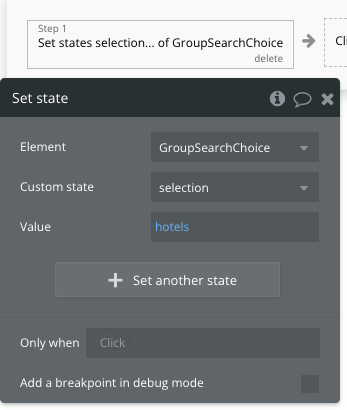
- If “GroupHotels” is clicked, we’ll change the custom states value to “hotels.”
- If “GroupCarRentals” is clicked we'll change the value of the custom state to “car rentals.”
- When “GroupFlights” is clicked the custom state will be change to “flights.”
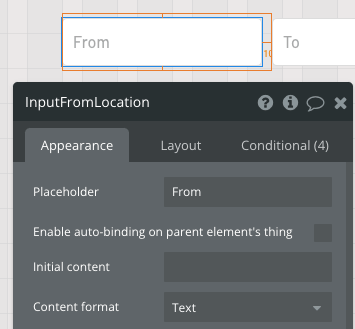
We’re going to change certain input elements depending on what custom state we’ve chosen. When we’re searching for Hotels or Car Rentals, there’s no need to have two location-based inputs. Therefore, we’re going to hide the second input element when the custom state of “GroupSearchChoice” is either “hotels” or “car rentals.”
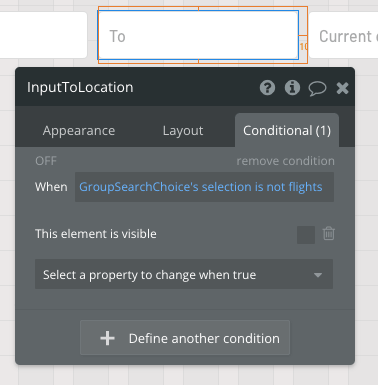
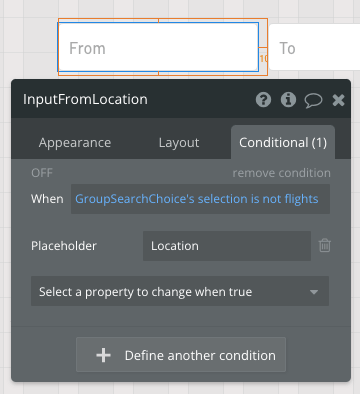
We’ll also change the placeholder content in the very first input element when the custom state of “GroupSearchChoice” is either “hotels” or “car rentals.”
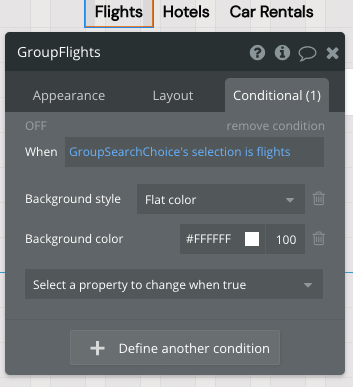
Finally, we’ll use conditional formatting to change the background color of some of the groups to indicate to the user which data type they’re currently searching for.
In this example, I’m changing the background color of “GroupFlights” to a different color when the custom state of “GroupSearchChoice” is set to “flights.”
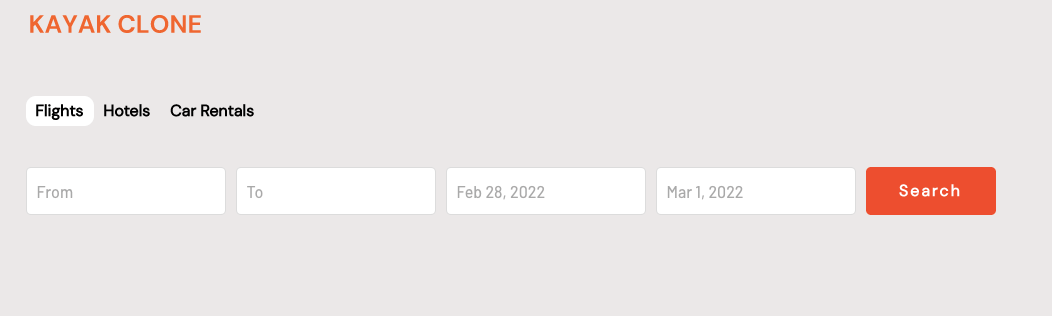
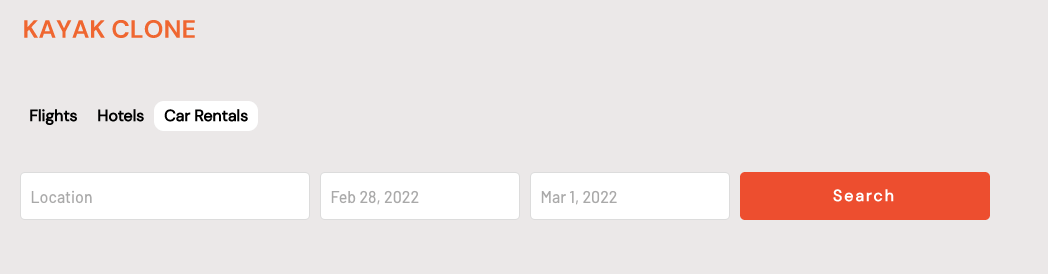
This can be repeated for both “GroupHotels” and “GroupCarRentals.” The end result is that when a user clicks on the Flights group, they get something like this:
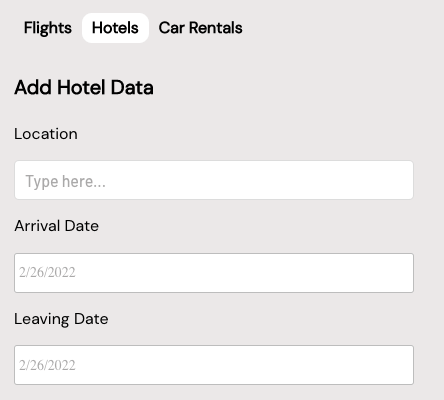
When the user clicks on “GroupHotels,” the Kayak clone homepage should look like this:

Finally, when the user clicks on “GroupCarRentals,” our homepage will look like this:
Now that our users have the ability to search for flights/hotels/car rentals by location and date, we’re going to work displaying relevant search results.
Sending Data to a Results Page
Let's create a new page called “search-results.” We’re going to display search results for either flights, hotels, or car rentals, depending on what the user has selected on the Kayak clone homepage.
To achieve this, we’re going to send data from the homepage to the search results page using URL Parameters.
Go back to the Kayak clone homepage and add a new workflow whenever the “Search” button is clicked.
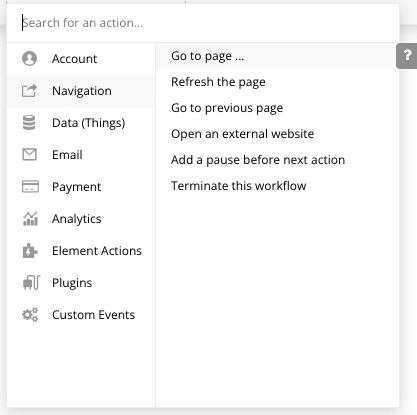
We’re going to navigate to the “search-results” page and send data to that page by ticking the “Send more parameters to the page” checkbox.
Each key value we input is going to represent one of the input boxes on the homepage.
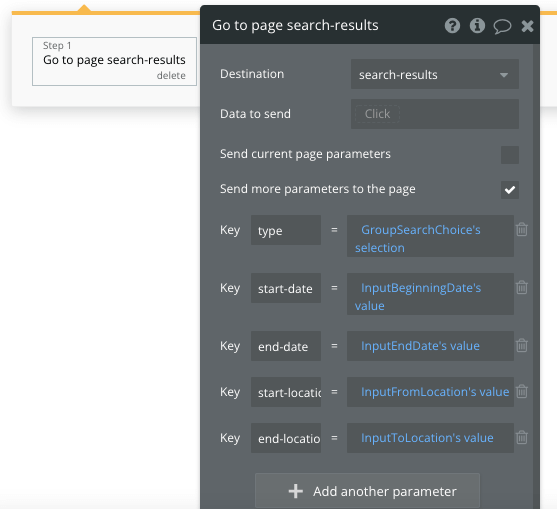
We’re sending five separate pieces of data to the search results page:
- “type,” which is going to be either “flights,” “hotels,” or “car rentals,” depending on what the user has selected.
- “start-date,” which will be whatever date the user puts into first date input box on the homepage.
- “end-date,” which will be whatever date the user puts into second date input box on the homepage.
- “start-location,” which will be whatever date the user puts into first location input box on the homepage.
- “end-location,” which will be whatever date the user puts into second location input box on the homepage.
In the below example, we’re searching for flights from Paris to New York.
If we click the “Search” button, we’re brought to the “search-results” page. If you look at the URL in the address bar, it should look like the following:
https://kayak-clone.bubbleapps.io/search-results?type=flights&start-date=Apr%206%2C%202022%2012%3A00%20am&end-date=Apr%2023%2C%202022%2012%3A00%20am&start-location=Paris&end-location=New%20York
The parts of the URL that are in bold contain data that we’ve sent from the homepage.
Displaying Data on the Search Results Page
Now that we can send data from the Kayak clone homepage to the search results page, let's display search results that answer the users search query.
We’re going to create three repeating groups on the search results page: one each for flights, hotels, and car rentals.
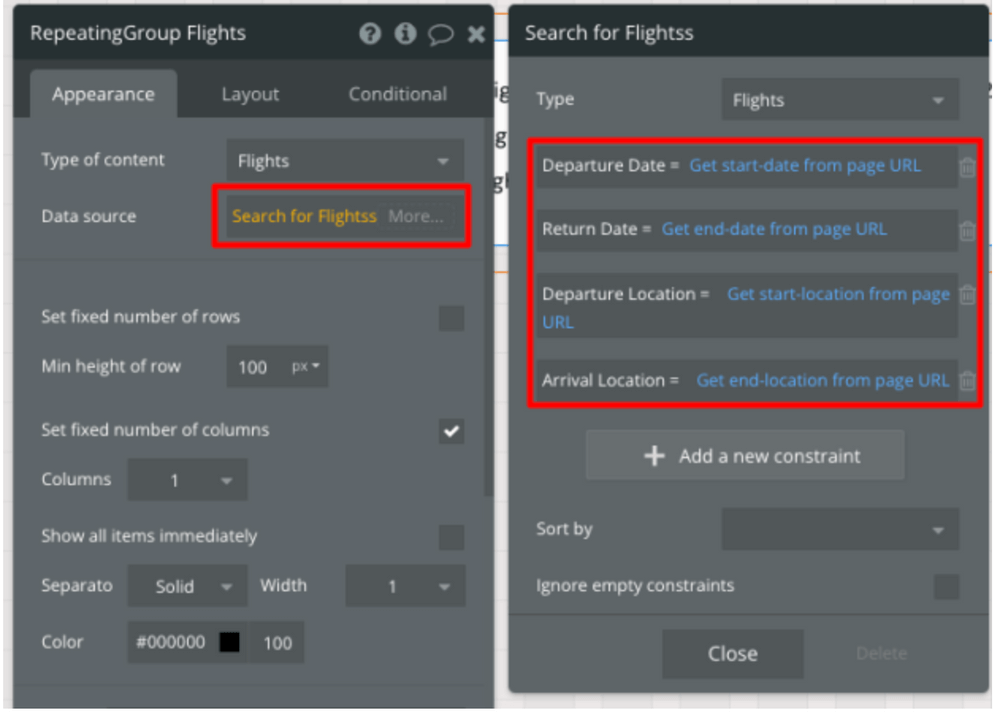
First, we’ll create a repeating group that will show us search results for flights. We’ll also drop some elements that will give details for the specific flight results.

The data source of this repeating group will involve searching for Flights. We’re also going to use some constraints to only show “flights” data that matches the user's search criteria. This will involve pulling data from the page URL.
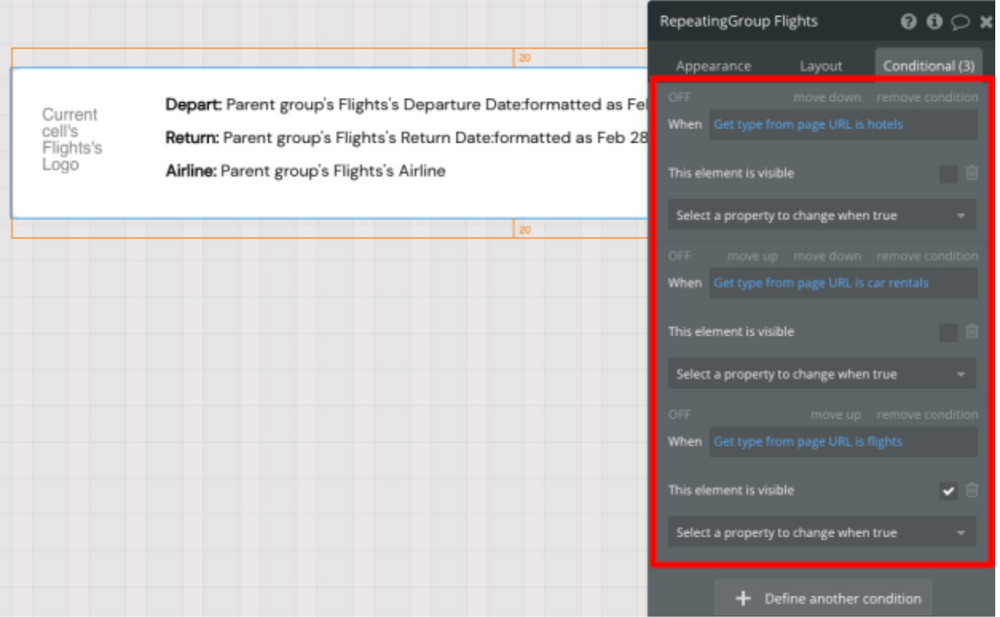
Next, we’ll set some conditional rules to hide and show the “RepeatingGroup Flights” element depending on what the user was searching for.
If the user was searching for hotels or car rentals on the homepage, we wouldn't want to show this repeating group. If they were searching for flights, then we do want to show it.
We’ll again take data from the page URL and only show the repeating group when the “type” key is “flights.”
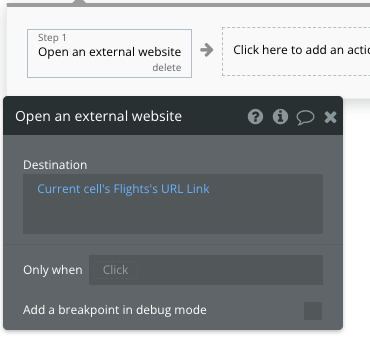
Finally, for the Flights data, we’re going to create a workflow that brings the user to an external site when they click on the “Get Flights” button. As our Kayak clone is an aggregator of other sites' data, the ability to book flights will be shown on a third-party website.
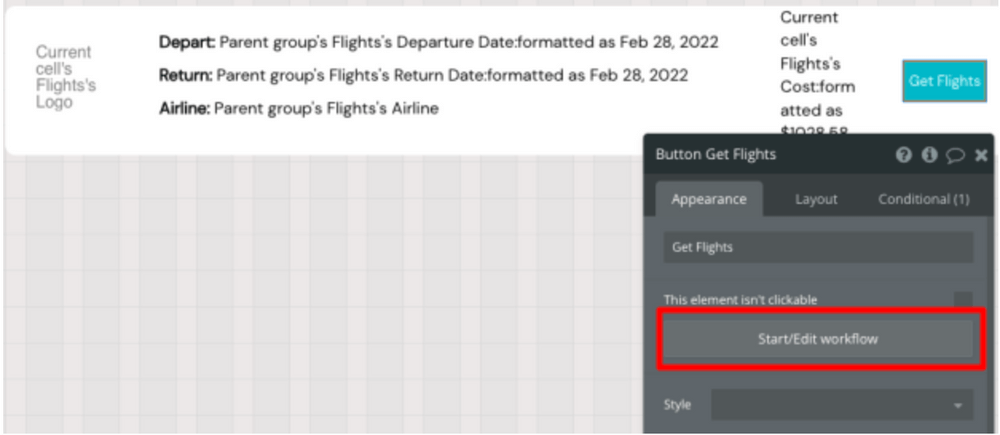
We’ll send the user to the current cell’s Flights URL Link.
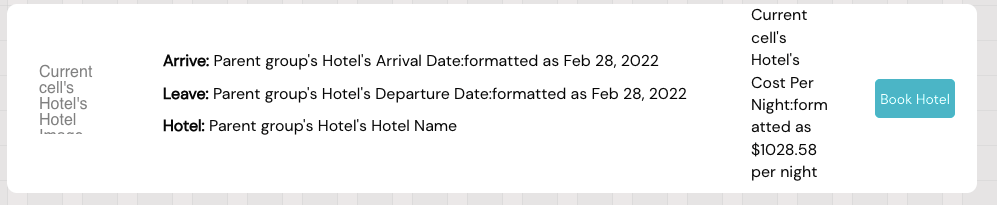
Next, we’re going to repeat the above steps for a repeating group that shows “Hotels” data. Once again we’ll drop some text, image, and button elements in the repeating group so that we can show the user relevant information.
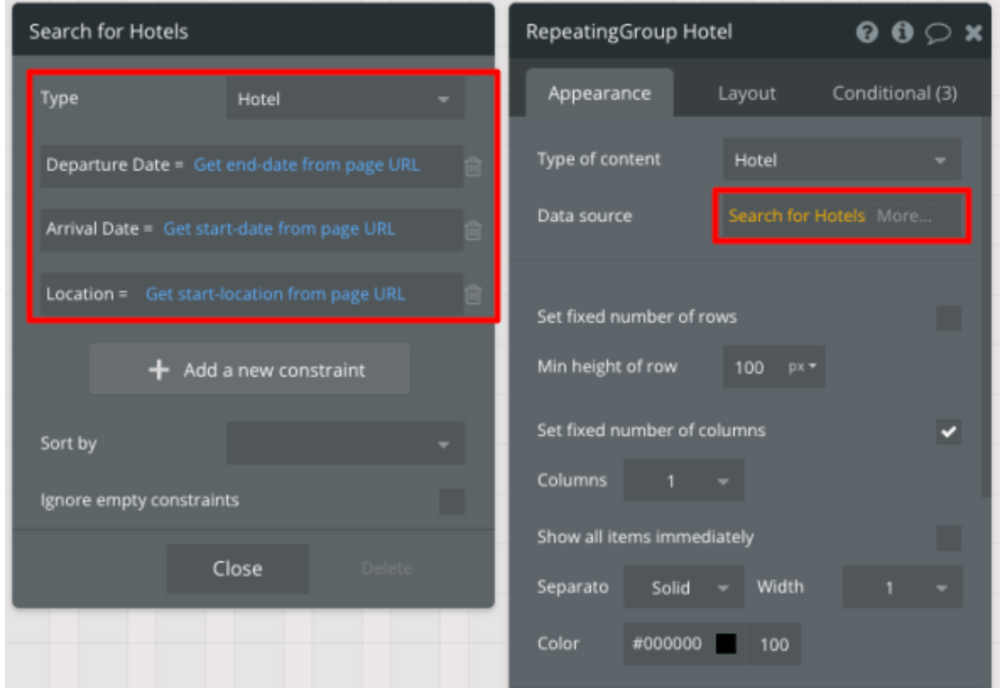
The data source this time around will involve searching for “Hotels” data and again setting constraints using data from the page URL.
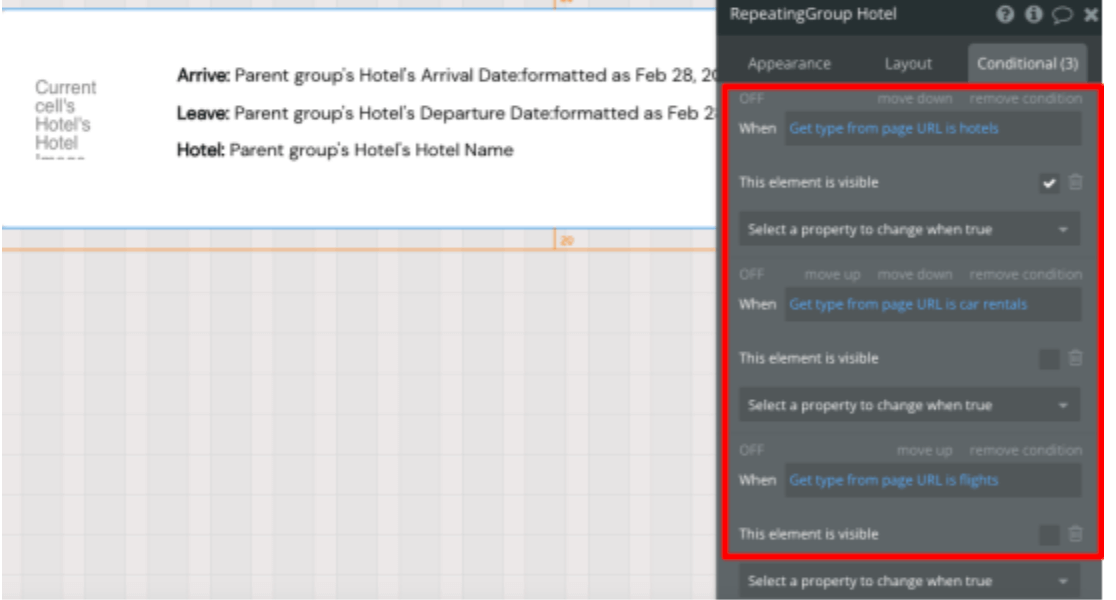
We’ll hide the repeating group if the user was searching for “Flights” or “Car Rentals” and show it if the user was searching for “Hotels.”
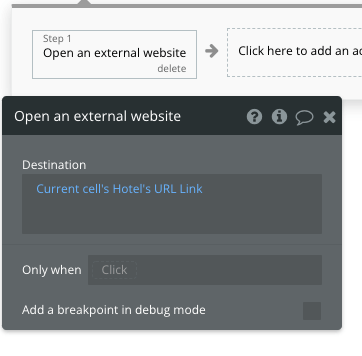
We’ll again create a workflow that brings the user to an external site when they click on the “Book Hotel” button.
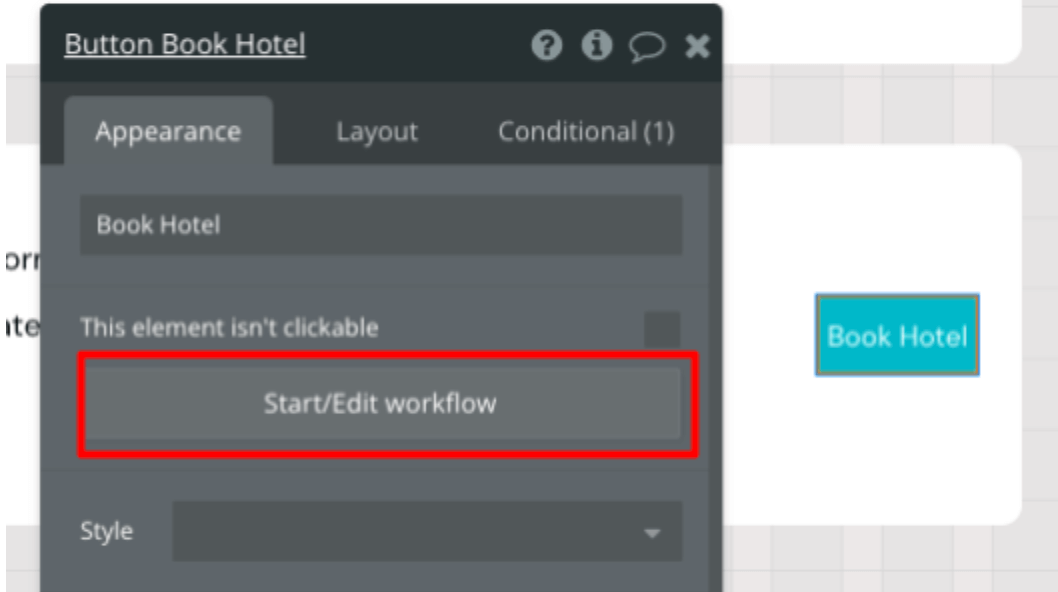
The user will be sent to an external site that will display full details of the hotel booking.
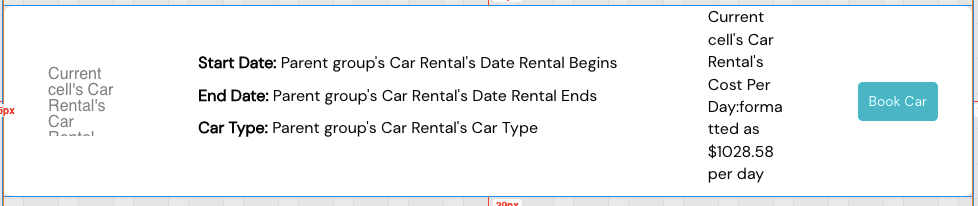
Lastly, we’ll add a repeating group to show results for searches for Car Rentals. We’ll once again use text, image, and button elements to show data specific to the Car Rentals data type.
The data source for this repeating group will involve searching for “Car Rentals” data and again setting constraints using data from the page URL.

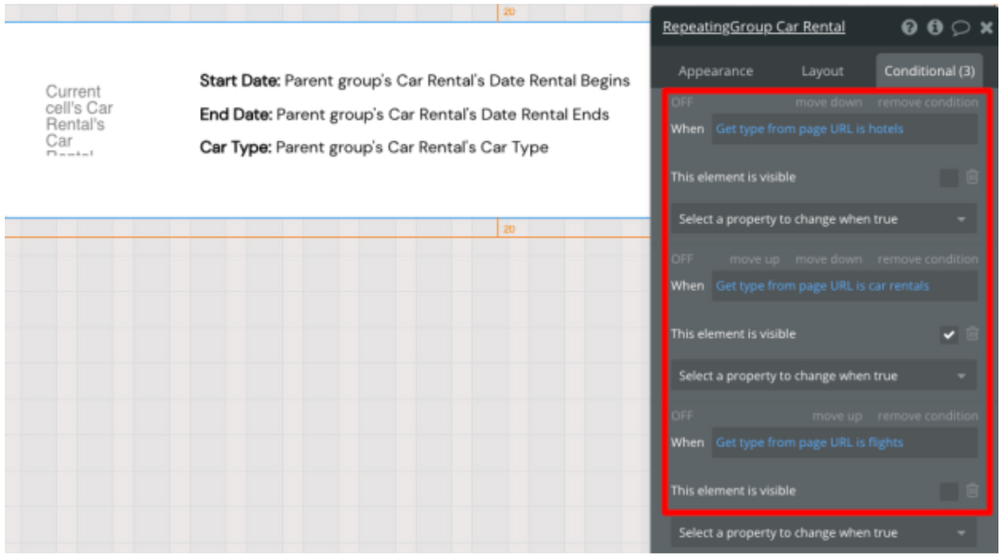
We’ll hide the repeating group if the user was searching for “Flights” or “Hotels” and show it if the user was searching for “Car Rentals.”
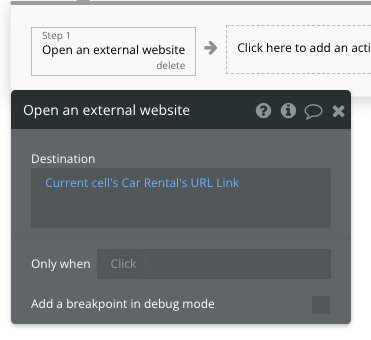
We’ll create a workflow that brings the user to an external site when they click on the “Book Car” button.
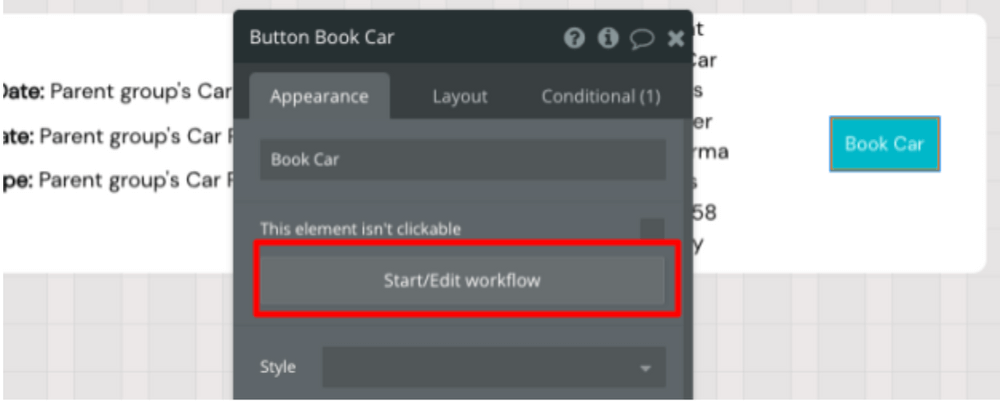
The user will be sent to an external site that will display full details of the car rental booking.
Additional Features
Once you’re comfortable with the basic features outlined above, you can start experimenting with adding additional features search as:
- Searching for flights/hotels/car rentals based on price
- Letting users “favorite” flights/hotels/car rentals so they can come back to them later
- Adding user reviews on flights/hotels/cars
- Offering dynamic recommendations to cross-sell products on your search-results page
Further Resources
If you’re interested in building a Kayak clone, you might also find it useful to read some other “How to Build” tutorials that cover similar ground such as:
Privacy & Security
Now that you have the basics of your app, don't forget to start setting some privacy rules and conditions to keep your data secure - starting with roles in the 'Privacy' section of your data tab. You can also check if you're unintentionally exposing any data with an API checker.
Launch
Hiring a developer or dev team to build this app would cost thousands, if not tens-of-thousands of dollars. As you launch and grow in users, paid plans allow you to host the app on your own custom domain, and these start as low as $25 per month. Some templates and plugins may cost more, but you can build all the functionality of a Kayak without any additional costs.
Start building
Bubble can help you build a Kayak clone or any other product you choose! It’s never been easier to build something incredible without having to code.
Ready to join the no-code movement? Register your free Bubble account and get started today.
If you’d like additional help when building your product, our thriving community forum is a great place to source actionable advice and resources. Any maker is encouraged to ask questions within the community to help empower their no-code journey.
Build for as long as you want on the Free plan. Only upgrade when you're ready to launch.
Join Bubble