TL;DR: This guide covers how to build an e-commerce app on Bubble: defining your store’s data model, setting up a product catalog and cart, wiring up checkout and payments, and publishing to web, iOS, and Android, all without writing code.
You have a product you want to sell online, and you want it live quickly. That means setting up an order database, building a checkout flow that handles payment securely, and making decisions like whether you want AI features or a native mobile app.
Those decisions don’t stop at launch, either. Bubble’s Business of Building 2026 report looked at 250,000 live apps and found that the ones that go on to make money get edited about 614 times in their first six months, compared to just 25 for apps that don’t.
The good news is that you don’t need to be a security expert or a coder to get this right. Bubble is a fully visual AI-powered app builder, so you can build your store fast and keep improving it yourself, instead of trusting generated code you can’t read.
What you can build with Bubble's visual editor for e-commerce
An e-commerce experience generally comes in one of three forms: a website, a web app, or a native mobile app. Depending on your business, you might only need one of these, or you might want all three.
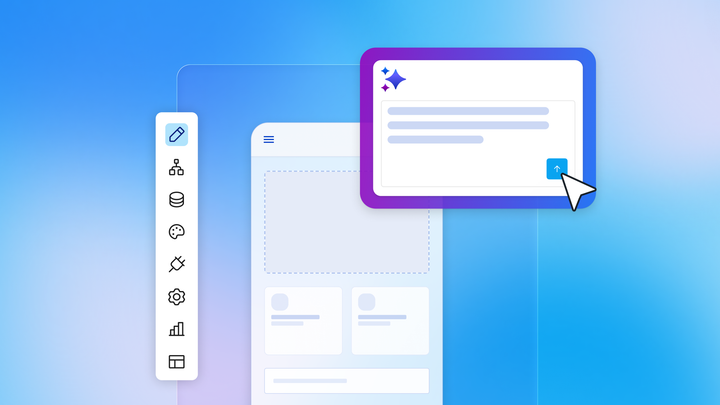
With Bubble AI, you can build any (or all) of them from a single plain-language prompt that generates your app’s design, database, workflows, and privacy rules. From there, you can keep talking with the Bubble AI Agent (beta) to refine it, or open the visual editor and adjust any of it directly.
Two of the most important elements for e-commerce are payments and security. Bubble handles both.
- Payments: Stripe is the standard for online payments, and Bubble makes it easy to integrate. If you need to add a tool to calculate taxes or shipping, or just prefer another payment provider, you can either use Bubble’s API Connector or one of the many plugins built by the Bubble community (browse the marketplace).
- Security: Privacy rules and a security dashboard cover customer data protection automatically, and Bubble AI generates the data structures underneath it all.
Websites
A website is the simplest starting point: Your customers shop right in their browser, without needing to download an app. You design the product pages yourself, set SEO-friendly URLs, and add promotions like a seasonal discount.
If you also build a native mobile app down the road, it shares the same backend. New orders and updates to your product show up in both places automatically, so you won’t need to sync two systems.
Web apps
A web app gives you more options through accounts that remember your customers’ history to streamline shopping and shipping. They can pay and return purchases easily, see their cart, and apply coupons, while you can use their info to offer things like loyalty points and early access to sales. On Bubble, all of that runs through visual workflows you build yourself.
Native mobile apps
Bubble also lets you build a native mobile app for your e-commerce store, with mobile functionality like push from the same editor and backend as your web app. A native mobile app is what people download from the App Store or Google Play Store, running on the phone’s own operating system instead of a browser tab, so you can reach customers more directly.
A few e-commerce moments where push notifications can boost sales:
- Flash sale alerts: Let your customers know about limited-time discounts they need to act on now.
- Back-in-stock notifications: Show them when a wishlisted product comes back.
- Order status updates: Alert them when an order ships or is out for delivery.
- Abandoned cart reminders: Re-engage shoppers who got to the last step, but didn’t complete checkout.
Bubble’s native mobile apps run on React Native (the same framework used by major consumer apps), so what you build is a true native app, not a web wrapper.
No-code e-commerce app examples
A single founder selling one product needs a different setup than a marketplace juggling dozens of vendors. Below are a few common business models that come together on Bubble.
Direct-to-consumer (DTC) stores
Most e-commerce apps are DTC stores, where you sell your products straight to your own customers. Many apps also sell variants like size and color, or subscriptions that turn one-time buyers into repeat revenue. Variants live as fields on your Product data type; Stripe’s subscription actions, which are built into Bubble’s Stripe plugin, handle the recurring billing.
Marketplaces
A marketplace flips that. Instead of selling your own products, you’re hosting other sellers. Each vendor manages their own listings and needs to get paid directly.
Bubble’s Stripe plugin already has a marketplace mode. You register each seller through a dedicated action, and their payments go straight to them instead of landing in your account.
Business-to-business (B2B) ordering apps
With a B2B ordering app, your customers are companies, and their needs are different. Your app should let employees log into a business account, place bulk orders, and see company-specific prices. On Bubble, you’d link each employee to the account, then use privacy rules to control which pricing and catalog each person sees.
Artificial intelligence solutions
You can add AI elements to help your customers and save time. Here are a few things AI can do for your store:
- Personalized product recommendations: Connect an AI model that learns what a customer tends to browse and buy, then shows them more of what they’ll actually want. It lifts both order value and repeat visits.
- Smart search: Let customers type something like “something warm for a winter hike” and get results that match the intent, not just the keywords. Fewer dead-end searches means fewer abandoned visits.
- AI-generated product descriptions: Add a button to your product-management pages that calls an AI model to draft a description for a new listing. It saves time when you’re adding products in bulk.
You build these through the API Connector or plugins, and the Bubble AI Agent can help create and modify the calls, or suggest and install plugins for you. Some plugin-based workflow actions still need manual configuration once they’re in.
How to build an e-commerce app step by step
Here’s the core sequence for going from idea to a live e-commerce app.
Step 1: Define your store's goals and target customers
This step comes before you touch any tool, because everything you build next depends on what your store sells and who it’s for. Answer these three questions before you start:
- What are you selling? You might sell physical products, digital downloads, subscriptions, or a mix. Each needs a different data model and checkout flow. A digital product store needs to deliver instantly after payment, while a physical goods store needs to collect a shipping address and handle fulfillment.
- Who’s your customer? A DTC store selling to individual shoppers needs different accounts and checkout flows than a B2B store with bulk ordering or negotiated pricing. DTC usually means guest checkout and a saved cart, while B2B means tiered pricing by account.
- What does success look like? Pick one or two outcomes to aim for, like your first sale or a target number of orders a month. That’s what tells you what to build first and what can wait for v2.
Step 2: Set up your product catalog and database
Every product listing, customer account, order, and cart item lives in your database as a structured record. On Bubble, that database works a lot like a spreadsheet where data types are the tabs (Products, Orders, Users), and fields are the columns (name, price, image, stock level).
You can ask Bubble AI to set up your data types and fields for you, and the more specific your prompt, the better the result. For an online clothing store, instead of “create a database for my store,” try something like “create products with name, price, and size and color variants, plus carts and orders linked to a customer.” A prompt like that can generate all of those data types together, ready for you to refine from there.
Once it’s generated, open the visual editor to check that the data types and fields match what your store needs. If something’s missing, you can ask the Agent to add or adjust data types and fields, or make the change yourself directly in the editor.
A common e-commerce data model on Bubble includes these core types:
- User: Name, email, shipping address, and order history. Having this on record builds repeat purchase behavior and cuts down on checkout friction the next time someone visits.
- Product: Name, description, price, images, category, stock level, and variants like size or color. This is the core of your catalog and what customers actually browse.
- Shopping cart: A container tied to the user’s active or completed purchase, tracking totals and status. Some apps add a separate Order data type as well for fulfillment and reporting.
- Cart item: Each item someone adds to a cart gets its own record, holding the quantity and a snapshot of that product’s price and description at the moment they bought it. If you update the product later, previous orders, returns, and refunds still reflect what the customer actually paid for.
Now, you’ll set up privacy rules to protect your new database. To control who can see or edit each data type, you set them up one at a time in the Data tab under Privacy. For example, you’ll want to limit a cart or order to just the customer it belongs to, while your own admin account keeps full access to fulfill orders.
Step 3: Build your product listings and cart
This step covers two things: the pages customers shop from, and what happens when they add something to their cart.
Use the visual editor to design the pages customers see and connect them to the database. Start with a product listing page that shows everything in your catalog, then a product detail page for a single product with an “Add to cart” button.
Your product listing page uses a repeating group element, which displays every record from a data type (like all your Products) as a list. When you add a new product to the database, it shows up on the page automatically, with no extra design work.
When your customer clicks “Add to cart,” your store needs to create a new Cart item record that links the current user, the product, its price, and how many they’re buying. You can build that workflow yourself in the workflow editor, or tell the Bubble AI Agent what you want with a prompt like “when the Add to Cart button is clicked, create a cart item for the current user.” You’ll also need a cart page, which pulls together every Cart item record for the current user and shows a running total.
Step 4: Add checkout and payment integration
Checkout is where customers review the cart, enter a shipping address, and pay. You can build it as a series of pages (familiar, and each step gets its own URL), or as a multi-step popup (keeps customers on the same page, no full reload between steps). You’ll connect payment tools through plugins and the API Connector.
You can use Bubble's official Stripe plugin for charging users, subscriptions, coupons, invoices, refunds, and a built-in marketplace mode for routing payments to registered sellers. Other providers, like PayPal, need a community-built plugin or your own API Connector call instead.
Whichever you use, one workflow can tie it all together: charge the card, create an Order record, clear the cart, and fire off a confirmation email, all in a single visual flow.
The Agent can set up those API Connector calls for you, or suggest and install a payment plugin. Even then, expect to configure a few plugin-specific details yourself, like entering your own API keys.
Guest checkout lets customers buy without creating an account. Set up the Order to link to an email address instead of a logged-in user record, and the Agent can help with the data and workflow setup, though plan to check the payment and plugin steps yourself.
Step 5: Test your e-commerce app before launch
Testing here covers two things: whether the app does what it’s supposed to, and whether it looks and works right across different screens. Walk through the core customer journey before you go live:
- Browse products and use search or filters
- Add a product to the cart and update the quantity
- Complete checkout with a test payment (Stripe provides test card numbers for this)
- Receive an order confirmation
For mobile, dev builds let you load your native app onto a real device and interact with it — including push notifications — without publishing to the app store. (Requires a paid plan.) You can also use simulated device preview to gives you a close, browser-based preview, though it won't cover push notifications or other hardware-specific features.
To test those, install a dev build instead. It's a fuller version of your app, with your icon and plugins included, that runs on your own device and still stays synced with the Bubble editor. Use it to confirm your push notifications actually fire, whether that’s a test flash sale alert or an order update.
This is also the time to check privacy and security. Log in as two different test users to confirm that privacy rules stop one customer from seeing another’s orders, and run the security dashboard to flag exposed credentials, unsafe API configurations, and other vulnerabilities, with a clear checklist for fixing each one. The dashboard catches common mistakes, but it’s not a full audit, so it’s still worth reviewing your privacy rules and workflows yourself before launch.
Step 6: Publish your e-commerce app
When you’re ready to publish, you’ll need to upgrade to a paid plan. The Free plan works for building and testing, but you can’t launch to customers on it.
Hosting and scaling are managed for you, for both web and native mobile. Keep an eye on your workload usage, and choose a plan that can handle spikes, like the traffic from a big sale push notification.
If you’re just doing a web app, the process is simple. You can use any paid plan, including the Starter. Click Deploy to go live at your custom domain, with SSL included.
For native mobile apps, there are several more steps. Here’s what to expect:
- Set up developer accounts: Before you can submit a native app, you’ll need developer accounts with Apple and Google.
- Package your native app: Bubble configures your app’s icons, splash screens, name, and other platform-specific settings, then packages the build for iOS and Android itself.
- Set up push notifications: Enter your APNs Key ID and key for iOS, and your Firebase service account key plus a google-services.json file for Android, both in Settings > Mobile. Then build the actual notification flows visually in your workflows.
- Submit to the app stores: iOS builds go to App Store Connect for Apple’s review. For Android, Bubble emails you an .aab file for your first manual upload to Google Play Console. Later uploads can be automated once you activate the Google Developer API.
- Plan for future updates: Bug fixes, text changes, and light UI tweaks can go out instantly through OTA updates, without resubmitting to the app stores. Bigger changes, like a new feature, need a new build and another round of app store review.
How much does it cost to build an e-commerce app?
Your costs break down into two buckets: what you pay Bubble, and anything you pay to third parties. Bubble’s Free plan is just for building and testing. Once you’re ready to add things like a live website, a custom domain, or mobile app submissions, plans start at $59 a month, with Growth, Team, and Enterprise tiers above that for more workload capacity.
| What it covers | Notes | |
|---|---|---|
| Bubble plan | Hosting, database, deployment, and mobile app build submissions | Free plan is for development; paid plans starting with Starter add live websites, custom domains, and mobile build submissions |
| Apple Developer account | Required to publish to the App Store | Annual fee; one account covers all your apps |
| Google Play developer account | Required to publish to the Google Play Store | One-time registration fee |
| Payment processing | Stripe or another payment provider | Percentage-based fee per transaction; set by the payment provider |
| Custom domain | Your store's URL (e.g., yourstore.com) | Purchased separately from a domain registrar |
Instead of piecing together a database, hosting, security, and a dev team, you get all of it in one place. You can launch, then keep improving, without ever having to assemble a full engineering stack.
What features does an e-commerce app need?
If you’re building your first e-commerce app, the question is what to prioritize now versus what can wait.
Must-have features for launch:
- Product catalog: A browsable list of products with images, descriptions, prices, and stock levels. Without this, there’s nothing for customers to actually buy.
- Cart: A persistent list of items a customer has selected, with the ability to update quantities or remove things before checkout. It holds its state even if they wander off and come back later.
- Checkout: A flow that collects a shipping address and payment details and confirms the order. Skip this and customers can browse all day but never actually buy anything.
- Payment integration: A connection to a provider like Stripe that processes card payments securely.
- Order management: A way for you to view, fulfill, and update order status, usually through an admin dashboard. It’s the backend view that keeps the business running day to day.
- User accounts: The ability for customers to create an account, log in, and see their order history. It’s what builds repeat purchases and cuts friction on the next visit.
Growth features to add after launch:
- Push notifications: Alert customers to sales, back-in-stock items, and order updates. They’re especially effective on native mobile for time-sensitive messages like flash sales or a price drop on something a customer’s watching.
- Wishlists: Let customers save what they’re interested in, which doubles as a signal for targeted campaigns. You’ll know what they want before they’re ready to buy, and can notify them when it goes on sale or comes back in stock.
- Coupons and loyalty programs: Discount codes and reward points bring customers back and raise customer lifetime value. It’s a feature that pays off: 63% of consumers say loyalty programs are the app feature they value most.
- Product reviews and ratings: Social proof that lifts conversion on product pages by easing purchase anxiety and answering objections before checkout.
- Search and filters: Help customers find what they’re looking for faster. This matters more as your catalog grows past a few dozen products.
- Analytics dashboard: An internal view of revenue, top products, and customer behavior that tells you what’s working and what needs to change.
Start building your e-commerce app
You don’t need every feature covered here to launch. Start with the must-haves, get your first sale, and add the rest as your store grows.
Bubble AI can generate your database, cart, and checkout flow from a single prompt, and the visual editor keeps you in control of everything else, so you’re never stuck waiting on code you can’t read. Sign up for free and start building your store today.
Frequently asked questions about building an e-commerce app
Can I build an e-commerce app without coding experience?
Yes, you can build and launch a full e-commerce app, including product listings, cart, checkout, and payment integration, without writing code, by combining AI generation with a fully visual editor. You still review and control the underlying data, workflows, and privacy rules yourself, so nothing is hidden from you.
Can I build a mobile app for my e-commerce store with push notifications for sales?
Yes, you can build native iOS and Android apps for your e-commerce store from the same editor and backend as your web app. Push notifications need some platform setup first: your APNs Key ID and key for iOS, your Firebase service account key, and google-services.json file for Android.
Once that’s done, you can trigger them from Bubble workflows for flash sales, back-in-stock alerts, abandoned cart reminders, and order updates.
How long does it take to build an e-commerce app on Bubble?
Bubble AI can generate a database, sample data, and basic UI in minutes. Getting to a functional v1 from there takes longer, and depends on how complex your app is, how much payment and data modeling you need, how thoroughly you test, and how familiar you already are with Bubble.
What payment gateways does Bubble support for e-commerce apps?
Payment integrations run through plugins and the API Connector. Stripe is the only provider with a Bubble-made plugin.
It covers card payments, subscriptions, refunds, and a built-in marketplace mode for routing payments to registered sellers. Other providers, like PayPal, along with wallet payment methods, work through community-built plugins or a manually configured API Connector call instead.
How do I publish my Bubble e-commerce app to the App Store and Google Play Store?
Bubble packages your native mobile app and configures icons and splash screens for you, keeping Xcode and Android Studio out of your hands entirely. You’ll still need Apple and Google developer accounts, and you’ll go through each platform’s own setup, testing, review, and release steps.
iOS builds go straight to App Store Connect for submission. For Google Play, Bubble emails you the .aab file for a manual first upload, and future uploads can be automated once you’ve activated the Google Developer API.
Build for as long as you want on the Free plan. Only upgrade when you're ready to launch.
Join Bubble