TL;DR: Visual workflow automation connects your existing software using editable flowcharts with triggers, actions, and decision points. You'll learn what these tools do, how to map your first cross-system automation, and what features to look for when evaluating platforms like Zapier, Make, Workato, Power Automate, and n8n. You'll also learn when these tools are the right fit and when you're actually in a different category: building a custom app rather than connecting existing ones.
Every morning, you're copy-pasting data between your spreadsheet and CRM, a habit that costs companies $28,500 per employee annually according to Parseur. Or maybe you're maintaining a Python script that breaks whenever your data structure changes. Developers spend an average of 50% of their programming time debugging and fixing broken code, according to TechRepublic.
Wasted time is only part of the problem. Manual handoffs introduce errors that compound over time. Scripts break without warning, leaving you scrambling to fix them. Visual workflow automation solves this by connecting your existing tools through editable flowcharts instead of custom code.
In this guide, you'll learn how to map cross-system processes from trigger to completion, design automations using visual interfaces, and test execution to catch errors early. Along the way, we'll help you decide whether connecting your existing tools is the right approach for your situation, or whether you'd be better served by building a custom app instead.
What is visual workflow automation?
Visual workflow automation connects your existing software using editable flowcharts instead of code. You see the triggers that start processes, the actions that move data between systems, and the decision points that route information based on your conditions. When something breaks, you can pinpoint exactly where and why.
Think of it like GPS for connecting your business tools. Manual work is driving without directions: You know the destination, but you're guessing at every turn. Scripts are written directions that work great until the road changes. Visual workflow automation gives you a live map of every step, so you can adjust your route on the fly. This visibility makes debugging faster, helps non-technical stakeholders understand your integrations, and simplifies maintenance as your systems evolve.
Every visual workflow has four key components:
- Triggers start the automation when something happens in one of your tools. Think form submissions in Typeform, new deals in Salesforce, scheduled times, or webhooks from payment processors
- Actions are the tasks performed in your other systems, like sending emails through SendGrid, creating rows in Google Sheets, posting to Slack, or updating records in HubSpot
- Decision points route data based on conditions, like "if order total exceeds $1,000, create a task in Asana for manager approval"
- Data transformations format information as it moves between systems, like converting dates, splitting names, or calculating totals
Tools like Zapier, Make, Workato, Power Automate, and n8n let you build these connections through visual interfaces. You select your apps from pre-built connector libraries, map data fields between them, and set conditions for how information flows. The platforms handle authentication, API calls, and error handling automatically.
Why visual automation matters for connecting systems
Visual automation platforms let you connect your existing tools through editable flowcharts instead of custom code. This visibility transforms how teams build and maintain integrations: You connect triggers, actions, and decision points in a drag-and-drop interface, then modify them as your systems change without rewriting scripts. When processes change, you update the visual flow directly instead of deciphering code or waiting for developers.
Faster debugging means seeing exactly which step failed and what data caused the problem. Instead of searching through logs, you click the failed step, check what was sent to the API, and fix the mapping, often in minutes instead of hours.
Better collaboration happens when operations teams review integration logic without interpreting code. Stakeholders see the cross-system process they approved actually implemented in the flowchart. Teams stay aligned because the automation matches the diagram everyone agreed on.
Fewer errors come from visual validation. Poor data quality costs organizations over $5 million annually according to IBM. Missing error handling becomes obvious when you see an integration path that just ends. You can add retry logic, fallback actions, or admin notifications before deploying.
Easier maintenance means modifying integrations when requirements change. Add a new system by selecting it from the connector library and mapping fields. Change routing logic by updating a decision point. Scale complexity without losing clarity about how your systems connect.
Built-in governance provides audit trails showing what data moved between systems, when, and why. Compliance teams review automations to ensure sensitive information follows proper handling rules. You can demonstrate your integrations meet regulations by showing the flowchart.
Build your first visual automation
Creating a working automation means planning your integration, designing the flow visually, and testing thoroughly before you deploy. You'll map out which systems need to connect, configure them in a visual interface, and validate that data moves reliably before going live.
Map your process and define success
Pick one repetitive task that moves data between systems. Look for manual copying between tools, notification triggers across platforms, scheduled syncs, or approval processes that span multiple apps. Write down every current step, including which systems are involved and where things get stuck.
Make your pain points specific. "This takes too long" becomes "Marketing spends three hours every Monday copying lead data from Typeform into Salesforce." "This breaks a lot" becomes "When sales updates deal values in HubSpot, it doesn't sync to QuickBooks, causing invoice errors." Specific problems lead to specific solutions.
Define success criteria before building:
- Time saved: How many hours per week will this automation save?
- Error reduction: What's your current error rate and what's acceptable?
- Stakeholder approval: Who needs to review the integration before it goes live?
- Timeline: When do you need this working? (Usually 1–2 weeks for simple integrations)
Choose triggers and connected systems
Map every trigger point where your automation should start. Common triggers include form submissions in Typeform or Google Forms, new records in Salesforce or Airtable, scheduled times (every Monday at 9 AM), and webhooks from Stripe or PayPal. Each automation needs one clear trigger; multiple triggers usually mean you need multiple automations.
List every system that needs to share data. Your form tool might send lead data to your CRM, which creates tasks in your project management tool, which posts notifications to Slack. Write down every integration you'll need and verify the platform you're evaluating has connectors for all of them. Check that you have admin access to authorize connections.
Plan error handling at every integration point:
- What happens if the CRM API is down?
- What if a required field is missing from the form submission?
- What if the email service rejects the message?
- Should the automation retry, alert an admin, log the error and continue, or stop and wait for manual review?
Design the visual flow
Start by sketching your automation structure as a flowchart. Map each step from trigger to completion, showing how data moves between your systems. Identify where the flow branches based on conditions and where it needs human input. This visual map becomes your blueprint.
Select your apps from the platform's connector library. Most platforms offer hundreds of pre-built integrations for common tools like Salesforce, Google Workspace, Slack, HubSpot, Shopify, and Stripe. Authorize each connection so the platform can access your data.
Configure each action's specific settings: which fields to pull from the trigger, how to map them to the destination system, what values to transform. Define the exact parameters for every step so your automation knows precisely what data to move and where.
Add decision points wherever the integration path splits. If lead score is above 80, create a task in Salesforce for immediate follow-up; if below, add to a nurture campaign in Mailchimp. If order total exceeds $500, post to the high-value channel in Slack; otherwise, log to a spreadsheet. Label each path clearly so anyone reviewing the automation understands the logic.
Include human approval steps only where needed, usually for high-value transactions, sensitive data changes, or compliance requirements. Configure who approves, what information they see, and what happens if they reject. Set timeouts so automations don't hang waiting for approvals.
Set up notifications at key milestones. When an automation completes, notify the requester. When it fails, alert the admin. When it's waiting for approval, remind the approver. Good notifications keep everyone informed without creating alert fatigue.
Most platforms let you build these flows through drag-and-drop interfaces. You select a trigger app, choose the specific event, map data fields to your action apps, and add conditional logic where needed. The visual editor shows you exactly what you're building as you go.
Test and monitor your automation
Before you connect real data, run test scenarios with sample records. Create test entries in your trigger system that match your actual data structure but won't affect production, then execute the automation to verify that each step performs correctly: The right data transforms happen, correct records get created in destination systems, and proper notifications are sent.
As you're testing, monitor execution logs to see exactly what happens at each step. Check that conditional logic routes correctly by testing both the "true" and "false" paths. Verify that error handling works by intentionally triggering failures. Try disconnecting an API, sending malformed data, or removing a required field.
Before going live, set up alerts for failures like:
- Automations failing more than twice in an hour
- Automations taking longer than expected to complete
- Specific error types that need immediate attention
Once you're confident in your testing, run the automation alongside your manual process for one to two weeks. This parallel approach lets you compare outputs to ensure accuracy. Check in with users to see if notifications are helpful or overwhelming, then adjust timing, logic, and data mapping based on what you learn from real-world usage.
Essential features to evaluate in automation platforms
When evaluating visual automation platforms, certain features determine whether you can build, maintain, and scale your integrations effectively. Here's what to look for.
Pre-built connector library
The platform should offer connectors for the tools you already use. Check that it supports your CRM, email platform, project management tool, payment processor, and any other systems you need to connect. Platforms like Zapier offer thousands of pre-built integrations, while others focus on specific categories like enterprise software or developer tools.
Pre-built connectors handle authentication, API versioning, and rate limiting automatically. You select the app, authorize the connection, and start mapping data without writing API calls or managing credentials manually.
Custom API and webhook support
For tools without pre-built connectors, you'll need custom API and webhook capabilities. Look for platforms that let you configure HTTP requests, specify authentication methods, define request and response formats, and handle errors visually.
Webhook support lets external systems trigger your automations in real time. When a payment processes, a form submits, or a record updates, the webhook fires immediately instead of waiting for a scheduled check.
Visual data transformation
Data rarely moves between systems in exactly the right format. You'll need to split names, format dates, calculate totals, or transform text. Visual transformation tools let you configure these changes through interfaces instead of writing code.
Look for platforms that offer common transformations like text formatting, date conversion, mathematical operations, and conditional logic. More advanced platforms include lookup tables, regular expressions, and custom functions.
Error handling and retry logic
APIs fail. Networks drop. Services go down. Your automation platform needs to handle these failures gracefully. Look for configurable retry logic that attempts failed steps multiple times before alerting you. Check that you can set different retry strategies for different types of failures.
Error notifications should tell you exactly what failed, what data caused the problem, and what error the API returned. Good platforms surface this information in execution logs and send alerts to the right people.
Execution logs and debugging
When automations fail, you need to see exactly what happened. Execution logs should show what data entered each step, what transformations occurred, what was sent to each API, and what responses came back. Click-through debugging lets you inspect each step without searching through text logs.
Look for platforms that retain execution history long enough to investigate issues. Some platforms keep logs for 7 days, others for 30 days or longer depending on your plan.
Version control and rollback
Automations change over time. You'll modify logic, add new steps, or update data mappings. Version control tracks these changes so you can see what was modified and when. Rollback capabilities let you restore previous versions if an update breaks production.
Some platforms offer automatic versioning, while others require manual snapshots. Check what's included in your plan tier.
Team collaboration and permissions
Multiple people will need to build, review, and maintain automations. Role-based permissions control who can view, edit, and deploy integrations. Look for platforms that let you set granular permissions and support real-time collaboration.
Audit trails show who made what changes and when. This matters for compliance, troubleshooting, and understanding how automations evolved over time.
Performance monitoring and analytics
You'll need to know which automations run most frequently, which ones fail, and which ones consume the most resources. Performance dashboards show execution counts, success rates, average run times, and error trends.
Good analytics help you prioritize optimization efforts. If one automation runs 10,000 times per day and another runs 10 times, you'll focus performance improvements differently.
| Integration Platforms |
Enterprise Platforms |
Open Source |
App Builders |
|
|---|---|---|---|---|
| Example platforms |
Zapier, Make | Workato, Power Automate | n8n | Bubble |
| Pre-built connectors |
Thousands of apps | Enterprise-focused integrations | 400+ connectors | API connector for external tools |
| Custom API support |
Limited | Advanced | Full control | Full REST API integration |
| Visual data transformation |
Basic formatting | Advanced transformations | Code-based options | Built-in database operations |
| Error handling |
Automatic retries | Configurable retry logic | Custom error workflows | Visual error handling in workflows |
| Execution logs |
7-30 days | Extended retention | Self-hosted storage | Server logs and debugging tools |
| Version control |
Limited | Full versioning | Git integration | Built-in version control |
| Team collaboration |
Basic permissions | Role-based access control | Self-managed | Real-time collaboration |
| Best for | Connecting existing tools | Enterprise integrations | Self-hosted automation | Building custom applications |
Common mistakes when implementing visual automation
Even with visual tools, certain mistakes can derail your automation efforts. Here's what to watch for.
Starting with complex integrations. Your first automation shouldn't connect five systems with branching logic and multiple approval gates. Start simple: one trigger, one or two actions, clear success criteria. Learn how the platform works before tackling complexity.
Skipping error handling. APIs fail. When they do, your automation needs a plan. Add retry logic for temporary failures, fallback actions for permanent ones, and notifications so you know when manual intervention is needed. Automations without error handling fail silently until someone notices data is missing.
Not testing with real data patterns. Sample data is clean, whereas real data has missing fields, unexpected formats, and edge cases. Test your automation with actual records from your systems, including the messy ones. You'll find issues in testing that would cause failures in production.
Ignoring rate limits. Most APIs limit how many requests you can make per minute or hour. If your automation triggers 100 times in quick succession, you might hit those limits and start failing. Check rate limits for each connected system and add delays or batching if needed.
Over-automating too quickly. Just because you can automate something doesn't mean you should. Start with high-impact, low-complexity integrations. Prove value before expanding. Teams that automate everything at once often create maintenance burdens that outweigh the time saved.
Not documenting what automations do. Six months from now, you won't remember why you built that Salesforce-to-Slack integration or what conditions trigger the approval path. Document what each automation does, why it exists, and who owns it. Future you will be grateful.
From connecting tools to building custom apps
Visual workflow automation platforms connect your existing systems. They're designed for a specific scenario: you already have a CRM, an email tool, a project management platform, and other software, and you need them to share data automatically.
But what if you're not connecting existing tools? What if you're building a custom application from scratch and need to define how it behaves? That's a different category entirely.
Tools like Zapier, Make, and Workato assume your systems exist and you're stitching them together. They excel at cross-system orchestration: syncing Salesforce to HubSpot, routing Typeform submissions to Slack, updating Google Sheets when Stripe processes payments.
If you're building a custom web or mobile app, you need something different. You're not connecting external tools; you're defining the internal logic of the application itself. When a user clicks a button, what happens? When data changes in your database, what updates? When someone signs up, what process runs?
That's where platforms like Bubble come in. Instead of connecting existing software, you're building the software itself, including the logic that makes it work.
Build custom apps with visual logic on Bubble
Bubble lets you build complete web and mobile applications where you define behavior visually instead of writing code. The visual editor controls what happens inside your app: what occurs when users interact with your interface, how data moves through your database, and what processes run automatically.
You're not connecting external tools through pre-built integrations. You're building the tool itself, defining its UI, database structure, user permissions, and internal logic all in one platform.
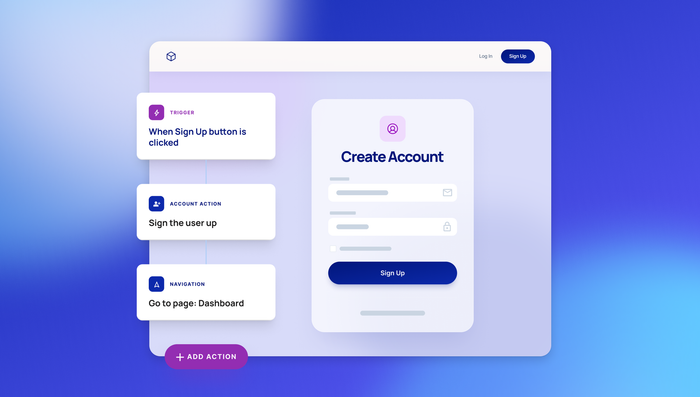
The visual editor shows you what happens when users take actions. Click a button and you see the sequence: validate the form, create a database record, send an email, update the UI, log the event. Decision points route users based on conditions you define. Everything stays visual and editable.
Your database connects directly to this logic. When you create or update records, you see exactly what's happening in the same visual interface. Privacy rules define which users can access which data, and they're enforced automatically across your entire app.
Build once and deploy to web and native iOS and Android apps. The same logic, database, and user management work across all platforms because everything uses the same backend.
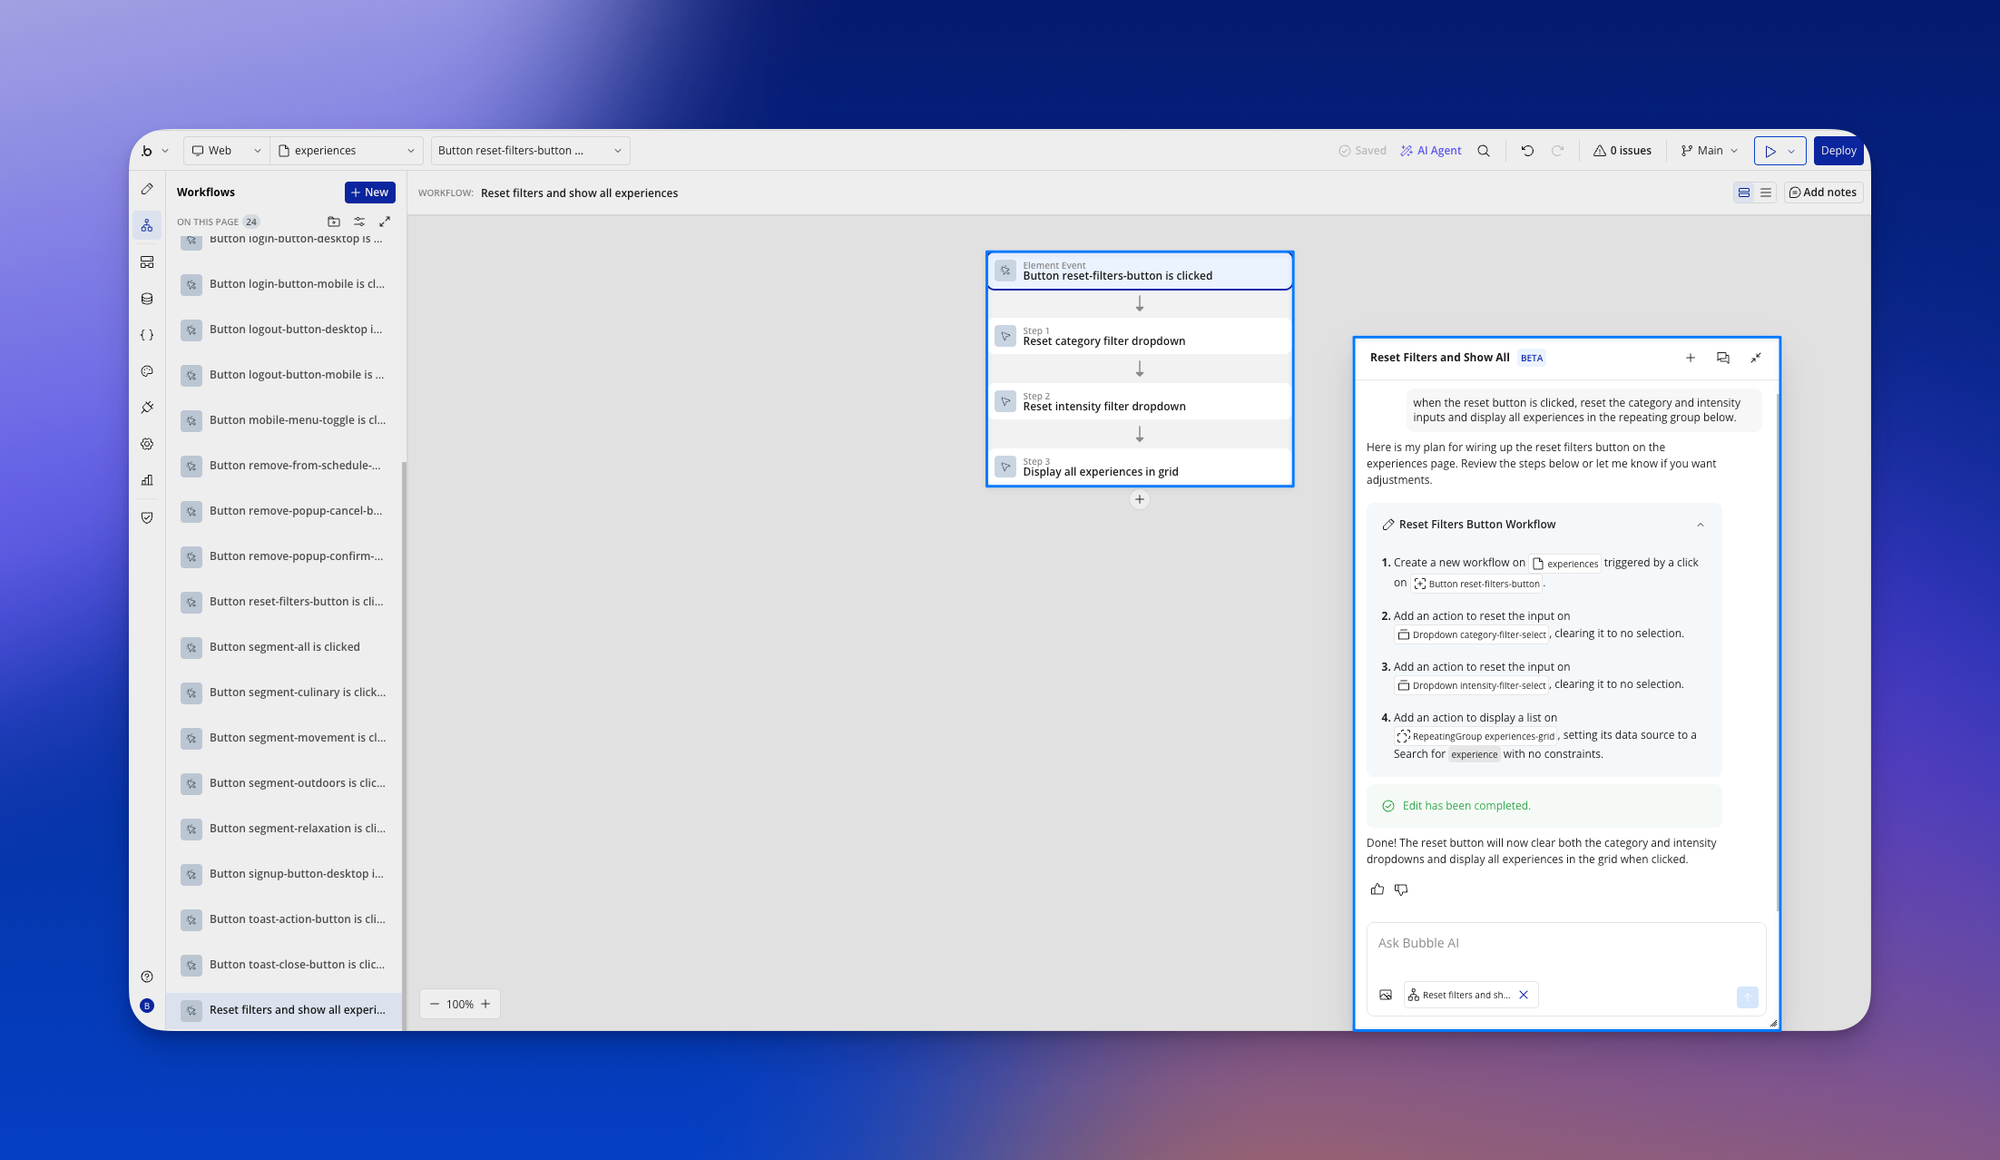
The Bubble AI Agent can generate this logic through natural language prompts. Describe what you need and watch it build the sequence step-by-step. You'll see what was created and can modify it visually whenever requirements change.
Switch between AI generation and visual editing based on what works best. Use the Agent to build structure quickly, then switch to visual editing to fine-tune the details.
Note: When using Bubble's AI Agent, your inputs and generated outputs may be used by Bubble to train and improve their AI tools, with appropriate safeguards for personal data. Bubble may also share inputs with third-party AI service providers.
Bubble is SOC 2 Type II compliant and hosts on AWS infrastructure that maintains ISO/IEC 27001 and CSA CAIQ compliance. Security scanning catches vulnerabilities before you deploy. Privacy rules, authentication, and encryption are built in.
Bubble plans include monthly workload unit allocations (50K on Free to 500K on Team plans). Additional usage costs $0.30 per 1,000 workload units. Pricing starts at $0/month for Free, $59/month for Starter, $209/month for Growth, and $549/month for Team plans (billed annually), with Enterprise options available for larger organizations.
Next steps: choose the right approach
You now understand how visual automation platforms connect existing systems, what features matter when evaluating them, and when you might need a different approach entirely. Here's how to move forward.
- If you're connecting existing tools, pick one integration that wastes at least five hours per week. Choose something with clear steps and measurable outcomes, like syncing leads between systems or routing notifications across platforms. Map the current process completely, identify which systems need to connect, and define specific success metrics so you'll know when you've succeeded. Evaluate platforms based on whether they have connectors for your specific tools.
- If you're building a custom application, you're in a different category. Visual automation platforms connect existing software; app builders let you create new software with visual logic. Bubble lets you build web and mobile apps where you define behavior, database structure, and user permissions visually, all on one platform.
- Test extensively before deploying. Validate your logic with sample data before connecting real systems. Verify that error handling works by intentionally triggering failure conditions. Run a pilot with a small group before full rollout. Testing finds problems when they're still cheap to fix.
- Monitor continuously after deployment. Set up alerts for failures and performance issues so you catch problems early. Review execution logs weekly to spot trends before they become issues. Gather feedback from users regularly to understand what's working and what needs adjustment.
If you're connecting existing systems, start small. Pick one integration that wastes five hours a week, evaluate platforms based on whether they support your specific tools, and prove value before expanding.
If you're building custom software, you're in a different category. Bubble lets you create web and native mobile apps where you define behavior, database structure, and user permissions visually — all on one platform. The Bubble AI Agent generates logic through natural language prompts, and you can edit anything directly when you want precision.
Ready to build a custom app you can see, control, and scale? Start building on Bubble for free.
Frequently asked questions
When should I use a workflow automation tool vs. build a custom app?
Use workflow automation tools like Zapier, Make, or Workato when you're connecting existing software that already does what you need. Use an app builder like Bubble when you're creating new software with custom logic, database structure, and user interfaces. If you're trying to replace your existing tools rather than connect them, you're probably in the app-building category.
How are Bubble workflows different from robotic process automation?
RPA automates individual UI tasks by mimicking clicks and keystrokes in existing software. Bubble lets you build new applications where you define internal logic visually. Instead of automating within existing software, you're creating the software itself, including custom UI, databases, and behavior.
Can visual automation platforms handle enterprise-level complexity?
Yes. Platforms like Workato and Power Automate support complex branching logic, parallel processing, error handling, and integration with enterprise systems. They offer SOC 2 compliance, role-based access controls, and audit trails. Enterprise plans typically include dedicated support, SLAs, and advanced security features.
Do I need coding skills to maintain visual automations after I build them?
No. Visual automation platforms let you modify integrations through drag-and-drop interfaces. You can update data mappings, change conditional logic, and add new steps without writing code. Technical team members can handle complex API integrations when needed, but most maintenance happens through visual editing.
How do I use workflows in Bubble mobile applications?
Bubble's native iOS and Android apps share the same backend infrastructure as your web app. Build your app's logic once and it works identically across web and mobile: same database, same behavior, same privacy rules. You can generate mobile apps with Bubble AI or build them in the visual mobile editor, and all logic remains consistent across platforms.
Build for as long as you want on the Free plan. Only upgrade when you're ready to launch.
Join Bubble